Archive: January 29, 2016

How to choose the right lens for the job

Following on from my earlier article about how to choose the right camera for the job it made sense to follow up with one on how to choose the right lens, a major factor that will help you with your choice of camera. The two go hand in hand and your decision on which camera to choose could actually be dependent on the lenses you plan to use.

My stance on choosing lenses is very much the same as cameras:

No lens is perfect. But, for each job there is a perfect lens (or lenses).

Even then, it is subjective.

You see, just like cameras, lenses have their own quirks and variants that make them ideal in certain situations and a nightmare in others. It would be easy to assume that cost alone would be the main consideration but just spending more on a piece of glass doesn’t necessarily make it perfect for your project.

Consider your situation. Do you have a short term brief to meet or a long term investment to consider? If you are stuck choosing a lens for your camera, here are some factors to consider before your investment becomes a money losing opportunity:
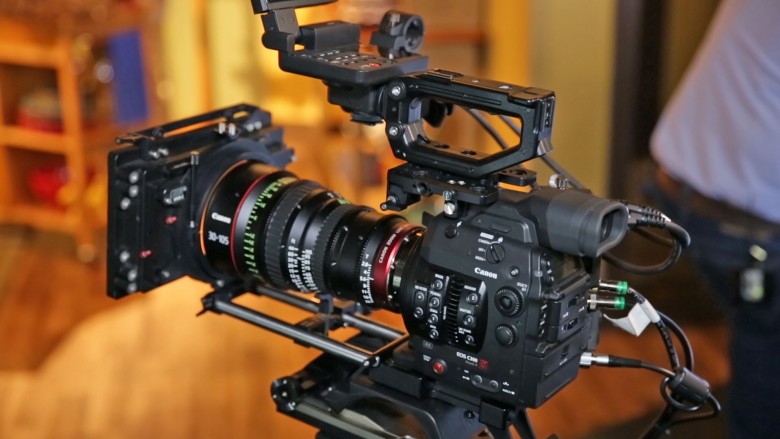
Video Production Brighton

mmm, such choice!

Price

First and foremost. What’s your budget? Typically, lenses become more expensive the better they are in low light, the less they breathe when focusing and the sharper they are. Image stabilization, build quality and brand can also affect the cost of the glass considerably.

Return on investment

Are you shooting a one off job or a series of projects? Knowing exactly what you need, rather than what you would like will narrow your choice down and then it’s a matter of working out how likely you would be able to make a return on your investment with the options left to you. Is a £3K cine prime really your best choice to buy when you mostly shoot talking heads? On the contrary, is spending a little bit more going to mean that your lens will outlive your next 2 cameras?


Mount type    EF mount

This is a big one. Different lens mounts have varying choices that go along with them and this will of course affect your choice of camera. Here are just some of the options available to you:


EF (Canon) – Popular mount choice for Canon cameras and some third party cameras such as the Black Magic Production Camera.

F – (Nikon) – Another popular choice of mount with a huge range of lenses available to choose from and numerous adapters to adapt them for other systems.

A & E (Sony) – Both A and E mount lenses are rising in popularity due to the likes of Sony cameras such as the A7S and FS7, although some would argue that there is less choice here than some of the other mounts.

PL (Arri) – Geared towards cinema, originally designed for 16mm and 35mm film cameras. Extremely high quality but out of reach for most who are looking to buy.

IMG_9025

Is your 24 really a 24?

Angle of view and crop factor

There are countless combinations available to you when it comes to choosing lenses and cameras so it’s important to understand field of view and crop factor before you accidentally make the wrong purchase.

Crop factor refers to how much a lens magnifies the image when a camera’s sensor is smaller than a full frame sensor or an equivalent 35mm film camera. Most lenses are designed using full frame as a reference, however it’s the sensor size that determines what your actual angle of view would be.

For example, a 24mm lens on a Canon 5D, which has a full frame sensor, will give us an angle of view equivalent to 24mm (73.7 degrees to be exact). However, on a smaller sensor camera such as the Canon 600D (APS-C sensor) there is a crop factor of 1.6 meaning 24mm is magnified by 1.6. Our 24mm now gives an angle of view equivalent to about 38mm on a full frame sensor (or 51.9 degrees). This is quite a jump when you think about it, so making sure you know what angle of view you need before you decide is crucial.

70-200 devils dyke

Could you do with a little extra reach?

Crop factors can be a disadvantage when you need wide angles, such as in this example, but on longer lenses they can give you much greater range which could work for you. It’s also good to know that there are lenses designed specifically for crop sensor cameras, so wide angles aren’t limited to full frame users alone.

To learn more about crop factor check out this excellent field of view calculator from Abelcine.


Type of production

What do you currently shoot or plan to shoot? This will determine which lenses will fit your needs best. Consider the following:

  • What size screen your project will show on – any optical imperfections will naturally be magnified in a cinema
  • Sharpness required – you’ll get more sharpness for your money when choosing primes over zooms
  • The size of the camera crew – do you have someone to help you change lenses safely?
  • Project turnaround – do you have time to change lenses for every shot?
  • The location & portability – do you like to travel light?
  • If you need to zoom – how unpredictable is your subject or location?
  • Your lighting conditions – are you shooting a lot in low light?
  • Screw in filters or mattebox – what kind of ND, polarisers and other filters will you be using?
  • The grip you have available – will you always have a rig or is image stabilization essential?
  • Follow focus – to attach or not and if so, how?
  • Aesthetics & personal preferences – is beautiful bokeh (background blur) or minimal distortion a priority? What about the way a particular lens handles contrast and saturation?

With answers to these questions you should get a clearer idea of whether you need primes, zooms or perhaps a bit of both.

Examples

As you can see there is a lot to consider when making a lens choice. In fact, you may just be a little more stuck than you were before. However, have no fear as here are a couple of practical examples of lens/camera combinations I’ve used and the pros and cons of these choices.

WWTW

The 24-70. Good for close ups..

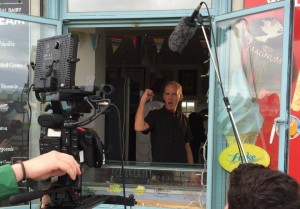
Walking with the Wounded: Cumbrian Challenge

The brief: 3 minute highlights video of fundraising event. Positive and engaging.

Location: The Lake district

Camera: Canon C100 with Canon 24-70mm f2.8 L & Canon 70-200 f2.8 IS L


Screenshot 2016-01-28 11.07.55

..and for GVs.

The C100 has a crop factor of 1.3 so my 24mm became a 31.2mm and my 200mm became a whopping 260mm. Being in the great outdoors having zooms covering this range was excellent and being able to get shots of the walkers from a great distance was essential. The widest angle was still wide enough to get establishing shots; anything much wider probably would have weighed me down unnecessarily.


Screenshot 2016-01-28 11.08.28

The 70-200 was good for flexibility on the mountainside..

In fact, talking of weight, the telephoto lens was a beast. As it opened up to f2.8 it was quite heavy but being in the great outdoors during the day meant that I never needed this extra stop of light. In this case, the 70-200 f4 IS would have been more suitable as it is smaller and lighter (as well as cheaper). Image stabilization for me was a must on the telephoto though as it wasn’t always easy to use a tripod and it was quite windy up on that mountain.


Screenshot 2016-01-28 11.28.28

..which resulted in a good variety of coverage

Other suitable lenses:

Canon 24-105 f4 IS L – This would have given my 24-70 greater range and image stabilization at the expense of 1 stop of light and some sharpness.

Canon 28-135 f3.5-5.6 IS – If I only wanted to take one lens this may have been the best option. Incredible range and image stabilization at the expense of aperture and sharpness.


Noose

Brief: Short horror film. Moody and suspenseful.

Location: Hotel interior

Camera: Canon 5D mkii with Zeiss ZF primes and EF adapter

A short film I did a few years ago. Full frame was the choice for this project because low light ability, shallow depth of field and a wide angle of view were essential to getting a cinematic look whilst showing the space within the rooms. The Zeiss set hired included an 18, 25, 35, 50, 85 and 100mm so were a fantastic range for drama and being primes, were very good in low light. What’s more, their sharpness and very aesthetically pleasing bokeh (background blur) made them an exceptional choice for the project.

Screenshot 2016-01-28 11.54.47

The 18mm showed the space of the hotel perfectly without distorting the edges

Screenshot 2016-01-28 11.50.02

The Zeiss lenses have exceptional bokeh

On the flip side changing lenses slowed us down on what was already an incredibly tight schedule plus there were no focus gears on the lenses themselves (we had some complicated camera moves) so we had to apply and reapply focus rings quite often. What’s more, being Nikon mount we had to also attach and reattach EF adapters which once again, slowed us down. Of course, we could have chosen to use a zoom lens to speed things up but our maximum aperture would have been lower and there would be a greater chance of distortion in the corners of the image.

At the end of the day image quality really mattered here and by looking at the stills you can see why I would choose Zeiss primes again in a heartbeat.

Other suitable lenses:

Canon EF cine primes – Incredibly sharp and optimized for cinema with manual iris, focus rings and no ‘breathing’ when focusing, these lenses would have been an excellent choice. The EF mount would have made them quick to change too, however, all of this would have come at a much higher price.

Canon L series primes – These would be around the same price to hire as the Zeiss but with the Canon mount for convenience. No focus rings again and aesthetics that are in my opinion not as pleasing (this is just personal preference) but they are certainly a good economical choice, especially for sharpness.


These are just a few examples to get you thinking and of course these are just my own opinions, but as you can see it’s a bit of a minefield out there. There are so many factors to consider and what one person needs in their lenses may be unnecessary for another so ultimately it’s down to you to decide what your priority is. It also doesn’t help that new lenses are being introduced regularly, although fortunately nowhere near as much as new cameras are.

One thing to remember though is that old lenses aren’t necessarily bad lenses! If they are free of mould and scratches and the like, they could be perfectly usable. In fact, newer lenses with electronically controlled apertures (Canon are particularly guilty here) limit your choice of format unless you’re prepared to buy expensive powered adapters such as Metabones. However, older manual lenses such as the Nikon M42 variety can be used on many modern cameras (with adapters if necessary) usually at a much lower cost but sometimes rivaling the quality in areas. In fact many vintage lenses have characteristics that make them rare and unique (this deserves an article in itself) hence their appeal to collectors and photography lovers.

At the end of the day do your research and only get what you need. By concentrating on producing high quality work and making sensible choices you’ll realise it’s not just about the camera or the lens, but the person behind it.

Video Production London

10 things they don’t tell you about working in video production

Universities, film schools, specialist courses – all can be a great place to start if you want to equip yourself with useful skills for a job working in video or film production. However, there are some things that just can’t be learned in an educational environment. Only by talking to those already working in the industry and gaining experience yourself will you learn some things that no book or lecture could ever prepare you for. So listen up, we’ve got a few industry insights here. Some are positive and some are not, but if you want to work in this industry you had better listen to the pros first before you dive in at the deep end.

Video Production Company Brighton

Fatboy Slim appreciated the gig!

1. Every new job you land, no matter how big or small, becomes a huge personal victory.

This is especially true to start ups and freelancers. It is much harder to get new clients than it is to get repeat business from an existing one. Even landing little jobs that only last a few hours can give you that warm feeling inside that something is working because people want to hire YOU. This in turn will help you stay driven and motivated. Enjoy it!


2. How tremendously adaptable you sometimes have to be.

To get where you want to be in your career you may find yourself sooner or later doing something that you don’t really want to do (well, that’s life!) but you’ll realise that it’s a necessity to making any sort of progress. Whether it be learning a new skill in an area you’re not confident in or taking on work in a completely different industry just so you can survive until your next video job comes in, if you really want to succeed you’ll do what it takes. You may just find it character building too.

3. Marketing is so incredibly, ridiculously important.

Whether you freelance or run your own business, you simply can’t avoid the subject of marketing or you will fail. Word of mouth is often described as one of the best ways of getting work in an industry as small as this, and this is true, but first impressions count and knowing who it is you are trying to work for and how to target them is key to starting new working relationships. Included in this is the ability to sell yourself, plus with growing demand for online video content the marketeers out there should be your best friends!

4. GAS.

Not the poisonous kind, unless you let it get the better of you. GAS stands for gear acquisition syndrome. It is actually a thing. In the western world we are suckers for consumerism and just love to own stuff but this is especially true in video production for cameras are sexy, lenses are bokehlicious and a DJI octocopter – well, who wouldn’t want one of those?

Video Production Brighton

I’ll take them all please

It’s very tempting to spend lots of money and think your career will instantly bloom but if you’re not careful you could get stuck in a never ending process of continually needing to buy stuff and never make any money as a result. For some of us of course it is important that you buy the right tools for the job but perhaps consider whether you really do need that new flashy gizmo or if hiring would be a more sensible option. And don’t forget, your talent counts for something too.

There’s some brilliant advice on the matter in this filmmaker magazine article by DOP Sean Porter including one bit that really stuck with me:

“We have to be very cognizant about the impact, however minute, we make when we mix our creative responsibilities with enterprise. Your gear is a powerful influence on your work, both good and bad. I think stepping up means knowing which is which, even if it’s not the answer you want to hear.”

Wise words.

5. How to balance multiple jobs.

This for me, and I’m sure many others, is probably one of the hardest things about starting off in this industry that’s on this list. I’m not just talking multiple film or video jobs; I’m referring to balancing the self employed work with the employed. The paid with the unpaid. The desirable with the reliable. The big question that nobody seems to have the answer to is:

How can you get experience without a job when you can’t get the job without experience?

You have to start somewhere. Maybe you’ll be working part time so many days a week so you can focus on the video work on your days off – if you can afford to live off part time wages. But then, what if your perfect job comes up while you’re at work and you could be potentially missing out on your big break? If you keep trying to get time off from your reliable work are you likely to keep that job for long? On the contrary if you always keep your diary open, how do you know that you’re definitely going to land more video work to pay the bills? Juggling the reliable and the desirable work can be an absolute nightmare and it’s one thing that no educational institution can ever prepare you for.

My advice is to keep your options open and explore the different possibilities available to you until you find something that works. Everybody needs to earn somehow but what ends up working for one person may not work for someone else. I recently wrote about how my non video job helped me learn new transferable skills but the most important thing to understand is you have to be prepared to work your socks off, whichever path you decide to tread.

Oh, and one more thing. Dealing with a clash of job offers never gets any easier.

6. When to say no.

I must refer again to the article mentioned earlier by DOP Sean Porter, who deals with this point in great detail. Knowing when to say no can be another one of the hardest things to deal with in this industry. Taking on too much work could leave your clients unsatisfied or affect your personal life and relationships in a negative way. It’s another thing that can only be learned through experience and through applying a good level of judgment every time an opportunity arises. We’ve all accepted those jobs we’d wished we’d declined but it’s all about learning from these mistakes so that our future selves won’t curse our present selves into oblivion!

money

Budgeting can be hard when your income fluctuates

7. Steady sources of income can disappear suddenly and you may not know why.

A client may go on sick leave or change premises, marketing budgets may be slashed or a competitor may offer your clients better value. In fact, there are a whole host of reasons why you might lose a steady client and it can be very hard and frustrating when this happens, especially if you don’t know why.

The answer? Don’t take it personally, avoid complacency and learn to be like a gecko – adapt! Don’t stress and remember that factors which are beyond your control can be a blessing as well as a curse in your work life. It also pays during busy times to save for a rainy day.

8. How to manage your taxes.

Tax returns, accounting, filing..yawn. It may be boring but unfortunately it’s something that none of us can avoid doing, whether we freelance or run a business. Not to suck the fun completely out of the creative industry at hand but the more you learn about tax returns and the like the earlier on in your career the easier it will be for you to stay on top of your money and make sensible decisions throughout. You wouldn’t want any nasty surprises now!

The first place to look for information on all things tax is the HMRC website.

9. Your competition may also be your friends.

It’s not all doom and gloom. Working in such a small industry means we often bump into familiar faces and that includes the competition. The beauty of this, unlike most industries, is your competition could not only help to keep you on your toes but they could potentially be a reliable stand in for you when you need a helping hand or could loan you equipment and vice versa. There’s also a thing called referral fees for the business minded among us!

Video Production Brighton

Time to take a break?

10. How to switch off and relax.

Last, but certainly not least. You spend so much of your time and energy hacking away at your career that no matter where you are on the ladder, it can be nigh on impossible to switch off from work when you’re worried about things like where your next pay cheque is, if your clients will like your work and what your competitors are up to. Whether running a business or working for yourself and with dangerous cross overs between work and play on your social media accounts, switching off from the world of work can be very difficult indeed. It could be viewed as a good thing as we are just that determined to succeed, but don’t let it consume you. Allow yourself some ‘me time’ and enjoy those rare opportunities to turn off your phone. Your other half will appreciate it!

There is no real single secret to a successful career in any of the creative industries, but hopefully these insights will help you make the right decisions early on. If you make mistakes along the way however, that’s OK, it is part of your professional development no matter what career you decide to embark on (except for the tax issues – we wouldn’t want you getting in trouble!).

Light meters – do we need them for video?

It was my birthday earlier this week and one of the presents I received from my family was a light meter – a Sekonic Flashmate L-308s to be exact. This little gizmo is hardly the most glamorous gadget in the arsenal of video gear and probably nowhere near the top of most camera peoples’ wishlists, but nevertheless I decided that it was time to get one. Now I shoot quite a lot of video and you may be wondering why I would ever need a light meter when most video cameras have histograms, wave forms, zebras and other exposure aids built in. It’s perfectly valid to question why anyone would want to spend more money on an item that is, in theory, debatable as to whether it is really needed in these modern times.

In this digital age and with the rapid advancement of technology has the light meter become more of a relic from a bygone era rather than an essential video making tool? Do photographers even need to use them anymore now that most shoot digital? Do we really need light meters for video?

The short answer is yes. But it’s not as simple as that. Depending on what you shoot, the answer may actually be no. To decide if you do need a light meter or not it’s worth considering the reasons why one might have one in their kit bag. You may be surprised at how many reasons there are:

sekonic light meter

Sekonic – a widely adopted brand of light meters

1. To get the most accurate exposure:

First and foremost and the most obvious reason for owning one. I’m not discounting inbuilt light meters in digital cameras but the truth is a quality light meter will always be the most accurate way to measure exposure because that is their primary purpose. Inbuilt light meters usually feature modes that rely on averaging the exposure by taking several readings across the frame. Using an averaging mode can sometimes result in the camera been tricked into the wrong exposure because it averages the whole scene rather than taking a reading of the subject you are focusing on, meaning your subject could end up over or under exposed. Using a light meter here can allow you to expose the correct area of the frame first time round.

To control the highlight in this image a flag was held partially in front of the light source so it didn't wrap around the face too much.

The back light here was deliberately over exposed so that it was unrecoverable in post but if I wanted to I could have measured it so it was specifically 1 or 2 stops over the rest of his face.

2. It is easier to control your contrast:

Once you have established optimum exposure of your subject, a light meter can be used to balance the other areas of the frame to help create the look your production desires. For instance, you may want everything to be flat and even for a corporate video or high contrast and moody for drama. You could always judge by eye but knowing exactly how many stops over or under areas of your image are you can have confidence knowing that you’re being accurate. What’s more, if you know the dynamic range of your camera you can expose your images in a way that lets you have a greater degree of flexibility during colour grading if you want it.

Can you rely on the natural light alone?

3. You can have a more efficient location recce:

When you visit a location how do you know what equipment to bring if you don’t know how good the natural light really is? Our eyes can be deceiving and lead us into thinking the natural light can do all the work but really the only way to be fully prepared is to measure that light and then make the decision.


talent and lighting

Metering will improve your efficiency in setting up.

4. You can light a scene before the talent arrives (and quicker):

This is a very important point. If we could only light when the talent (or a stand in) was in shot we would never get anything done. Of course, once the talent is in the frame you may want to make some small adjustments but being able to set the exposure beforehand will help save you and everybody else’s time and money. Adding to this, if you have to run back and forth between adjusting a light and viewing the histogram or waveform this can be quite time consuming.


which camera?

It doesn’t matter which camera you decide to use, a light meter could assist you with exposure for any model that lets you set exposure manually

5. Video & photography skills often overlap. Embrace this:

For the DSLR video shooters out there, you’ve probably learned a thing or two about photography whilst you’ve been at it. You may have tried out long exposure and timelapse photography out of curiosity, the latter of which can certainly add an interesting element to your videos. Much of this may be a result of simple trial and error until you get pleasing results (this is certainly how I used to do it), however using a light meter can help you to reduce this method and once again save you time. What’s more, you could go further down the photography route later on and so having a greater understanding of exposure and light now could actually make you more employable in the future.


dog 35mm film

This photo of the old family dog ‘Dolly’ was taken on my old pentax 35mm film camera. Although it’s a lovely photo, if I had taken a reading off of her fur rather than relying on the inbuilt meter to average it out then it wouldn’t have appeared slightly over exposed, as being a golden lab her fur was actually a shade darker.

6. You open up the possibility of shooting on film:

Ever had that burning desire to go old school? We all have. With Kodak’s recent announcement of a new (yes, new!) Super 8 film camera you may just get tempted further into experimenting with film.

Now, many 35mm stills cameras have inbuilt spot meters, as do super 8 cameras, however, once again they may not always be the best option for you, especially if these meters calculate an exposure based on averages. Of course with digital cameras you can readjust your exposure and snap again but with rolls of film this can be an expensive thing to do so you have to be much more conservative with your shots. Taking proper exposure readings will eliminate the need for guess work and ensure you become comfortable with the format.

And finally..

7. You look like you know what you’re doing:

In other words, you look like a pro. That’s a good thing, right? Oh, and you can give accurate orders to an assistant (this is invaluable)!

So, taking these points into consideration, what kind of video shooters could benefit from using a light meter?

I believe the answer is anyone who wants or needs to light their productions to a high standard. This includes those who work in (but is certainly not limited to) commercials, drama, green screen and stills photography. Aspiring DOPs certainly need one, hence why I got one. For conferences, weddings, run and gun documentaries and corporate videos, you probably won’t need one. In these instances you can simply rely on your camera’s exposure aids and you won’t have to fork out for an expensive item that may just end up gathering dust.

At the end of the day the decision of whether you need a light meter or not is down to you and it all depends on what you shoot and/or what you want to shoot. Light meters aren’t the cheapest tools out there so, as with everything else, only get one if you really need it. If you decide that you do need one however, it could be one of the most important investments you’ll ever make in your video career.

If you would like to find out more about lighting check out this article on why good lighting can sometimes be more important than the camera and how a cheap reflector could be your most important lighting accessory (after the light meter of course!) .

Why a reflector is your most important lighting accessory

The 5 in 1 reflector: cheap and incredibly useful

Cheap, light and with so many uses, your 5 in 1 reflector is a lighting accessory that should accompany you on every shoot.

Lighting in video production is not just about flicking switches. When I was just starting out as a freelancer I was guilty of believing this; that lighting simply had to be turned on and that was that. I recently wrote about how lighting could actually be more important than the camera itself and that lighting can sometimes be deceptively simple but what should be noted here is the idea that the subject isn’t always referring to the lights themselves but to the modifiers as well. In fact, I’d say that half of lighting is actually modification. Flags, floppies, bounce, scrims, nets, diffusers..there seems to be so many different lighting accessories about that it’s hard to keep track of what they actually do. These items are all examples of lighting modifiers, however in this case I’d like to focus on the simple 5 in 1 reflector – a low cost, multi use modifier that really is an essential tool for any film maker.

But it’s just a reflector?

No it’s not. If you’re thinking that, you probably haven’t explored the many uses even the cheapest of 5 in 1 reflectors has to offer. Having 5 different sides allows you to do a lot in a variety of shooting situations whilst remaining portable and convenient.

Lets take a look at the different sides of a typical 5 in 1 reflector and how you might use them in your moving image productions:

White

Tip: If you need something bigger to bounce, polystyrene board is cheap, light and in your local DIY store

Tip: If you need something bigger to bounce, polystyrene board is cheap, light and available at your local DIY store

Any white reflective surface is often referred to as ‘bounce’, the reason being that a hard light is bounced off the surface and onto the subject to create a nice soft light with minimal shadows. Your hard light source could be a powerful tungsten lamp or the sun.

Soft light is commonly used in corporate environments

Look at the difference between a hard light shone directly at the subject (left) and a hard light bounced off a reflector (right)

Look at the difference between a hard light shone directly at the subject (left) and a hard light bounced off a reflector (right)


Bounced light can be used as the key light (main light source) when even lighting is required or as fill (to fill in shadows created by the key light) when a higher degree of contrast is needed. It is commonly used in all matter of video and film productions for a flattering image.

Black

Tip: If you need a flag to block out a large area such as a big window a tarpaulin is an effective solution.

From experience, you can never have enough flags.

Your matte black surface is vital in situations where you want to cut out light. This could be to control exposure, shape light or even remove light from the image entirely. It is often referred to as ‘flagging’ or providing ‘negative fill’ and you would be surprised at the number of situations that you might find the need to do this.


For situations where your reflector might not be big enough a tarpaulin is a great way of flagging a large area such as a full window

For situations where your reflector might not be big enough a tarpaulin is a great way of flagging a large area such as a window.

Can't see your screen? A flag would be handy here..

Having difficulty viewing your LCD screen? A flag would be handy here..

The problem with powerful key lights is that it’s easy to lose control of them, in that light can get in some areas of the image that you don’t want it to. Some lights have barn door attachments which can help but this may not always be enough to control the spill. Simply holding up a flag can make all the difference. The other thing to consider is how long you are filming for and if natural light likely to change throughout your shoot. Flagging any uncontrollable light sources allows you to start from scratch and build your lighting design from the ground up, even allowing you to shoot night scenes during the day!

To control the highlight in this image a flag was held partially in front of the light source so it didn't wrap around the face too much.

Without a flag partially cutting the back light, the beam here would have over exposed half the actor’s face.

Diffuser

Tip: There are many different types of material that diffuse light in varying amounts. One popular and cheap method of diffusing large sources on low budget films is to use a shower curtain.

Tip: There are many different types of material that diffuse light in varying amounts. One popular and cheap method of diffusing large sources on low budget films is to use a shower curtain.

Sometimes you may not want to directly cut out light but soften it instead, so it creates more subtle shadows. Hard light sources such as direct sunlight can create strong shadows and too much contrast as a whole, in which case placing the diffuser between the light source and the subject can make it appear much less harsh. The surface of your diffuser may appear similar to the bounce but on closer inspection you’ll find it much more translucent.

lighting at kinetico cropped

Hard light shone through a diffuser is softened but without a huge reduction in overall output.

4X4-TRACE-FRAME-460x346

The diffuser is essentially a cheaper (and more portable) version of a trace frame.


By diffusing a hard light source you are able to soften the light but also keep the spread. Moving the diffuser further away from the light source will soften the shadows even further.

Tip: Another popular low budget method of creating higher contrast is to use tin foil.

Tip: Another popular low budget method of creating higher contrast is to use tin foil.

Silver

Silver is incredibly useful in creating contrast quickly, by making certain parts of the image ‘pop’ out from the rest. Whilst it must be used carefully to avoid blinding the subject, it has a surprising number of uses such as creating highlights (areas of the image that are deliberately over exposed for creative effect), filling in shadows and for creating texture (such as a rippling effect from light reflected off water).


Silver - a bit more kick to your fill than normal bounce.

It can provide a bit more kick to your fill than normal bounce.

Silver can be used to create a rippling water or a 'glow from the TV' effect.

The uneven texture of silver means it can be used to create effects such as that of rippling water or a glow from the TV. Easiest to see in a moving image (yes, watching breaking bad counts as work!)


Tip: Although not as powerful as silver, gold can help increase the contrast in your image too.

Tip: Although not as powerful as silver, gold can help increase the contrast in your image too.

Gold!

Always believe in your..

Ahem.

In my opinion this is the least useful of the 5 for the moving image, but it still has some useful applications. Gold is mostly used for creating a warming sunset effect or for texture and can be particularly flattering in fashion and beauty films.

An up lighting effect for warmth.

A subtle up lighting effect for a bit of warmth.

So there you have it – your reflector has so many uses that it really is your most important lighting accessory – and I’ve only begun to touch the surface. Bouncing, diffusing and flagging each deserve their own articles but just knowing how you can start doing these modifications with your reflector will take you a step closer to raising your production values, and that’s whether you’re in a studio or on location and working in controlled settings or operating run and gun.

If you care about production values then there are really no excuses for leaving your reflector at home. In fact, once you start utilizing one you’ll probably want another (and if you need to google how to fold it back into its bag, that’s OK – we’re all guilty!).

Happy shooting!

Before you go..
Download our free ebook

Mustard-Education-Video-ebook

7 Steps:
Make your school’s video
content pay for itself

  • How to use your new video to attract attention and get the results it deserves
  • How the most successful independent schools are getting all the new enrolments
  • The techniques that will give you a clear, predictable return on your video investment
  • How to track and record ROI to prove your video strategy’s working