Category: production values

TV look with crew

Achieving the TV look on an online budget

It’s 2016 and the marketeers are telling us to invest in online video. We are hearing many reasons for this:

“It will help your SEO”

“It’s cheaper than TV advertising”

“Your audience can be targeted on their commute, at home and at work

All very good reasons, sure. But once we have accepted that we need to invest in online video, how can we make sure that our content looks good enough to be on TV yet stays within the realms of an online budget?

Whilst anyone can in theory take out their phone, shoot a video and upload it in seconds to their website and social media channels, businesses who care about their image and production values (I imagine that’s most of us) will certainly get better value from investing in professional online video. Gone are the days of dull looking corporate videos. We’re in the age where online advertising should look as good as TV!

So, how could you get the TV look on an online budget?

Through utilising cost effective technology.

TV look Ronin

Getting the TV look (or even the film look!) with the nimble DJI Ronin

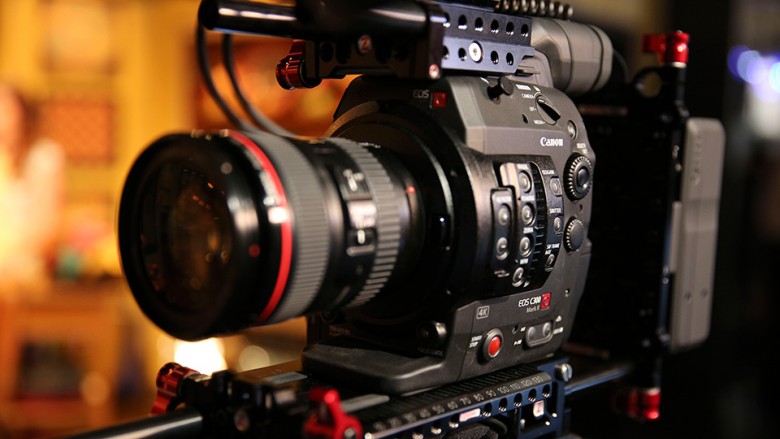
One of the major benefits of opting for online content rather than broadcast media is that the fast moving digital landscape is allowing technology to be more affordable than ever before. You’ll have already experienced it with your electronic devices at home and the same applies in the video production industry. Cameras that produce beautiful images fit for broadcast are now within reach. As a result we use everything from larger cinema cameras to tiny DSLRs to portray your business in the best light. To keep things economical we buy some of the equipment outright whereas other bits are more cost effective to hire. This ensures that we can provide quality equipment all year round and still have access to anything specialist or brand spanking new when you need it, getting the best of both worlds.

Another example is in the aerial photography world. As HD cameras have gotten smaller they have been easier to attach to UAVs – aka drones! Only a few years ago aerial photography was too expensive a venture for most businesses; drones are obviously much more cost effective than helicopters!

If you have an interest in tech then you might like this article on how to choose the right camera.

It’s not just the camera: lighting & sound are important too.

One of the cons of this technology becoming affordable is that suddenly everybody considers themselves a Video Producer. Some think they can just buy an HD camera and become a professional without considering other areas of video production. What contributes immensely to creating a high value production or the ‘TV look’ is lighting and sound and at flyCreative we respect that. Just because you may be considering a less expensive option that doesn’t mean your product should be cheap!

A little bit more on lighting:

Only fairly recently have many cameras started to become good in low light conditions. However despite this, even big TV programmes today still require the use of lighting rigs. Next time you are watching X Factor take a look at the background of the wide shots. You’ll often see a large film light of some sort. Apart from being able to see the subjects, lighting is used to make people look good! Don’t you want your business to look good?

With an untrained eye it can be easy to accept a TV image as ‘real life’. Trust us though, you’ll notice the lighting when it’s gone. Or if it’s bad!

Music to the ears: 

The other half of achieving the TV look is through getting good sound. When it’s not good you’ll notice it and will wish that you’d hired a professional. To maintain TV production values on an online budget we also take our sound very seriously, using broadcast quality microphones and recorders to ensure clarity and noiseless recordings. Some projects require their own sound recordist, just as in TV.

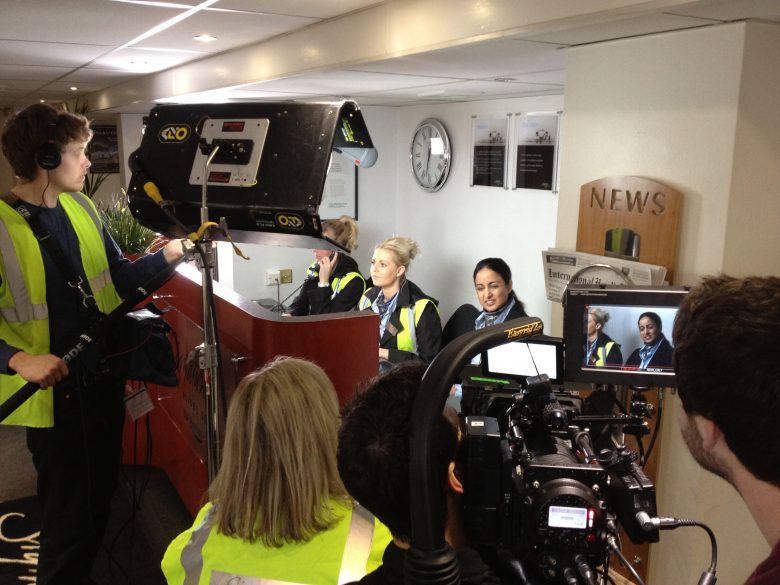
As online productions are usually smaller in scale than big TV shows, there is less of a requirement for large lighting rigs, mixing desks and huge teams of personnel which can add substantially to the cost of a production. Portable lighting kits, solo sound engineers and self shooting producers are more widely used than ever before. The number of crew required will depend on your individual requirements, but generally speaking the crews are small for online content.

Through planning and creativity, except you are in control.

Creating content for broadcast can sometimes be a little restricting. All of the major broadcasters such as ITV and SKY have strict broadcast guidelines regarding what can be considered ‘fit for broadcast’. Whilst legal issues such as libel, defamation and copyright breaches aren’t exactly blown under the carpet when it comes to producing online, the truth is by not having so many restrictions and guidelines to meet you can effectively have a lot more freedom when it comes to the kind of content you want to produce, how long that content should be and when you want to release it. With broadcast advertising you may also be competing with many other organisations, all after the same airtime. This can once again hike up the cost. Obviously, to get the most engagement from online distribution you should have a well informed social media and marketing strategy in place.

The beauty of having freedom to create whatever you want (within reason!) means that it’s easier to innovate and choose an idea that hasn’t been done before. This can increase the likelihood of your content being shared and for some, can even mean going viral. Remember, it has been accessibility to content on social media that has helped many adverts (that were originally made for broadcast) go viral. Do you think the Old Spice adverts would have had as much success if they weren’t shared on social media?

Need some inspiration? Take a look at this promo for Virgin Holidays where we got a bit creative. Cinematic slow motion cameras were used to capture members of Cirque du Soleil performing acrobatics on the streets of London.

http://mustard.education/portfolio/virgin-holidays/

The finishing touches to the TV look: post production.

To get the TV look it’s not just about the shoot itself but what we do to the footage afterwards. Colour grading, as part of the editing process, is used to enhance the images so that they help evoke a certain emotion from the audience. This can make your brand stand out from the crowd. Once this is done titles, text, motion graphics and animation can be added to further enhance the production.

The video below is a good example of how a project was really brought to life through post production. Not only did we shoot a range of material to promote London in the summer through the use of steadicams, drones and slow motion filming, but we added warm flashes of colour throughout to give off a summer flavour and produced some small animations along with the text. There’s a lot going on here and it certainly looks fit for TV.

http://mustard.education/portfolio/visit-london-summer-in-the-city/

Don’t forget..optimise your content for your chosen demographic!

Just because you’ve got your content looking like it should be on the telly you must not forget one of the key reasons for choosing to advertise online in the first place. Your creative freedom and a flexible online budget can allow you to customise your content for particular audiences; from simply adjusting the title cards for each audience to creating specific ads for each demographic. Once again, timing of release is crucial here too. What time of day are your customers most likely to be online? With so many options available, it’s down to you to decide what you would like and we will help you realise your vision.

And another thing..

The recurring theme here and the key difference between producing content for TV and online is the scale. Whilst there are many technological savings to be made and in ways a lot more freedom to produce the content you want for online, you will still have to consider the scale of your production. Hiring 50 extras to star in the background of a promo in London Victoria Station is still going to cost a fortune, regardless of whether it is for web or TV. If you are prepared to think big but balance it with realism then there is no reason why you can’t make substantial savings and still walk away with an incredible advert for your business.

To find out how we can achieve the TV look in your online production come on by and say hello!


A beginners guide to lighting gels

Gels are used by cinematographers and videographers to balance the colour of light sources, adjust contrast and control shadows. It is the use of these gels that helps to create certain moods and looks to productions, whether that be low key drama or high key corporate video.

If you don’t know your ND from your CTB then read on as I introduce some of the most popular lighting gels and demonstrate how they may be used in your productions for creative effect.

CTB

CTB (not to be confused with CBT!) stands for colour temperature blue and is often referred to simply as ‘daylight’. It is used to convert tungsten balanced light sources such as traditional household bulbs and fresnels from 3200K to 5600K. It’s a common gel for balancing artificial light sources to daylight when the sun is acting as the key light in a scene.

With our camera balanced to daylight and using a tungsten light source, our professional model looks like he should be in TOWIE..

5200K_FULL_DAYLIGHT_GEL

..so by applying FULL CTB the skin tone looks a bit more natural now.

5200K_HALF_DAYLIGHT_GEL

If your subject has a lighter skin tone or if your camera’s auto white balance reads around the 4500K mark (for some fluorescent lighting), you may want something in the middle between tungsten and daylight and HALF CTB may be your answer, converting tungsten sources to 4300K. In this shot the camera is still balanced to daylight.

  • CTO

Another popular colour correction gel is CTO which stands for colour temperature orange and is often simply referred to as ‘Tungsten’. It is used to convert daylight 5600K sources to 3200K, in line with the colour temperature of most traditional household lamps.

3200K_NO_TUNGSTEN_GEL

Using a daylight balanced LED light and with the camera balanced to tungsten, our image is looking a bit cold. But there is a use for this though; it is a popular method of simulating moonlight as well as shooting ‘day for night’.

3200K_FULL_CTO_GEL

But if moonlight isn’t what you’re after, FULL CTO will return the skin tone back to a more natural colour.

3200K_HALF_CTO_GEL

HALF CTO converts 5200K to 3800K, so a little cooler than FULL CTO but not too far off. With the light I’m using (dedolight ledzilla) and the model’s skin tone in this case HALF CTO actually looks a little nicer.

Both CTB and CTO also come in other strengths including QUARTER and EIGHTH, for those more subtle differences, but FULL and HALF are the most widely used.

  • ND

ND stands for neutral density and is used to reduce the amount of light without altering the colour. ND is often used on the camera in filter form but for lighting it can be invaluable in helping to control exposure and contrast. Using ND to reduce powerful light sources that do not have dimmers (or if you don’t want to change the colour temperature of the source through dimming) or stopping natural light from washing a scene out through covering windows with these gels, it is an incredibly useful tool.

NO ND

Oh no, you can see that I forgot to iron my backdrop..so in this shot as you can see our model is looking a bit ghostly. Time to crack out the ND.

1 STOP ND

ND.3 reduces the light by 1 stop.

ND.6 reduces the light by 2 stops.

ND.6 reduces the light by 2 stops.

And ND.9 reduces the light by 3 stops.

And ND.9 reduces the light by 3 stops.

Wise words a gaffer once said to me, “you can never have enough ND!”

  • Diffusion

Diffusion is used to control the softness of shadows and the softer the source the less prominent the shadows will be. As hard lights have typically much higher output than soft lights, diffusion is key to softening these sources whilst utilising a strong beam.

There are so many different types of diffusion available and it can be difficult to know where to start so here are a few examples to give you an idea of the range available. At the end of the day it’s down to you to experiment with various types and find what you like.

NO_DIFF

Our professional hand model is currently being lit with a hard LED source (Dedolight Ledzilla) and no diffusion.

HAMPSHIRE_FROST

This diffusion used here is HAMPSHIRE FROST. Notice a subtle softening of the shadow.


HEAVY_DIFF

HEAVY DIFFUSION is being used here (and it’s easy to see why it got this name)

CLOTH1

I don’t actually know what this diffusion is called but it somehow found its way into my kit. A thicker, rougher sheet that is a little closer to greaseproof paper. As you can see it has a lovely texture to it and can add a bit of spice to a background.


It’s important to note too that the further a piece of diffusion is away from a light source, the softer the shadows will be, as will be a slight reduction in overall output of the light. See the example below:

HALF DIFFUSION attached to the light..

HALF DIFFUSION attached to the light..

HALF_DIFF_FURTHER_AWAY

..and the HALF DIFFUSION moved away from the light source (closer to the subject). Notice how much softer the shadow is now.


  • “Party” gels

Not necessarily an official term but in this case I shall refer to most other coloured gels as ‘party gels’. Whilst these may not be as important for most shoots as the colour correction and other gels mentioned above, they can be used to create certain moods for your scenes whether they are used as key lights, backlights or kickers. There are an almost endless number of these gels to choose from but here are a couple of examples.

3200K_STEEL_GREEN

STEEL GREEN with the camera balanced to tungsten. Sci fi!

STEEL GREEN but with the camera balanced to daylight.

STEEL GREEN but with the camera balanced to daylight. Lord of the Rings or Matrix?


3200K_STRAW

More subtle than the above, a STRAW lighting gel with the camera balanced to tungsten. A nice morning light look.

5600K_STRAW

A STRAW gel but with the camera balanced to daylight. I’m getting a CSI Miami vibe here.


So, which gels should you buy?

It all starts with the light source(s) that you’ll be using most. Their colour temperature, power, whether they are dimmable and how hard or soft they are will all determine the gels you need. Aspiring DOPs will probably accumulate gels over time as their portfolio grows, but a good place to start is with the simple colour correction gels (CTO and/or CTB) and some diffusion which are the bare bones for lighting anything professionally. Another thing, don’t always rely on kit hire companies to stock a wide range of gels!

Big D Jonny boy

Experimenting is key to finding lighting styles that will grab your audience’s attention.

Use of softbox fill Liquiproof

Part of the fun and the craft of being a DOP is finding lighting styles that fit your productions and consequently help you to create your own signature style. Experiment with gels and see which colour combinations work and which don’t. Get creative!

Whether you are new to lighting or not, the LEE filter comparison tool here is a fantastic resource to see the range of lighting gels available and help you make decisions on what to buy. LEE filters are widely considered the number one name for gels; heat proof, colour accurate and with a huge choice available, they are an essential investment if you’re an aspiring DOP.

Happy shooting!


P.S. This post would not have been possible without my trusty light meter. Here are a few reasons why every aspiring DOP simply must have one.

So you shoot video…but can you do stills?

Many times I have been on a shoot and the client has asked if I can do photos too. Now I imagine this is a popular question for the majority of other videographers too but for me it has always been a bit difficult to answer. I’ll explain why.

Whilst it could appear that a digital professional who works in one visual medium would probably be competent in a similar one, the truth is that video and stills photography aren’t always as close to each other as many may think. In theory, anyone can take our their phone and take a picture and shoot some video with relatively no skill at all but most businesses wouldn’t choose this option if they wanted high quality content. Assuming that your photos and videos could be done by the same person is also not always the best thing if you want the highest quality from either, however it’s easy to see why those outside of the creative industries might pair the two up.

The reality is that the skills and experience required for the role of videographer and photographer are completely different, despite an overlap of certain techniques and equipment.

Hold on! There are some similarities..

Technically we – the video guys – can do your stills. The single biggest reason why is that we actually use DSLR cameras to shoot our videos! Using dedicated stills cameras for video may seem absurd but one of the main benefits can be that we have the ability get high quality images at excellent value. The Sony A7Sii and Panasonic GH4 are both good examples of DSLRs that offer 4K video capability at an affordable price and as 4K online video is still in it550D food filmings infancy it’s not economical for the majority of us to invest in top of the range 4K video or cinema cameras so these types of DSLRs are sensible purchases. Adding to this, many DSLRs have large sensors meaning that they are exceptional in low light which is great for event videos and can offer cinematic bokeh (background blur) which can make videos look stunning. DSLRs are also perfect for shooting high quality timelapses which can add another interesting element to video content. With these considerations it makes absolute sense that online content producers have DSLRs at their disposal.

Shot composition, framing and an understanding of the technology behind the respective crafts are essential regardless of whether someone shoots video, stills or both. Colour temperature, exposure and shutter speed (or angle) are further concepts that must be grasped by either professional.

A whole lotta’ differences..

Apart from the obvious one that videos are moving and stills are not, there are actually many other less obvious differences between the two which maybe mean no, us videographers can’t (or choose not to) do your stills.

Camera on slider

Motion from the camera or from the subject helps to make a sequence more engrossing.

It boils down to the key ingredients for each craft which are in turn, completely different. Video needs motion, whereas photography is all about light (well actually, premium video is about light, which I talked about in an earlier article but the absolute bare bones of video production is motion). Successful business videos engage with an audience, encouraging them to react (i.e. with a like, share or comment on social media) and to help with this motion is essential to keeping their attention. Even if the subject isn’t moving a cut to another angle can be enough to create at least an element of movement. Sound is the other key skill in video production that often gets overlooked but it really is an art in itself.

City of London

Landscape photography – being in the right place at the right time..and having a bit of patience!

Photography however is all about capturing perfect moments in the best light, whether that be using natural or artificial sources or a combination of the two. Capturing a single moment that’s sharp, interesting and exposed well is an entirely different art to shooting video and for a picture to paint a thousand words, it has to be something special. Landscape photography is a good example of how difficult it can be; to get the perfect image photographers may have to wait for hours to be in the right place at the right time in order to capture the best natural light.

The post production process can be drastically different too. Photographic editing often involves retouching, fine adjustment and layers upon layers of edits even just for a single image. Car photography in a studio is a good example; to make the various parts of a car look perfect all at once each part has to be lit separately and all of the images blended together in post production to only show the best bits from each setup. Whilst this can happen in video too it is much more time consuming and processor intensive as multiple layers of correction would require key framing (and bearing in mind that PAL video is made up of 25 frames per second, that’s a lot of frames to consider!) and so only suitable for the highest end projects.

“Could you take a still image from the video?”

Another question that I get asked often. Yes, this is possible, however as the majority of online content is shot in HD, not 4K, doing this means that you will have a smaller resolution image than you would have done if you had used a designated stills camera (and not in video mode). Megapixels are more important in photography than video for sure and as a result many camcorders will have a much lower pixel count, plus if there is any movement in your video taking a still frame might leave you with a subject that’s got a bit of motion blur. For some web purposes it may be fine extracting a smaller image from a video (including in a blog for instance) but if you wanted to zoom in, enlarge the image greatly or print it professionally then it wouldn’t be a suitable option.

So in practice yes, but if you want the best quality then no.

Wedding shooters: similar equipment, different style.

Wedding DSLR

5Dmkiii – a popular choice of camera for both wedding photographers and DSLR videographers

A good example of the differing styles of a videographer and a photographer would be at a typical wedding. The photographer will be capturing the key moments of the day but will also be herding the guests so they can set up and take memorable portraits that can be cherished forever. With only one opportunity to get these people together they are very much in the limelight during certain parts of the day. They would certainly need to be a people person!

The videographer however will be the complete opposite; rather than being noticeable and central to the day they will most likely be blending into the background so that they can go unnoticed. They would capture the day but not intervene with the order of events so that when the happy couple come to watch their video back they actually see the day from a whole new perspective. Events can be unpredictable so being able to foresee what’s coming and then be able to simultaneously capture the best audio and visuals is something that can take years of mastering.

C100 wedding

Canon C100 – where stills and motion overlap. A camcorder that uses interchangeable DSLR lenses.

The editing styles of each wedding shooter role differ immensely too; the photographer will spend days editing potentially hundreds of photos whereas the videographer will most likely be editing in camera, shooting as linearly as they can on the day to keep the editing time affordable and sustainable in the long term. This is especially important as data processing could take almost as much time as the editing itself due to the large file sizes involved and the process of burning the final (often hour long or more) videos onto multiple DVDs for clients.

The bottom line

Don’t get me wrong, there is absolutely no harm in offering both video and photographic services but the point of this post is that there are different skills, workflows and to some extent, even personal qualities that can be applied to each craft and more often than not the best practice is to hire the relevant specialist. On the contrary, many experienced cinematographers in film production have backgrounds in stills photography, as do many photographers venture into video production, so there is no set rule. At the end of the day it certainly can’t hurt to have an interest in both fields but knowing and being honest about where your strengths and weaknesses lie is vital when it comes to maintaining strong working relationships, regardless of the industry you work in.

So if we were to answer to the original question: “Can you do stills?”, well yes; here at FlyCreative we rely on a trusted network of talented freelancers with a range of talents to assist us in fulfilling our moving image and other digital needs. If we can’t personally meet your requirements then we’ll certainly be able to recommend you a trusted professional.

Get in touch today to find out more about our services.

7 DIY lighting essentials for low budget filmmakers

So you’ve raised the finance for your project, chosen your camera, cast your actors..and you suddenly find that your budget has disappeared in a flash. Where did it all go? Film making can be a seriously expensive affair and sadly certain departments sometimes get neglected as a result. Lighting is one of these departments.

No matter how low your budget is, lighting should never be neglected if you want to create cinematic visuals to be remembered. In fact, here are a list of reasons why good lighting is so important. In this article however I’m going to identify 7 lighting essentials that don’t cost the earth but every low budget camera operator or DOP should be armed with. Sometimes you need to spend good money on kit and sometimes you don’t, but if you’re keen to increase production value economically then read on.

  • Gaffer Tape

gaffer tapeA ridiculously obvious one but gaffer tape is something that should go with you on every shoot no matter how big or small your budget! It can save your life (in a creative emergency, I have yet to prove this medically!), whether it’s used to rig lights or modifiers onto unusually shaped objects or into areas that are inaccessible for light stands, gaffer tape really is essential. It can also be used to make DIY french flags to avoid lens flare and teamed up with some trusty cinefoil/blackwrap makes a perfectly functioning LCD cover for operating in bright sunlight. Trust me, don’t leave this behind!

And the award for best DIY rig goes to..

And the award for best DIY rigging solution goes to..

One item you can't afford to be without is cinefoil. This, along with your gels is worth spending good money on.

Gaffer and cinefoil = budget french flag. Cinefoil is one item you can’t afford to be without on set. This, along with your gels is worth spending good money on.


  • Halogen work light

Revealing an indHalogen worklightustry secret here. Or maybe not. This item is ridiculously obvious and cheap but the likelihood is that most of us low budget filmmakers probably don’t use them..or at least not yet. If you pop down to your local B&Q you’ll find these useful halogen work lights. At about £10 each these little lights give out a fair amount of light considering their size and use tungsten balanced bulbs which means their colour temperature matches the expensive Arri equivalent. If you have the right colour correction gels then armed with a few of these you could in theory light your whole film.

Of course being cheap means that these little fixtures do have their drawbacks; short power leads, a lack of any way to control the spread of the light and the fact that they won’t attach to normal light stands are the main ones (because obviously film making isn’t what they were designed for) but, if you purchase one of these, and I recommend you get several, you could potentially fill decent sized spaces for little money. What’s more, their handles allow for easier rigging at height than some lights. With a bit of problem solving, and lets face it – that’s what film making mostly is, you’ll be able to find ways to rig, hide and control the output of these lights.

  • Polyboard & foamcore
bounce board on roof

Polyboard is common even on the biggest of film sets

While you’re down at the DIY shop why don’t you pick up some of this too? Polyboard is a perfect and cheap way to bounce light in order to create flattering soft light and fill in shadows on your subject. It often comes in fairly large sizes and in various thicknesses and can be easily cut to size to meet your needs, or at least to fit in your car! What’s more, if you have any black paint lying around then paint one side and bob’s your uncle: you now have a large, lightweight flag to use for cutting light and creating negative fill. Two for the price of one (almost!).

foamcore flagIn addition to this your local craft shop will probably stock black and white foam core; both of which can be useful for smaller, more portable bounce boards and flags. Once again this is inexpensive, easy to cut to size and easy to rig. The only downside is any thin layers of card on these boards will be flammable, so be careful using them near hot light sources.


  • Spring clamps
spring clamps

Top tip: buying multi packs on sites such as eBay can make these accessories even cheaper for you.

Cheap and cheerful, but where would I be without them? These large spring clamps are cheap, lightweight and a must have for anyone doing any sort of lighting. Use them to attach reflectors or boards to stands, flags and tarpaulins to backdrops and for making green screens taut. Do yourself a favour and get some now.

Diffuser reflector spring clamps

A quick way to hold up your reflector

spring clamp reflector


  • China ball lantern
china ball

A beautiful quality of light for certain applications.

China ball lanterns can create beautiful soft light for use in close ups and as practicals. Inexpensive and by using regular household bulbs, china lanterns are a cost effective option over the dearer branded soft fixtures and combinations offered by the likes of Arri and Chimera. They do have a specific use however, their main drawback being that regular 60W or similar household bulbs don’t give out huge amounts of light, at least not for cinema use. To the naked eye their light output is fine but on camera the lanterns reduce a bulb’s output a fair amount. Adding to this, their size and the fact that they’re made out of paper means significant fire hazards are present if too powerful bulbs are used, so you need to stick to the recommended wattage. For larger areas of soft light an Arri/Chimera combination is a much more suitable option which understandably you will need to pay for.

Despite their drawbacks if you’re able to find use for them still china ball lanterns can provide wonderful results. Rig them off C stands or mic stands, ensure you have long enough extension leads and you’re good to go. Watch out for that colour temperature though; some bulbs rate lower than 3200K (tungsten) so will appear warmer than you may like. Once again it pays to have a good selection of colour correction gels!

  • Tin foil & baking paper
tin foil

Tin foil: cheap as chips!

Who’d have thought that every day items around the home could help you in lighting your cinematic masterpieces? The highly reflective surface of tin foil can be used in the same way that the silver side of a reflector is used; to fill in shadows when a white surface isn’t cutting it or to create a bit of ‘pop’ to the image through introducing highlights. Attaching sheets of tin foil to your foam core boards (see above) or even just a sheet of plywood can give you another way of applying contrast quickly, cheaply and without having to hire anything!

No product placement here..

No product placement here..

Baking/parchment paper is a good option for when you need to diffuse hard light sources to soften their shadows and reduce the contrast. It’s designed to withstand heat so is ideal for using with hot light sources without risk of burning. So if you’ve run out of diffusing gels and need a quick softening solution, go have a look in the kitchen cupboard or run to the shop!


  • Tarpaulin
tarpaulin night shoot

Protecting a 2K arri fresnel from the rain.

There are many uses for a tarpaulin, many of which may appear to have nothing to do with filming, however the long days on location and the unpredictability of the weather (especially in glorious England) mean that a tarpaulin lends itself to being pretty useful in general on set. For DOPs a tarpaulin can provide suitable protection to lights (and camera) from the rain and from dusty or wet terrain. More importantly, they can also be setup and rigged to act as huge flags, with a host of uses. From blocking out large windows in order to control interior lighting to providing a huge source of negative fill on location, tarpaulins are inexpensive, reusable and portable. If you decide to rig one up on location then make sure you remember your spring clamps! (see above)

tarpaulin over windscreen

Flagging the windscreen of a car to eliminate reflections and any changes to ambient light levels.

These are just some of the useful lighting accessories that can be used in low budget film making. However, as you climb the ladder in your film career, you may find yourself using some of these items on the bigger budget productions too!

Remember that there are certain items you’ll need regardless of your budget; lighting gels and cinefoil are the big ones here. Don’t cut corners on your gels, buy the real thing (I recommend Lee filters) so you know you have high quality, accurate colours and so you can avoid setting anything alight. If your budget can stretch a little or if your professional image concerns you then get yourself a few 5 in 1 reflectors; you won’t regret it.

Hopefully you’ve found this helpful and if you have any suggestions of your own for DIY lighting do tell us in the comments!


Why we use external recorders to record video

It’s rare to be able to just turn up on set, take a camera out of it’s bag and start shooting straight away. With such a vast range of accessories available to shooters for all manner of shooting situations it’s hard to keep up with, let alone afford all the technology available to us. However, one tool that appears to be cropping up more than most are external recorders. In fact, they’ve been around for a little while now yet they continue to be growing in popularity. For those who may have wondered what the point of these devices is, read on.

What is the point in recording video externally?

1. Edit friendly codecs

Do you know which codec you should be editing in?

Do you know which codec you should be editing in?

This is the primary reason why anyone would record externally. Many consumer and prosumer cameras, notably DSLRs (except for a few exceptions), compress footage using codecs that are good for keeping file sizes down and easy playback but aren’t so good for editing and colour grading.

The Canon 5D mkiii for example records internally with the H.264 codec and it’s files can be opened easily on any computer. However, editing using this codec can prove troublesome, often resulting in glitchy or delayed playback. When colour grading the limitation of this codec results in a relatively small dynamic range, meaning that pushing or pulling the image a great deal will result in substantial noise and lack of ability to recover the highlights and shadows. Even with the likes of non linear editing applications such as Adobe Premiere allowing you to conform almost any type of video file to the editing timeline, the limitations of the original codec do not go away. Edit friendly codecs, most notably Apple Pro res 422 (and the numerous variants of it) are a good solution to improving workflow for those who often find themselves batch converting lots of files, being particularly useful for projects with a tight turnaround. These codecs can be found on all good external recorders.

ninja blade conference

Atomos Ninja blade mounted to Canon 5D mkiii for a conference. Extending the record time to over 30 minutes, using mains power and recording to Pro Res LT made the filming and editing infinitely easier.

2.Higher bit rates

The bit rate required for video footage can vary greatly, depending on what it is that you’re shooting. Live event filming may require lower bit rates for storage whereas commercials would need broadcast quality. Many lower end cameras however are limited in the bit rates that they offer, often not qualifying as ‘broadcast quality’ because their bit rate is too low (by broadcast quality, I’m referring to the minimum bit rate required for HD footage broadcast on the BBC which is 100Mbits/sec). External recorders allow cameras to deliver higher bit rates by using codecs such as pro res 422, as mentioned above. Without compressing and uncompressing footage, digital artifacts that can plague footage for broadcast can be eliminated.

External recorders can also help for those going through an offline and online editing process. Although you’ll need more storage space for footage shot with higher bit rates, shooting directly with them still allows you to use proxies (lower quality versions) so editors who are cutting large projects with substantial amounts of information can edit using lower quality files and then reconnect them with the higher quality files at a later date for colour grading and delivery. This is much more efficient and less processor intensive than editing with colossal amounts of high quality data from the outset. Although you still need to downscale to the proxy, you have one less job to do and the amount of time saved by not having to batch convert masses of data to a high quality codec can be better spent editing.

For more information on the pro res codec and the variants of it, including their effective bit rates, check out this useful article on the matter.

3. Monitoring solutions

No need to record externally with the Amira, however the PIX-E5 by Video Devices made a useful monitor. It c

No need to record externally with the Amira which records ProRes internally, however the Sound Devices PIX-E5 made a useful monitor for me. It could have also been used for low res recording for quick assembly edits.

Excluding the Atomos Ninja Star, most external recorders include a screen for monitoring purposes. Most of these are in fact larger than the inbuilt LCD screens on most cameras which make them incredibly useful even if you aren’t recording to them! For those situations when you can’t reach the viewfinder or see the screen, or another person needs to see the screen such as an assistant or client, having an extra screen can speed up the filming process.

Now, whether recorders are a suitable replacement for professional, colour accurate monitors or not is another topic entirely, however for the purposes of most shoots the extra screen is rarely going to be a hindrance. What’s more, inbuilt tools and scopes for exposure (waveforms, false colour and zebras.) and achieving critical focus (peaking and magnification) are usually offered in addition to the screen. Even if some of these features are included on the camera, the chances are there will be more on the recorder (and they will be much easier to use!).

4. Cost efficient & reliable media

Most external recorders store files on readily available HDDs and SSDs*. The former is more cost effective per gigabyte whereas the latter is often faster and more reliable with no moving parts. Either way, both these methods of storage are easy to find, purchase and change, unlike some storage media that can be extremely expensive (e.g. red mag SSDs and SxS cards). If you’re going to be recording hours of footage at high bit rates, affordable and reliable storage should be at the top of your list of priorities.

*The Atomos Ninja star is an exception, using ultra fast and reliable C Fast cards. This ultimately comes at a premium.

5. Compatible powering solutions

Dual batteries on the PIX-E5

Dual batteries can be a godsend

Not a primary reason for using but models offered by Atomos and Video Devices in particular are well noted for their compatibility when it comes to power and in some instances can out last the camera (5D shooters, take note!). The Atomos Ninja Blade for example can be powered by Sony NPF, Canon and Nikon batteries, as well as with an AC unit. Adding to this, dual battery slots are a common feature in most recorders and allow for continuous use on location.


Do we need external recorders for every shoot?

conference and ninja blade

A quality recorder can be a useful asset as well as a costly, glamorous add on. The question is, do you need one or want one?

The answer to this, as I would say about any other bit of equipment is no; there is always a time and a place. Sometimes it is simply easier to turn up with your camera and shoot. News gathering, weddings and sports are just some examples where it might just be easier to shoot in camera, especially if it means the difference between getting the shot or not. However, this is all relative to the camera you’re using in the first place (if you need some help choosing a camera it may be worth checking out an earlier article on how to choose the right camera for the job).

External recorders have been designed to get an extra lease of life out of cameras old and new and to make content producers’ lives that little bit easier. However despite this, we shouldn’t forget that every extra gadget needed to get our desired results is another item that needs to be powered, mounted, connected, protected in transit and supported with compatible media; all of which usually come at extra cost. Ultimately it’s down to you and what you shoot to determine whether a recorder is a suitable investment for you or something to hire on occasion.

In the case of the Sony A7S mark i, an external recorder was a solution to a camera that couldn't record 4K internally

In the case of the Sony A7S mark i, an external recorder was a solution to a camera that could record 4K video but not internally


Prices for external recorders can range from a few hundred to several thousand pounds, depending on the features, connections, maximum resolution and frame rates offered. Below are some of the popular manufacturers:

Atomos

Black Magic Design

Convergent Design

Video Devices


Tips for improving the audio in your video

The first tell tale sign of a video amateur is bad audio. It doesn’t matter how beautiful your images are, how long your steadicam shot is or how interesting your talent is; if your audience is struggling to hear the content they probably won’t give you the time of day. As sound is half of the picture it is crucial that video producers get their audio knowledge up to scratch.

So, what are some of the common causes of bad sound and how could we solve these issues?

Poor location choice

Can you rely on the natural light alone?

A thorough reccie will allow you to (somewhat) find out if you’ll be disturbed during filming

Background noise is probably the biggest problem when it comes to clean sound recording. Where ever we go, whether that be in the city or the countryside, some sort of background noise will try to interfere with our recordings. This could include traffic noise, chatter, sirens, aircraft, footsteps, air conditioning..and the list goes on.


Solution: If you are fortunate enough to do a location reccie, consider the audio elements as well as the visual. Filming under flight paths, by main roads, next to the staff room etc. should all be avoided where possible. If your location looks great but you’re going to be interrupted every 2 minutes, is it really the best place to film? Consider what time of day may be best to do the recording; if the office empties out at lunch time, why not film then? Also, turn off any appliances and equipment that you’re allowed to if they emit unwanted noise. It all goes back to a little foresight and planning before your shoot.

Poor acoustics

Recording in wide open rooms with hard floors and few furnishings can make your recordings sound reverberated. While it is easy to add reverb in post, it is much harder to remove it from a recording. Acoustically treated rooms sound much better to the listener, particularly if recording voice overs.

Solution: Where possible try to shoot in rooms with soft furnishings. Consider using old carpet to reduce the reverb somewhat and this will also reduce any sounds of footsteps. If recording voice overs, either use a studio that has been sound proofed, or set up carpet and pop shields close to the artiste to treat their voice as much as possible.

Unsuitable microphone choice & placement

Sometimes it's good to have options

Sometimes it’s good to have options

You can still record good sound if there is some background noise, but how manageable that noise is all falls down to your choice of microphone. Using the inbuilt mic on your camera is rarely the best option. These mics are often of lower quality, have poor bass response and aren’t usually that directional. High quality shotgun mics may be good alternatives but even those with the most directional pickup patterns can’t completely eliminate some background noise. Lapel mics can also be a good choice but if your subject moves a lot expect to hear a lot of rustling. You also might have trouble attaching a lapel on certain outfits!

Solution: Only ever use your camera’s inbuilt mic for reference so that you can get rid of that tinny sound and reduce the likelihood of any handling noise. Shotgun mics can be great on location, but consider whether having one attached to your camera is going to get the clearest recording or if you need to get it in closer to the subject and purchase a ‘deadcat’ or ‘fluffie’ to eliminate wind noise if you are on location. If using a radio mic, attach stickies and under/over covers to eliminate wind and clothing noise. If possible, find somewhere to attach your mic where there is less chance of your audio becoming muffled  – under a tie or a shirt collar for example. If you have the luxury of both a shotgun and radio mic, record using both into separate channels so you have options! Lastly, if your camera has AGC (automatic gain control), for Pete’s sake turn it off!

Imperfect recording technique

There are numerous ways that your recording technique can affect the quality (or lack of) in your recordings. Turning your microphone’s gain up so high that there is distortion and choosing a mic input when you should be using line are both suitable examples.

Solution: Different equipment manufacturers and sound recordists will have their own opinions on what is a safe level to record at. Some may recommend your maximum recording level hit -18db as it peaks, but some may prefer it to be closer to -12db or even -6db (which is a little dangerous for my liking). It’s important to remember that once a microphone distorts it is pretty much impossible to recover, whereas sound that is recorded slightly too quietly can always be amplified. However, recording as close to your devices’ nominal level is best as too low a level will result in amplification of hiss. This page from the Final Cut Pro user guide explains it well but basically you’ll want to use microphone and recorder combinations with the lowest signal to noise ratio possible. Before you buy any audio equipment do your homework first and look out for comments made by other users regarding this.

One way I found to get a cleaner radio mic recording into my C100 was to select line input in and turn up the output of the receiver quite high

One way I found to get a cleaner radio mic recording into my C100 was to use a line input in and turn up the output of the receiver

One thing to remember is that recording into a designated audio recorder rather than a camera will in most cases give you the cleanest audio as some cameras have quite noisy preamps. On location this might not always be practical but in an acoustically treated studio this is definitely the best method. Either way it is always good to test and get to know your equipment before you go out on a shoot to see how you can get the cleanest recordings possible.


Insufficient mixing & EQ

audio waveformIs the music drowning out the dialogue? Does your subject become lost amongst the layers of foley? Recording good sound at the outset is important but mixing and equalizing that sound appropriately is just as important in order to produce a product that people want to listen to.


Solution: Check your levels using the audio meters in your editing program on both your speakers and through a set of headphones. You may notice things through your headphones that you didn’t notice otherwise.  Experiment with EQ and see if you can make any improvements, continually referring back to the original audio. Maybe you’ll discover something, maybe you won’t, but there’s no harm in trying things out. Use fade ins and fade outs where possible so that no source jars when it starts or stops. Find out more about EQ here.

Too much noise reduction

Ever watched a video that sounds like it was made underwater? If so, one cause of this is too much or inappropriately applied noise reduction in post. It sounds bad; worse than most cases of background noise!

Solution: Get it right at the recording stage – do what you can to reduce the background noise. If this isn’t entirely possible, utilize noise reduction and other plugins such as high pass filters to eliminate certain frequencies. The latter cuts off all frequencies below a certain level, allowing the higher frequencies to pass through which can be good for consistent low level noise from an appliance for example. With this and any audio filter be prepared to spend time tinkering if you want the best chances of reducing the unwanted frequency without affecting the voice.

Not listening!

 filming headphones

Despite what anyone may tell you I am a good listener!

Pretty self explanatory, really!

Solution: Always wear a decent pair of headphones and be prepared to playback takes if you can to ensure you’re recording the cleanest sound possible. Other things to listen out for include unsuitable gaps between questions and answers in an interview (you need room to cut), spikes in the audio from background noise (the consistent sound of traffic may be OK but a siren will stand out) and interference.

If you have even the slightest doubt about your recording, go for another take if you can. You will thank yourself in the edit.


These tips are just the beginning and should only be the start of your research into sound recording. However, by taking these points on board and applying them to your productions you should start to see a noticeable improvement in your audio. Plan as much as you realistically can, be prepared for the unexpected and when scheduling allow for interviews and pieces to camera to take a bit longer so you can get it right the first time.

How to choose the right lens for the job

Following on from my earlier article about how to choose the right camera for the job it made sense to follow up with one on how to choose the right lens, a major factor that will help you with your choice of camera. The two go hand in hand and your decision on which camera to choose could actually be dependent on the lenses you plan to use.

My stance on choosing lenses is very much the same as cameras:

No lens is perfect. But, for each job there is a perfect lens (or lenses).

Even then, it is subjective.

You see, just like cameras, lenses have their own quirks and variants that make them ideal in certain situations and a nightmare in others. It would be easy to assume that cost alone would be the main consideration but just spending more on a piece of glass doesn’t necessarily make it perfect for your project.

Consider your situation. Do you have a short term brief to meet or a long term investment to consider? If you are stuck choosing a lens for your camera, here are some factors to consider before your investment becomes a money losing opportunity:

Video Production Brighton

mmm, such choice!

Price

First and foremost. What’s your budget? Typically, lenses become more expensive the better they are in low light, the less they breathe when focusing and the sharper they are. Image stabilization, build quality and brand can also affect the cost of the glass considerably.

Return on investment

Are you shooting a one off job or a series of projects? Knowing exactly what you need, rather than what you would like will narrow your choice down and then it’s a matter of working out how likely you would be able to make a return on your investment with the options left to you. Is a £3K cine prime really your best choice to buy when you mostly shoot talking heads? On the contrary, is spending a little bit more going to mean that your lens will outlive your next 2 cameras?


Mount type    EF mount

This is a big one. Different lens mounts have varying choices that go along with them and this will of course affect your choice of camera. Here are just some of the options available to you:


EF (Canon) – Popular mount choice for Canon cameras and some third party cameras such as the Black Magic Production Camera.

F – (Nikon) – Another popular choice of mount with a huge range of lenses available to choose from and numerous adapters to adapt them for other systems.

A & E (Sony) – Both A and E mount lenses are rising in popularity due to the likes of Sony cameras such as the A7S and FS7, although some would argue that there is less choice here than some of the other mounts.

PL (Arri) – Geared towards cinema, originally designed for 16mm and 35mm film cameras. Extremely high quality but out of reach for most who are looking to buy.

IMG_9025

Is your 24 really a 24?

Angle of view and crop factor

There are countless combinations available to you when it comes to choosing lenses and cameras so it’s important to understand field of view and crop factor before you accidentally make the wrong purchase.

Crop factor refers to how much a lens magnifies the image when a camera’s sensor is smaller than a full frame sensor or an equivalent 35mm film camera. Most lenses are designed using full frame as a reference, however it’s the sensor size that determines what your actual angle of view would be.

For example, a 24mm lens on a Canon 5D, which has a full frame sensor, will give us an angle of view equivalent to 24mm (73.7 degrees to be exact). However, on a smaller sensor camera such as the Canon 600D (APS-C sensor) there is a crop factor of 1.6 meaning 24mm is magnified by 1.6. Our 24mm now gives an angle of view equivalent to about 38mm on a full frame sensor (or 51.9 degrees). This is quite a jump when you think about it, so making sure you know what angle of view you need before you decide is crucial.

70-200 devils dyke

Could you do with a little extra reach?

Crop factors can be a disadvantage when you need wide angles, such as in this example, but on longer lenses they can give you much greater range which could work for you. It’s also good to know that there are lenses designed specifically for crop sensor cameras, so wide angles aren’t limited to full frame users alone.

To learn more about crop factor check out this excellent field of view calculator from Abelcine.


Type of production

What do you currently shoot or plan to shoot? This will determine which lenses will fit your needs best. Consider the following:

  • What size screen your project will show on – any optical imperfections will naturally be magnified in a cinema
  • Sharpness required – you’ll get more sharpness for your money when choosing primes over zooms
  • The size of the camera crew – do you have someone to help you change lenses safely?
  • Project turnaround – do you have time to change lenses for every shot?
  • The location & portability – do you like to travel light?
  • If you need to zoom – how unpredictable is your subject or location?
  • Your lighting conditions – are you shooting a lot in low light?
  • Screw in filters or mattebox – what kind of ND, polarisers and other filters will you be using?
  • The grip you have available – will you always have a rig or is image stabilization essential?
  • Follow focus – to attach or not and if so, how?
  • Aesthetics & personal preferences – is beautiful bokeh (background blur) or minimal distortion a priority? What about the way a particular lens handles contrast and saturation?

With answers to these questions you should get a clearer idea of whether you need primes, zooms or perhaps a bit of both.

Examples

As you can see there is a lot to consider when making a lens choice. In fact, you may just be a little more stuck than you were before. However, have no fear as here are a couple of practical examples of lens/camera combinations I’ve used and the pros and cons of these choices.

WWTW

The 24-70. Good for close ups..

Walking with the Wounded: Cumbrian Challenge

The brief: 3 minute highlights video of fundraising event. Positive and engaging.

Location: The Lake district

Camera: Canon C100 with Canon 24-70mm f2.8 L & Canon 70-200 f2.8 IS L


Screenshot 2016-01-28 11.07.55

..and for GVs.

The C100 has a crop factor of 1.3 so my 24mm became a 31.2mm and my 200mm became a whopping 260mm. Being in the great outdoors having zooms covering this range was excellent and being able to get shots of the walkers from a great distance was essential. The widest angle was still wide enough to get establishing shots; anything much wider probably would have weighed me down unnecessarily.


Screenshot 2016-01-28 11.08.28

The 70-200 was good for flexibility on the mountainside..

In fact, talking of weight, the telephoto lens was a beast. As it opened up to f2.8 it was quite heavy but being in the great outdoors during the day meant that I never needed this extra stop of light. In this case, the 70-200 f4 IS would have been more suitable as it is smaller and lighter (as well as cheaper). Image stabilization for me was a must on the telephoto though as it wasn’t always easy to use a tripod and it was quite windy up on that mountain.


Screenshot 2016-01-28 11.28.28

..which resulted in a good variety of coverage

Other suitable lenses:

Canon 24-105 f4 IS L – This would have given my 24-70 greater range and image stabilization at the expense of 1 stop of light and some sharpness.

Canon 28-135 f3.5-5.6 IS – If I only wanted to take one lens this may have been the best option. Incredible range and image stabilization at the expense of aperture and sharpness.


Noose

Brief: Short horror film. Moody and suspenseful.

Location: Hotel interior

Camera: Canon 5D mkii with Zeiss ZF primes and EF adapter

A short film I did a few years ago. Full frame was the choice for this project because low light ability, shallow depth of field and a wide angle of view were essential to getting a cinematic look whilst showing the space within the rooms. The Zeiss set hired included an 18, 25, 35, 50, 85 and 100mm so were a fantastic range for drama and being primes, were very good in low light. What’s more, their sharpness and very aesthetically pleasing bokeh (background blur) made them an exceptional choice for the project.

Screenshot 2016-01-28 11.54.47

The 18mm showed the space of the hotel perfectly without distorting the edges

Screenshot 2016-01-28 11.50.02

The Zeiss lenses have exceptional bokeh

On the flip side changing lenses slowed us down on what was already an incredibly tight schedule plus there were no focus gears on the lenses themselves (we had some complicated camera moves) so we had to apply and reapply focus rings quite often. What’s more, being Nikon mount we had to also attach and reattach EF adapters which once again, slowed us down. Of course, we could have chosen to use a zoom lens to speed things up but our maximum aperture would have been lower and there would be a greater chance of distortion in the corners of the image.

At the end of the day image quality really mattered here and by looking at the stills you can see why I would choose Zeiss primes again in a heartbeat.

Other suitable lenses:

Canon EF cine primes – Incredibly sharp and optimized for cinema with manual iris, focus rings and no ‘breathing’ when focusing, these lenses would have been an excellent choice. The EF mount would have made them quick to change too, however, all of this would have come at a much higher price.

Canon L series primes – These would be around the same price to hire as the Zeiss but with the Canon mount for convenience. No focus rings again and aesthetics that are in my opinion not as pleasing (this is just personal preference) but they are certainly a good economical choice, especially for sharpness.


These are just a few examples to get you thinking and of course these are just my own opinions, but as you can see it’s a bit of a minefield out there. There are so many factors to consider and what one person needs in their lenses may be unnecessary for another so ultimately it’s down to you to decide what your priority is. It also doesn’t help that new lenses are being introduced regularly, although fortunately nowhere near as much as new cameras are.

One thing to remember though is that old lenses aren’t necessarily bad lenses! If they are free of mould and scratches and the like, they could be perfectly usable. In fact, newer lenses with electronically controlled apertures (Canon are particularly guilty here) limit your choice of format unless you’re prepared to buy expensive powered adapters such as Metabones. However, older manual lenses such as the Nikon M42 variety can be used on many modern cameras (with adapters if necessary) usually at a much lower cost but sometimes rivaling the quality in areas. In fact many vintage lenses have characteristics that make them rare and unique (this deserves an article in itself) hence their appeal to collectors and photography lovers.

At the end of the day do your research and only get what you need. By concentrating on producing high quality work and making sensible choices you’ll realise it’s not just about the camera or the lens, but the person behind it.

Light meters – do we need them for video?

It was my birthday earlier this week and one of the presents I received from my family was a light meter – a Sekonic Flashmate L-308s to be exact. This little gizmo is hardly the most glamorous gadget in the arsenal of video gear and probably nowhere near the top of most camera peoples’ wishlists, but nevertheless I decided that it was time to get one. Now I shoot quite a lot of video and you may be wondering why I would ever need a light meter when most video cameras have histograms, wave forms, zebras and other exposure aids built in. It’s perfectly valid to question why anyone would want to spend more money on an item that is, in theory, debatable as to whether it is really needed in these modern times.

In this digital age and with the rapid advancement of technology has the light meter become more of a relic from a bygone era rather than an essential video making tool? Do photographers even need to use them anymore now that most shoot digital? Do we really need light meters for video?

The short answer is yes. But it’s not as simple as that. Depending on what you shoot, the answer may actually be no. To decide if you do need a light meter or not it’s worth considering the reasons why one might have one in their kit bag. You may be surprised at how many reasons there are:

sekonic light meter

Sekonic – a widely adopted brand of light meters

1. To get the most accurate exposure:

First and foremost and the most obvious reason for owning one. I’m not discounting inbuilt light meters in digital cameras but the truth is a quality light meter will always be the most accurate way to measure exposure because that is their primary purpose. Inbuilt light meters usually feature modes that rely on averaging the exposure by taking several readings across the frame. Using an averaging mode can sometimes result in the camera been tricked into the wrong exposure because it averages the whole scene rather than taking a reading of the subject you are focusing on, meaning your subject could end up over or under exposed. Using a light meter here can allow you to expose the correct area of the frame first time round.

To control the highlight in this image a flag was held partially in front of the light source so it didn't wrap around the face too much.

The back light here was deliberately over exposed so that it was unrecoverable in post but if I wanted to I could have measured it so it was specifically 1 or 2 stops over the rest of his face.

2. It is easier to control your contrast:

Once you have established optimum exposure of your subject, a light meter can be used to balance the other areas of the frame to help create the look your production desires. For instance, you may want everything to be flat and even for a corporate video or high contrast and moody for drama. You could always judge by eye but knowing exactly how many stops over or under areas of your image are you can have confidence knowing that you’re being accurate. What’s more, if you know the dynamic range of your camera you can expose your images in a way that lets you have a greater degree of flexibility during colour grading if you want it.

Can you rely on the natural light alone?

3. You can have a more efficient location recce:

When you visit a location how do you know what equipment to bring if you don’t know how good the natural light really is? Our eyes can be deceiving and lead us into thinking the natural light can do all the work but really the only way to be fully prepared is to measure that light and then make the decision.


talent and lighting

Metering will improve your efficiency in setting up.

4. You can light a scene before the talent arrives (and quicker):

This is a very important point. If we could only light when the talent (or a stand in) was in shot we would never get anything done. Of course, once the talent is in the frame you may want to make some small adjustments but being able to set the exposure beforehand will help save you and everybody else’s time and money. Adding to this, if you have to run back and forth between adjusting a light and viewing the histogram or waveform this can be quite time consuming.


which camera?

It doesn’t matter which camera you decide to use, a light meter could assist you with exposure for any model that lets you set exposure manually

5. Video & photography skills often overlap. Embrace this:

For the DSLR video shooters out there, you’ve probably learned a thing or two about photography whilst you’ve been at it. You may have tried out long exposure and timelapse photography out of curiosity, the latter of which can certainly add an interesting element to your videos. Much of this may be a result of simple trial and error until you get pleasing results (this is certainly how I used to do it), however using a light meter can help you to reduce this method and once again save you time. What’s more, you could go further down the photography route later on and so having a greater understanding of exposure and light now could actually make you more employable in the future.


dog 35mm film

This photo of the old family dog ‘Dolly’ was taken on my old pentax 35mm film camera. Although it’s a lovely photo, if I had taken a reading off of her fur rather than relying on the inbuilt meter to average it out then it wouldn’t have appeared slightly over exposed, as being a golden lab her fur was actually a shade darker.

6. You open up the possibility of shooting on film:

Ever had that burning desire to go old school? We all have. With Kodak’s recent announcement of a new (yes, new!) Super 8 film camera you may just get tempted further into experimenting with film.

Now, many 35mm stills cameras have inbuilt spot meters, as do super 8 cameras, however, once again they may not always be the best option for you, especially if these meters calculate an exposure based on averages. Of course with digital cameras you can readjust your exposure and snap again but with rolls of film this can be an expensive thing to do so you have to be much more conservative with your shots. Taking proper exposure readings will eliminate the need for guess work and ensure you become comfortable with the format.

And finally..

7. You look like you know what you’re doing:

In other words, you look like a pro. That’s a good thing, right? Oh, and you can give accurate orders to an assistant (this is invaluable)!

So, taking these points into consideration, what kind of video shooters could benefit from using a light meter?

I believe the answer is anyone who wants or needs to light their productions to a high standard. This includes those who work in (but is certainly not limited to) commercials, drama, green screen and stills photography. Aspiring DOPs certainly need one, hence why I got one. For conferences, weddings, run and gun documentaries and corporate videos, you probably won’t need one. In these instances you can simply rely on your camera’s exposure aids and you won’t have to fork out for an expensive item that may just end up gathering dust.

At the end of the day the decision of whether you need a light meter or not is down to you and it all depends on what you shoot and/or what you want to shoot. Light meters aren’t the cheapest tools out there so, as with everything else, only get one if you really need it. If you decide that you do need one however, it could be one of the most important investments you’ll ever make in your video career.

If you would like to find out more about lighting check out this article on why good lighting can sometimes be more important than the camera and how a cheap reflector could be your most important lighting accessory (after the light meter of course!) .

Why a reflector is your most important lighting accessory

The 5 in 1 reflector: cheap and incredibly useful

Cheap, light and with so many uses, your 5 in 1 reflector is a lighting accessory that should accompany you on every shoot.

Lighting in video production is not just about flicking switches. When I was just starting out as a freelancer I was guilty of believing this; that lighting simply had to be turned on and that was that. I recently wrote about how lighting could actually be more important than the camera itself and that lighting can sometimes be deceptively simple but what should be noted here is the idea that the subject isn’t always referring to the lights themselves but to the modifiers as well. In fact, I’d say that half of lighting is actually modification. Flags, floppies, bounce, scrims, nets, diffusers..there seems to be so many different lighting accessories about that it’s hard to keep track of what they actually do. These items are all examples of lighting modifiers, however in this case I’d like to focus on the simple 5 in 1 reflector – a low cost, multi use modifier that really is an essential tool for any film maker.

But it’s just a reflector?

No it’s not. If you’re thinking that, you probably haven’t explored the many uses even the cheapest of 5 in 1 reflectors has to offer. Having 5 different sides allows you to do a lot in a variety of shooting situations whilst remaining portable and convenient.

Lets take a look at the different sides of a typical 5 in 1 reflector and how you might use them in your moving image productions:

White

Tip: If you need something bigger to bounce, polystyrene board is cheap, light and in your local DIY store

Tip: If you need something bigger to bounce, polystyrene board is cheap, light and available at your local DIY store

Any white reflective surface is often referred to as ‘bounce’, the reason being that a hard light is bounced off the surface and onto the subject to create a nice soft light with minimal shadows. Your hard light source could be a powerful tungsten lamp or the sun.

Soft light is commonly used in corporate environments

Look at the difference between a hard light shone directly at the subject (left) and a hard light bounced off a reflector (right)

Look at the difference between a hard light shone directly at the subject (left) and a hard light bounced off a reflector (right)


Bounced light can be used as the key light (main light source) when even lighting is required or as fill (to fill in shadows created by the key light) when a higher degree of contrast is needed. It is commonly used in all matter of video and film productions for a flattering image.

Black

Tip: If you need a flag to block out a large area such as a big window a tarpaulin is an effective solution.

From experience, you can never have enough flags.

Your matte black surface is vital in situations where you want to cut out light. This could be to control exposure, shape light or even remove light from the image entirely. It is often referred to as ‘flagging’ or providing ‘negative fill’ and you would be surprised at the number of situations that you might find the need to do this.


For situations where your reflector might not be big enough a tarpaulin is a great way of flagging a large area such as a full window

For situations where your reflector might not be big enough a tarpaulin is a great way of flagging a large area such as a window.

Can't see your screen? A flag would be handy here..

Having difficulty viewing your LCD screen? A flag would be handy here..

The problem with powerful key lights is that it’s easy to lose control of them, in that light can get in some areas of the image that you don’t want it to. Some lights have barn door attachments which can help but this may not always be enough to control the spill. Simply holding up a flag can make all the difference. The other thing to consider is how long you are filming for and if natural light likely to change throughout your shoot. Flagging any uncontrollable light sources allows you to start from scratch and build your lighting design from the ground up, even allowing you to shoot night scenes during the day!

To control the highlight in this image a flag was held partially in front of the light source so it didn't wrap around the face too much.

Without a flag partially cutting the back light, the beam here would have over exposed half the actor’s face.

Diffuser

Tip: There are many different types of material that diffuse light in varying amounts. One popular and cheap method of diffusing large sources on low budget films is to use a shower curtain.

Tip: There are many different types of material that diffuse light in varying amounts. One popular and cheap method of diffusing large sources on low budget films is to use a shower curtain.

Sometimes you may not want to directly cut out light but soften it instead, so it creates more subtle shadows. Hard light sources such as direct sunlight can create strong shadows and too much contrast as a whole, in which case placing the diffuser between the light source and the subject can make it appear much less harsh. The surface of your diffuser may appear similar to the bounce but on closer inspection you’ll find it much more translucent.

lighting at kinetico cropped

Hard light shone through a diffuser is softened but without a huge reduction in overall output.

4X4-TRACE-FRAME-460x346

The diffuser is essentially a cheaper (and more portable) version of a trace frame.


By diffusing a hard light source you are able to soften the light but also keep the spread. Moving the diffuser further away from the light source will soften the shadows even further.

Tip: Another popular low budget method of creating higher contrast is to use tin foil.

Tip: Another popular low budget method of creating higher contrast is to use tin foil.

Silver

Silver is incredibly useful in creating contrast quickly, by making certain parts of the image ‘pop’ out from the rest. Whilst it must be used carefully to avoid blinding the subject, it has a surprising number of uses such as creating highlights (areas of the image that are deliberately over exposed for creative effect), filling in shadows and for creating texture (such as a rippling effect from light reflected off water).


Silver - a bit more kick to your fill than normal bounce.

It can provide a bit more kick to your fill than normal bounce.

Silver can be used to create a rippling water or a 'glow from the TV' effect.

The uneven texture of silver means it can be used to create effects such as that of rippling water or a glow from the TV. Easiest to see in a moving image (yes, watching breaking bad counts as work!)


Tip: Although not as powerful as silver, gold can help increase the contrast in your image too.

Tip: Although not as powerful as silver, gold can help increase the contrast in your image too.

Gold!

Always believe in your..

Ahem.

In my opinion this is the least useful of the 5 for the moving image, but it still has some useful applications. Gold is mostly used for creating a warming sunset effect or for texture and can be particularly flattering in fashion and beauty films.

An up lighting effect for warmth.

A subtle up lighting effect for a bit of warmth.

So there you have it – your reflector has so many uses that it really is your most important lighting accessory – and I’ve only begun to touch the surface. Bouncing, diffusing and flagging each deserve their own articles but just knowing how you can start doing these modifications with your reflector will take you a step closer to raising your production values, and that’s whether you’re in a studio or on location and working in controlled settings or operating run and gun.

If you care about production values then there are really no excuses for leaving your reflector at home. In fact, once you start utilizing one you’ll probably want another (and if you need to google how to fold it back into its bag, that’s OK – we’re all guilty!).

Happy shooting!

Video Production Companies London

How to choose the right camera for the job

The C100's form factor and weight made it the perfect choice on a recent trip to Gibraltar

The C100’s form factor and weight made it the perfect choice for a day trip to Gibraltar

I’m terrible at making decisions sometimes. When presented with a multitude of options for anything in life it’s so easy to spend too much time overthinking which options to take that you end up wasting unforgivable amounts of time being indecisive and not actually getting anything done. The process of deciding on a camera to use is one of those tasks that I, and I’m sure many others in this field, have been guilty of in the past for spending far too long on. Many hours can be lost to Youtube comparison videos and the forums if you’re not careful. Sounding familiar? There are so many options available to us that it’s understandable why it would take so long to decide, but time is money after all and we’ll get left behind if we ‘oom’ and ‘ahh’ for too long.

And the award for most expensive wedding video ever goes to..

Lets face it – all of us techies would love to have the latest and greatest cameras for all of our projects. Wouldn’t it be great if we could shoot in 4K or 6K (or even greater) every time? Having the ability to shoot super slow motion on a full frame sensor with internal ND in a lightweight body would be pretty amazing right? Why would anyone want you shooting for them if you don’t have the most up to date technology possible?

We’d better stop dreaming I’m afraid.

Not to rain on the parade or anything but the fact of the matter is we can’t always have the most advanced technology every time. Most of the time this is down to money, but even if you had all of the money in the world to buy however many cameras you’d like, you’d probably reach the same conclusion as me eventually:

No camera is perfect. But, for each job there is a perfect camera. 

Think to yourself what your favourite film is. Why is it your favourite film? Did the choice of camera have anything to do with it?

Probably not.

You probably chose it for its story or maybe the acting. Perhaps you chose it for its cinematography, but remember the camera only did half the work. There was a person operating that camera and they would’ve probably made a conscious decision as to why that camera was the tool for the job in their current situation.

The right camera for the job

It’s very easy to get into the gear mindset and only think specs, but really if you want to be taken seriously as a professional then think of the equipment as merely tools. Cameras are obviously much more exciting than other tools in other industries, but realistically that’s what they are.  You are there to do a job and they are there to help you do that. The camera manufacturers want us to think differently, but then they want our hard earned cash! The key is finding the camera that will help you do your job, whatever it may be, as efficiently and effectively as possible whether you are buying or hiring.

So what is your situation? Do you have a short term brief to meet or a long term investment to consider? If you are stuck choosing a camera, here are some factors to consider before your dreaming becomes a money losing opportunity:

  • Price

The most obvious thing to consider. As with any other product the more features a camera has, the dearer it will be, whether you’re buying or hiring. Set yourself a budget.

  • Return on investment 

If you’re buying it’s sensible to think about how long it will take (or – gulp – if) you’ll make a return on your investment. We’d all like an Arri Alexa, but do we all earn that much in a year? Similarly if you’re shooting on a long project, would it make sense to hire a camera for that period when you could actually save money in the long run by buying?

  • Accessories

What do you actually need to make your camera perform how you want it to? Does it work straight out of the box or are there other bits required? Do these additional items cost much or take long to set up? Will these accessories remain useful if you decide to upgrade further down the line? Have you thought about which lenses you’re going to use? (that’s an entirely different subject in itself)

  • Target audience

Crucial, this one. What do you actually shoot? What are your clients asking for? Do you want to move into shooting something different? An Arri Alexa is probably going to be a bit overwhelming for talking heads!

  • Workflow

How quickly do your clients need their video? Do you need to shoot with edit friendly codecs for speed? Or do you require something more efficient for storage? Can your editing system handle 4K or do you plan to upgrade in the future? Do you need flexibility in the grade?

  • Image

It would be lovely to not have to worry about this but unfortunately in the world of business first impressions are made very quickly and this can mean the difference between landing a job or not. Whilst this is mostly attributed to personality, punctuality and presentation, the same can also be applied to the equipment you use. If your clients think you’re using cheap equipment are they likely to pay top dollar? If you shoot on a DSLR have you ever had someone ask you ‘Are you doing stills?’. What impression do you want to leave?

  • Style

OK, so we’re allowed to have a little bit of fun while we’re selecting our tools. Every camera out there has a distinct look and processes colours and skin tone slightly differently from the next. You might just simply prefer the look of one over the other, regardless of specs. Try some cameras out and see what you like. Are you Canon or Sony? Black Magic or Red?

Sony or Canon?

Are you Sony or Canon?

As you can see there is a lot to consider when choosing a camera and we would all want to know that we are making the right choice. Lets look at some examples, in this case some up to date 4K cameras, and think about when they could be used as effective tools and when they may just be a big fat waste of money:

Arri Amira

arri amiraEveryone knows that Arri is king when it comes to cameras, as was evident when cinematographer Roger Deakins commented that the Alexa was the first digital cinema camera to challenge 35mm film.

The Amira is essentially a slimmed down ‘documentary’ style version of the Alexa. With HD, 2K and 4K options, a range of Pro Res codecs, slow motion up to 200 fps, internal ND, interchangeable lenses and huge dynamic range, this camera really has everything I would love to have in a camera. Most importantly, the images it produces are superb. I mean they would have to be as this camera retails at over £20,000. Would probably be hiring this one me thinks.

20151020_093951

I was fortunate enough to spend some time recently with the Amira. An incredible camera but with the weight of accessories you might think twice about shooting on it entirely handheld.

Best for:

  • Broadcast and high end drama, documentary, commercial etc.

Worst for:

  • Event work and majority of online output (impractical and uneconomical)


Black Magic Cinema Camera

blackmagic_design_blackmagic_production_camera_4k_964119From my experience Black Magic seem to be a bit like marmite. Most people seem to either love them or hate them – there’s no in between. Why’s that? To start with, the specs for their production camera are very good with lots of frame rate options, huge dynamic range and popular lens mount options all within a small body. What’s more it comes at an unbelievable price for a 4K camera at just over £2000 currently. Where it falls short however is in its battery life, impractical screen and ergonomics. It sounds tempting but if you decide to invest in some accessories for it then suddenly it’s not so cheap.

BMPC: Ideal size and weight for a car rig.

BMPC: The ideal size and weight for a car rig.

Best for:

  • Low budget drama, commercials and music videos or 4K on a budget

Worst for:

  • Anytime you have to shoot quickly, as a lone shooter or in low light, i.e. documentaries & travel (impractical)

Sony A7S mkii

sony a7s iiThe A7S took the DSLR world by storm last year mostly due to its incredible low light capabilities attributed to its full frame sensor and it’s affordable price tag. Now the mkii is here and whereas previously you could only record 4K footage to an external recorder this new version offers internal 4K recording as well as some other nice features including frame rates up to 120fps and several variations of S-Log for greater dynamic range in the grade. At £2500 it is certainly an affordable 4K camera, but it may not be for everyone. As a DSLR it still lacks some features associated with professional video cameras including XLR inputs and is limited to recording no longer than 30 minutes. Its battery life is also not great and the Sony E mount offers far fewer lens options than EF or PL for example. If you decide to invest in accessories, then once again, it may not actually seem that cheap after all.

Best for:

  • Travel

Worst for:

  • Conferences, weddings and other long recordings (impractical)

C300 mkii 

canon_0635c002_eos_c300_mark_ii_1134579

A recent offering from Canon, the C300 mkii builds upon the success of the original C300 which became a widely recognised video production workhorse. The original camera was popular for broadcast, news gathering and corporate work and the C300 mkii looks set to improve on this build with new codecs and frame rates on offer, 4K recording, inbuilt ND, popular lens mount options and a form factor that makes it ideal for shooting as a single operator. But with only being able to shoot 4K at 30p, a heavier build than the previous model and a price tag far higher than the spec-tacular Sony FS7 (which is in the same league but does offer slow motion in 4K) this camera may be too much for some at £13500.

Best for:

  • Broadcast and online (anything that requires a single operator)

Worst for:

  • 4K slow motion requirements (non existent)
Video Production Companies London

The original C300 has dropped in price substantially since the mark ii release. Great if you don’t need 4K.

These are just a few examples to get you thinking and of course these are my own opinions, but as you can see it’s a bit of a minefield out there. There are so many factors to consider and what one person needs in a camera may be unnecessary for another. It also doesn’t help that new cameras are being thrown at us left, right and centre all the time and the old models are becoming obsolete quicker than ever (which hurts us financially for sure!). The plus side of this camera boom however is there are so many options available that there is something for every budget, whether you shoot HD or 4K.

Get what you need and concentrate on producing high quality work – remember it’s not just about the equipment but the people and the creativity behind it.

Before you go..
Download our free ebook

Mustard-Education-Video-ebook

7 Steps:
Make your school’s video
content pay for itself

  • How to use your new video to attract attention and get the results it deserves
  • How the most successful independent schools are getting all the new enrolments
  • The techniques that will give you a clear, predictable return on your video investment
  • How to track and record ROI to prove your video strategy’s working