Category: learning

How to prepare for your video interview

Whether you are preparing for your first ever interview on camera or you’ve been filmed a few times before, the prospect of being interviewed, for some, can be a little daunting. Even if you do know what to expect, the most confident and experienced of people can still find themselves stumbling as soon as the camera rolls. If you find yourself a little nervous that’s OK, you’re not alone. However, filming doesn’t have to be a strenuous task and with our guidance we’ll have you speaking confidently on camera in no time.

The purpose of this article is to give you a few quick tips about the filming process so that you don’t just leave your shoot with engaging material but you also enjoy the experience.

First things first: eyeline

Talking head Most corporate, promotional and event video interviews are carried out with the interviewee looking away from the camera rather than into the lens. Unless you are delivering a presentation or presenting a show then this is usually the best way to do it. Without having to look down the lens your interview has already become much easier as you can look directly at the person asking the questions, whether that be the videographer or someone from your own organisation. This approach helps you to forget that the camera is even there. All that it’s really doing is documenting a conversation.

Talk about what you know

It should be safe to assume that you’re being interviewed about a subject that you’re highly knowledgeable about. You will probably be saying things that you regularly talk about in your day to day work. So if there are any questions you’re unsure about, speak up and let your videographer know. Some questions might be better for a colleague!

With these first two points you may find that the interview process is already much easier than you initially thought.

Full sentences please

Now this is where it gtalking head studentets a little trickier. Although we should treat your interview as the “documenting of a conversation” the truth is for most promotional videos this conversation is actually going to be quite one sided. To keep up the pace of your video and deliver the crucial information, we need to cut out the interviewer’s questions so that we only hear you. To make this work, you’ll need to answer the questions in full sentences so that your answer still makes sense when the question is removed. This may involve you repeating the question in your answer.

Here are some examples.

The incorrect method:

INTERVIEWER

Do you enjoy working in video production?

ME

Yes, I do.

This isn’t suitable because if we inserted this into a sequence nobody would know what I was saying yes to!

The correct method:

INTERVIEWER

Do you enjoy working in video production?

ME

I enjoy working in video production because it’s a fast moving industry. It can be competitive and challenging at times, but ultimately it’s very rewarding work.

This answer is much better. Notice how I’ve expanded on my original answer a little bit and as a result it is much more interesting.
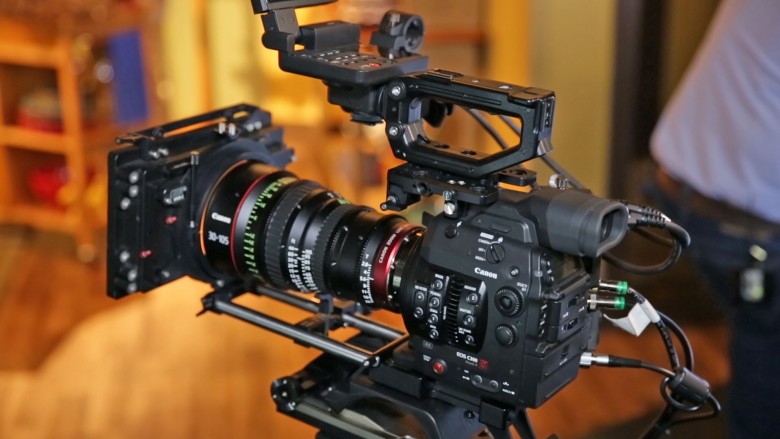
Technical matters

There are a few other things to bear in mind before you start filming. If you’ve hired video professionals such as flycreative, you won’t need to worry about the technical side of things. That’s what we’re there for! However, it is good to have some awareness of what we will be doing so it doesn’t surprise you on the day.

We want you to look and sound your best. To achieve this and avoid a costly reshoot we aim to capture the best material possible whilst we’re there. From a technical standpoint there could be a number of reasons why we might need to stop, solve an issue and repeat the question again. Our lighting might need adjusting or our microphones may be picking up a loud conversation outside the room otalking head wwtwr humming from the air con. We may ask you to repeat your answer but shorten it slightly, rephrase it to avoid repetition of certain words or allow a slightly bigger gap between the question and your answer so nobody is talking over each other. Sometimes it’s good just to have options when it comes to the edit. If your videographer does intervene, don’t worry, this is perfectly normal.


Practice makes perfect

Because filming can require a bit of setup time, you can actually use this to your advantage. If you allow yourself enough time whilst the videographer is setting up you can actually practice what you’re going to say before the camera rolls. Even if they are operating alone and are asking the questions themselves, they will still need to test their audio levels, so this is your time to practice and to talk with them about your answers. You’ll soon feel at ease.
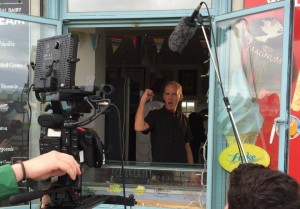
Example interviews

If you still need a bit of reassurance, why not see how others have done it? In our Signature Airlines promo we shot multiple interviews and achieved a fast paced, informative video through applying these techniques. It may not be obvious, but the majority of the people in this video had never been filmed before!

For the purposes of the edit (e.g. pacing) your full interview may not make it into the final video. This shouldn’t alarm you; usually there isn’t enough time to feature everything in a 3 minute video! Being concise and to the point is key and our Signature Airlines video demonstrates this perfectly.

Ready to do your interview?

Remember that the beauty of video production is that you can always stop and answer your question again. There’s no need to worry, even professional actors rarely nail it on the first take!

Now that you’re armed with these tips you can relax and go into your interview feeling like a pro.

To find out more about getting a professional video made for your business drop us a line today.


A beginners guide to lighting gels

Gels are used by cinematographers and videographers to balance the colour of light sources, adjust contrast and control shadows. It is the use of these gels that helps to create certain moods and looks to productions, whether that be low key drama or high key corporate video.

If you don’t know your ND from your CTB then read on as I introduce some of the most popular lighting gels and demonstrate how they may be used in your productions for creative effect.

CTB

CTB (not to be confused with CBT!) stands for colour temperature blue and is often referred to simply as ‘daylight’. It is used to convert tungsten balanced light sources such as traditional household bulbs and fresnels from 3200K to 5600K. It’s a common gel for balancing artificial light sources to daylight when the sun is acting as the key light in a scene.

With our camera balanced to daylight and using a tungsten light source, our professional model looks like he should be in TOWIE..

5200K_FULL_DAYLIGHT_GEL

..so by applying FULL CTB the skin tone looks a bit more natural now.

5200K_HALF_DAYLIGHT_GEL

If your subject has a lighter skin tone or if your camera’s auto white balance reads around the 4500K mark (for some fluorescent lighting), you may want something in the middle between tungsten and daylight and HALF CTB may be your answer, converting tungsten sources to 4300K. In this shot the camera is still balanced to daylight.

  • CTO

Another popular colour correction gel is CTO which stands for colour temperature orange and is often simply referred to as ‘Tungsten’. It is used to convert daylight 5600K sources to 3200K, in line with the colour temperature of most traditional household lamps.

3200K_NO_TUNGSTEN_GEL

Using a daylight balanced LED light and with the camera balanced to tungsten, our image is looking a bit cold. But there is a use for this though; it is a popular method of simulating moonlight as well as shooting ‘day for night’.

3200K_FULL_CTO_GEL

But if moonlight isn’t what you’re after, FULL CTO will return the skin tone back to a more natural colour.

3200K_HALF_CTO_GEL

HALF CTO converts 5200K to 3800K, so a little cooler than FULL CTO but not too far off. With the light I’m using (dedolight ledzilla) and the model’s skin tone in this case HALF CTO actually looks a little nicer.

Both CTB and CTO also come in other strengths including QUARTER and EIGHTH, for those more subtle differences, but FULL and HALF are the most widely used.

  • ND

ND stands for neutral density and is used to reduce the amount of light without altering the colour. ND is often used on the camera in filter form but for lighting it can be invaluable in helping to control exposure and contrast. Using ND to reduce powerful light sources that do not have dimmers (or if you don’t want to change the colour temperature of the source through dimming) or stopping natural light from washing a scene out through covering windows with these gels, it is an incredibly useful tool.

NO ND

Oh no, you can see that I forgot to iron my backdrop..so in this shot as you can see our model is looking a bit ghostly. Time to crack out the ND.

1 STOP ND

ND.3 reduces the light by 1 stop.

ND.6 reduces the light by 2 stops.

ND.6 reduces the light by 2 stops.

And ND.9 reduces the light by 3 stops.

And ND.9 reduces the light by 3 stops.

Wise words a gaffer once said to me, “you can never have enough ND!”

  • Diffusion

Diffusion is used to control the softness of shadows and the softer the source the less prominent the shadows will be. As hard lights have typically much higher output than soft lights, diffusion is key to softening these sources whilst utilising a strong beam.

There are so many different types of diffusion available and it can be difficult to know where to start so here are a few examples to give you an idea of the range available. At the end of the day it’s down to you to experiment with various types and find what you like.

NO_DIFF

Our professional hand model is currently being lit with a hard LED source (Dedolight Ledzilla) and no diffusion.

HAMPSHIRE_FROST

This diffusion used here is HAMPSHIRE FROST. Notice a subtle softening of the shadow.


HEAVY_DIFF

HEAVY DIFFUSION is being used here (and it’s easy to see why it got this name)

CLOTH1

I don’t actually know what this diffusion is called but it somehow found its way into my kit. A thicker, rougher sheet that is a little closer to greaseproof paper. As you can see it has a lovely texture to it and can add a bit of spice to a background.


It’s important to note too that the further a piece of diffusion is away from a light source, the softer the shadows will be, as will be a slight reduction in overall output of the light. See the example below:

HALF DIFFUSION attached to the light..

HALF DIFFUSION attached to the light..

HALF_DIFF_FURTHER_AWAY

..and the HALF DIFFUSION moved away from the light source (closer to the subject). Notice how much softer the shadow is now.


  • “Party” gels

Not necessarily an official term but in this case I shall refer to most other coloured gels as ‘party gels’. Whilst these may not be as important for most shoots as the colour correction and other gels mentioned above, they can be used to create certain moods for your scenes whether they are used as key lights, backlights or kickers. There are an almost endless number of these gels to choose from but here are a couple of examples.

3200K_STEEL_GREEN

STEEL GREEN with the camera balanced to tungsten. Sci fi!

STEEL GREEN but with the camera balanced to daylight.

STEEL GREEN but with the camera balanced to daylight. Lord of the Rings or Matrix?


3200K_STRAW

More subtle than the above, a STRAW lighting gel with the camera balanced to tungsten. A nice morning light look.

5600K_STRAW

A STRAW gel but with the camera balanced to daylight. I’m getting a CSI Miami vibe here.


So, which gels should you buy?

It all starts with the light source(s) that you’ll be using most. Their colour temperature, power, whether they are dimmable and how hard or soft they are will all determine the gels you need. Aspiring DOPs will probably accumulate gels over time as their portfolio grows, but a good place to start is with the simple colour correction gels (CTO and/or CTB) and some diffusion which are the bare bones for lighting anything professionally. Another thing, don’t always rely on kit hire companies to stock a wide range of gels!

Big D Jonny boy

Experimenting is key to finding lighting styles that will grab your audience’s attention.

Use of softbox fill Liquiproof

Part of the fun and the craft of being a DOP is finding lighting styles that fit your productions and consequently help you to create your own signature style. Experiment with gels and see which colour combinations work and which don’t. Get creative!

Whether you are new to lighting or not, the LEE filter comparison tool here is a fantastic resource to see the range of lighting gels available and help you make decisions on what to buy. LEE filters are widely considered the number one name for gels; heat proof, colour accurate and with a huge choice available, they are an essential investment if you’re an aspiring DOP.

Happy shooting!


P.S. This post would not have been possible without my trusty light meter. Here are a few reasons why every aspiring DOP simply must have one.

7 DIY lighting essentials for low budget filmmakers

So you’ve raised the finance for your project, chosen your camera, cast your actors..and you suddenly find that your budget has disappeared in a flash. Where did it all go? Film making can be a seriously expensive affair and sadly certain departments sometimes get neglected as a result. Lighting is one of these departments.

No matter how low your budget is, lighting should never be neglected if you want to create cinematic visuals to be remembered. In fact, here are a list of reasons why good lighting is so important. In this article however I’m going to identify 7 lighting essentials that don’t cost the earth but every low budget camera operator or DOP should be armed with. Sometimes you need to spend good money on kit and sometimes you don’t, but if you’re keen to increase production value economically then read on.

  • Gaffer Tape

gaffer tapeA ridiculously obvious one but gaffer tape is something that should go with you on every shoot no matter how big or small your budget! It can save your life (in a creative emergency, I have yet to prove this medically!), whether it’s used to rig lights or modifiers onto unusually shaped objects or into areas that are inaccessible for light stands, gaffer tape really is essential. It can also be used to make DIY french flags to avoid lens flare and teamed up with some trusty cinefoil/blackwrap makes a perfectly functioning LCD cover for operating in bright sunlight. Trust me, don’t leave this behind!

And the award for best DIY rig goes to..

And the award for best DIY rigging solution goes to..

One item you can't afford to be without is cinefoil. This, along with your gels is worth spending good money on.

Gaffer and cinefoil = budget french flag. Cinefoil is one item you can’t afford to be without on set. This, along with your gels is worth spending good money on.


  • Halogen work light

Revealing an indHalogen worklightustry secret here. Or maybe not. This item is ridiculously obvious and cheap but the likelihood is that most of us low budget filmmakers probably don’t use them..or at least not yet. If you pop down to your local B&Q you’ll find these useful halogen work lights. At about £10 each these little lights give out a fair amount of light considering their size and use tungsten balanced bulbs which means their colour temperature matches the expensive Arri equivalent. If you have the right colour correction gels then armed with a few of these you could in theory light your whole film.

Of course being cheap means that these little fixtures do have their drawbacks; short power leads, a lack of any way to control the spread of the light and the fact that they won’t attach to normal light stands are the main ones (because obviously film making isn’t what they were designed for) but, if you purchase one of these, and I recommend you get several, you could potentially fill decent sized spaces for little money. What’s more, their handles allow for easier rigging at height than some lights. With a bit of problem solving, and lets face it – that’s what film making mostly is, you’ll be able to find ways to rig, hide and control the output of these lights.

  • Polyboard & foamcore
bounce board on roof

Polyboard is common even on the biggest of film sets

While you’re down at the DIY shop why don’t you pick up some of this too? Polyboard is a perfect and cheap way to bounce light in order to create flattering soft light and fill in shadows on your subject. It often comes in fairly large sizes and in various thicknesses and can be easily cut to size to meet your needs, or at least to fit in your car! What’s more, if you have any black paint lying around then paint one side and bob’s your uncle: you now have a large, lightweight flag to use for cutting light and creating negative fill. Two for the price of one (almost!).

foamcore flagIn addition to this your local craft shop will probably stock black and white foam core; both of which can be useful for smaller, more portable bounce boards and flags. Once again this is inexpensive, easy to cut to size and easy to rig. The only downside is any thin layers of card on these boards will be flammable, so be careful using them near hot light sources.


  • Spring clamps
spring clamps

Top tip: buying multi packs on sites such as eBay can make these accessories even cheaper for you.

Cheap and cheerful, but where would I be without them? These large spring clamps are cheap, lightweight and a must have for anyone doing any sort of lighting. Use them to attach reflectors or boards to stands, flags and tarpaulins to backdrops and for making green screens taut. Do yourself a favour and get some now.

Diffuser reflector spring clamps

A quick way to hold up your reflector

spring clamp reflector


  • China ball lantern
china ball

A beautiful quality of light for certain applications.

China ball lanterns can create beautiful soft light for use in close ups and as practicals. Inexpensive and by using regular household bulbs, china lanterns are a cost effective option over the dearer branded soft fixtures and combinations offered by the likes of Arri and Chimera. They do have a specific use however, their main drawback being that regular 60W or similar household bulbs don’t give out huge amounts of light, at least not for cinema use. To the naked eye their light output is fine but on camera the lanterns reduce a bulb’s output a fair amount. Adding to this, their size and the fact that they’re made out of paper means significant fire hazards are present if too powerful bulbs are used, so you need to stick to the recommended wattage. For larger areas of soft light an Arri/Chimera combination is a much more suitable option which understandably you will need to pay for.

Despite their drawbacks if you’re able to find use for them still china ball lanterns can provide wonderful results. Rig them off C stands or mic stands, ensure you have long enough extension leads and you’re good to go. Watch out for that colour temperature though; some bulbs rate lower than 3200K (tungsten) so will appear warmer than you may like. Once again it pays to have a good selection of colour correction gels!

  • Tin foil & baking paper
tin foil

Tin foil: cheap as chips!

Who’d have thought that every day items around the home could help you in lighting your cinematic masterpieces? The highly reflective surface of tin foil can be used in the same way that the silver side of a reflector is used; to fill in shadows when a white surface isn’t cutting it or to create a bit of ‘pop’ to the image through introducing highlights. Attaching sheets of tin foil to your foam core boards (see above) or even just a sheet of plywood can give you another way of applying contrast quickly, cheaply and without having to hire anything!

No product placement here..

No product placement here..

Baking/parchment paper is a good option for when you need to diffuse hard light sources to soften their shadows and reduce the contrast. It’s designed to withstand heat so is ideal for using with hot light sources without risk of burning. So if you’ve run out of diffusing gels and need a quick softening solution, go have a look in the kitchen cupboard or run to the shop!


  • Tarpaulin
tarpaulin night shoot

Protecting a 2K arri fresnel from the rain.

There are many uses for a tarpaulin, many of which may appear to have nothing to do with filming, however the long days on location and the unpredictability of the weather (especially in glorious England) mean that a tarpaulin lends itself to being pretty useful in general on set. For DOPs a tarpaulin can provide suitable protection to lights (and camera) from the rain and from dusty or wet terrain. More importantly, they can also be setup and rigged to act as huge flags, with a host of uses. From blocking out large windows in order to control interior lighting to providing a huge source of negative fill on location, tarpaulins are inexpensive, reusable and portable. If you decide to rig one up on location then make sure you remember your spring clamps! (see above)

tarpaulin over windscreen

Flagging the windscreen of a car to eliminate reflections and any changes to ambient light levels.

These are just some of the useful lighting accessories that can be used in low budget film making. However, as you climb the ladder in your film career, you may find yourself using some of these items on the bigger budget productions too!

Remember that there are certain items you’ll need regardless of your budget; lighting gels and cinefoil are the big ones here. Don’t cut corners on your gels, buy the real thing (I recommend Lee filters) so you know you have high quality, accurate colours and so you can avoid setting anything alight. If your budget can stretch a little or if your professional image concerns you then get yourself a few 5 in 1 reflectors; you won’t regret it.

Hopefully you’ve found this helpful and if you have any suggestions of your own for DIY lighting do tell us in the comments!


Why we use external recorders to record video

It’s rare to be able to just turn up on set, take a camera out of it’s bag and start shooting straight away. With such a vast range of accessories available to shooters for all manner of shooting situations it’s hard to keep up with, let alone afford all the technology available to us. However, one tool that appears to be cropping up more than most are external recorders. In fact, they’ve been around for a little while now yet they continue to be growing in popularity. For those who may have wondered what the point of these devices is, read on.

What is the point in recording video externally?

1. Edit friendly codecs

Do you know which codec you should be editing in?

Do you know which codec you should be editing in?

This is the primary reason why anyone would record externally. Many consumer and prosumer cameras, notably DSLRs (except for a few exceptions), compress footage using codecs that are good for keeping file sizes down and easy playback but aren’t so good for editing and colour grading.

The Canon 5D mkiii for example records internally with the H.264 codec and it’s files can be opened easily on any computer. However, editing using this codec can prove troublesome, often resulting in glitchy or delayed playback. When colour grading the limitation of this codec results in a relatively small dynamic range, meaning that pushing or pulling the image a great deal will result in substantial noise and lack of ability to recover the highlights and shadows. Even with the likes of non linear editing applications such as Adobe Premiere allowing you to conform almost any type of video file to the editing timeline, the limitations of the original codec do not go away. Edit friendly codecs, most notably Apple Pro res 422 (and the numerous variants of it) are a good solution to improving workflow for those who often find themselves batch converting lots of files, being particularly useful for projects with a tight turnaround. These codecs can be found on all good external recorders.

ninja blade conference

Atomos Ninja blade mounted to Canon 5D mkiii for a conference. Extending the record time to over 30 minutes, using mains power and recording to Pro Res LT made the filming and editing infinitely easier.

2.Higher bit rates

The bit rate required for video footage can vary greatly, depending on what it is that you’re shooting. Live event filming may require lower bit rates for storage whereas commercials would need broadcast quality. Many lower end cameras however are limited in the bit rates that they offer, often not qualifying as ‘broadcast quality’ because their bit rate is too low (by broadcast quality, I’m referring to the minimum bit rate required for HD footage broadcast on the BBC which is 100Mbits/sec). External recorders allow cameras to deliver higher bit rates by using codecs such as pro res 422, as mentioned above. Without compressing and uncompressing footage, digital artifacts that can plague footage for broadcast can be eliminated.

External recorders can also help for those going through an offline and online editing process. Although you’ll need more storage space for footage shot with higher bit rates, shooting directly with them still allows you to use proxies (lower quality versions) so editors who are cutting large projects with substantial amounts of information can edit using lower quality files and then reconnect them with the higher quality files at a later date for colour grading and delivery. This is much more efficient and less processor intensive than editing with colossal amounts of high quality data from the outset. Although you still need to downscale to the proxy, you have one less job to do and the amount of time saved by not having to batch convert masses of data to a high quality codec can be better spent editing.

For more information on the pro res codec and the variants of it, including their effective bit rates, check out this useful article on the matter.

3. Monitoring solutions

No need to record externally with the Amira, however the PIX-E5 by Video Devices made a useful monitor. It c

No need to record externally with the Amira which records ProRes internally, however the Sound Devices PIX-E5 made a useful monitor for me. It could have also been used for low res recording for quick assembly edits.

Excluding the Atomos Ninja Star, most external recorders include a screen for monitoring purposes. Most of these are in fact larger than the inbuilt LCD screens on most cameras which make them incredibly useful even if you aren’t recording to them! For those situations when you can’t reach the viewfinder or see the screen, or another person needs to see the screen such as an assistant or client, having an extra screen can speed up the filming process.

Now, whether recorders are a suitable replacement for professional, colour accurate monitors or not is another topic entirely, however for the purposes of most shoots the extra screen is rarely going to be a hindrance. What’s more, inbuilt tools and scopes for exposure (waveforms, false colour and zebras.) and achieving critical focus (peaking and magnification) are usually offered in addition to the screen. Even if some of these features are included on the camera, the chances are there will be more on the recorder (and they will be much easier to use!).

4. Cost efficient & reliable media

Most external recorders store files on readily available HDDs and SSDs*. The former is more cost effective per gigabyte whereas the latter is often faster and more reliable with no moving parts. Either way, both these methods of storage are easy to find, purchase and change, unlike some storage media that can be extremely expensive (e.g. red mag SSDs and SxS cards). If you’re going to be recording hours of footage at high bit rates, affordable and reliable storage should be at the top of your list of priorities.

*The Atomos Ninja star is an exception, using ultra fast and reliable C Fast cards. This ultimately comes at a premium.

5. Compatible powering solutions

Dual batteries on the PIX-E5

Dual batteries can be a godsend

Not a primary reason for using but models offered by Atomos and Video Devices in particular are well noted for their compatibility when it comes to power and in some instances can out last the camera (5D shooters, take note!). The Atomos Ninja Blade for example can be powered by Sony NPF, Canon and Nikon batteries, as well as with an AC unit. Adding to this, dual battery slots are a common feature in most recorders and allow for continuous use on location.


Do we need external recorders for every shoot?

conference and ninja blade

A quality recorder can be a useful asset as well as a costly, glamorous add on. The question is, do you need one or want one?

The answer to this, as I would say about any other bit of equipment is no; there is always a time and a place. Sometimes it is simply easier to turn up with your camera and shoot. News gathering, weddings and sports are just some examples where it might just be easier to shoot in camera, especially if it means the difference between getting the shot or not. However, this is all relative to the camera you’re using in the first place (if you need some help choosing a camera it may be worth checking out an earlier article on how to choose the right camera for the job).

External recorders have been designed to get an extra lease of life out of cameras old and new and to make content producers’ lives that little bit easier. However despite this, we shouldn’t forget that every extra gadget needed to get our desired results is another item that needs to be powered, mounted, connected, protected in transit and supported with compatible media; all of which usually come at extra cost. Ultimately it’s down to you and what you shoot to determine whether a recorder is a suitable investment for you or something to hire on occasion.

In the case of the Sony A7S mark i, an external recorder was a solution to a camera that couldn't record 4K internally

In the case of the Sony A7S mark i, an external recorder was a solution to a camera that could record 4K video but not internally


Prices for external recorders can range from a few hundred to several thousand pounds, depending on the features, connections, maximum resolution and frame rates offered. Below are some of the popular manufacturers:

Atomos

Black Magic Design

Convergent Design

Video Devices


Why, when and how to use a clapperboard

“Lights, camera..action!”

This is probably the most well known phrase associated with Hollywood and film making.

If you’ve ever watched those little behind the scenes extras on DVDs you’ll have probably seen at some point a crew member using a clapperboard. Standing in front of the camera before it rolls, shouting out some random numbers and letters before hitting the sticks together and preceding to hurry out of shot immediately afterwards. Have you ever wondered what the point of this little device is? If so, then look no further.

Clapperboards are pretty fun things and they make fantastic decorations (especially if a production or director’s name has been inscribed on it!) but they are actually very important tools in the film making process. Understanding why we use them, when to use them and how you should be using them can not only help you act professionally, but potentially save you time and money, depending on your production

clapperboard close up

Clapperboards give the editor lots of information about the production which can assist in navigating large amounts of footage.

Why do we use them?

Lets turn back the clock to an age where 35mm and 16mm film were the standards for most people making movies. When the first ‘talkies’ were released way back in the 1920s, that is films that featured synchronized picture and sound, the sound was not recorded onto the film but separately (using a sound on disc system, recording to wax records). Early film cameras were also very noisy which contributed to the difficulty of recording live sound. Fast forward to the present day and in the 21st century on movie sets the sound is still recorded separately, albeit to designated sound recorders, rather than straight into camera. The primary purpose of the clapper board back in the early days and in the present is the same; to help sync up the visuals and the sound in the cutting room.

When do we use them?   

You may be thinking that in this day and age, why are we still recording sound and visuals separately? Isn’t the technology good enough to record both in one? There are actually many reasons why we still record separately. Firstly, being able to separate the camera operator and the boom operator means that the camera isn’t restricted and is free to move however the director wishes. The sound recordist and sound mixer are also free to record from multiple sources; using radio mics on each of the actors and/or condenser mics for room ambience for example. Furthermore, designated sound recorders are manufactured to record the cleanest sounding audio possible, whereas most cameras aren’t designed with this in mind.

So, we use clapper boards whenever the highest quality audio is required and when the situation allows.

using clapperboard

Tip: If clapping close to an actor it is good etiquette to do a quiet clap for the sake of their eardrums!

How do we use them?

On feature films, the 2nd Assistant Camera is responsible for the clapperboard. On a smaller production a camera assistant or even a runner could be responsible for this.

Every single scene, slate (another word for shot), take and roll is written onto the board to signify the part of the production that is being captured. Sometimes audio clip information might be included too. The production company, director and cinematographer is also written on the board along with other important information such as the date, the frame rate of the camera for that particular shot, the shutter speed or angle, scene information (whether it is day or night, interior or exterior) and finally, whether sound is being recorded and synced or if there’s no sound (mos).

Slating scenes accurately is crucial so syncing up the footage with the sound in post is a smooth process. Added to this, having visual logs for every shot allows the editor to sift through rushes quickly, knowing exactly which point of the film he or she is at, rather than having to watch or listen to every take in full. For most scenes a loud clap is required to create a noticeable spike in the audio levels, making syncing a breeze.

What kinds of clapperboards are available?

Make no mistake, there is such a thing as a professional clapperboard. Although you can find cheap ones in fancy dress shops or on eBay, these are not built to withstand the daily rigors of set life. From inexpensive chalk boards to fully digital acrylic boards with inbuilt timecode, there are many options available. Boards with timecode allow both the camera and sound departments to be perfectly synced all the way through production. You can even sync footage using an iPad with this handy app (but it’s not quite the same in my opinion!).

If you are looking to purchase a clapper board in the UK then I recommend these guys who offer a wide range of boards to suit various budgets. It’s where I got my first one and she’s still going strong!

Sometimes it's good to have options

Sometimes you have to record straight into camera, and that’s OK (although some cameras are better than others for this)

As with all tools, there is a time and a place.

Make no mistake, there are certain situations where a clapperboard is not essential. Sometimes you have no choice but to record sound directly into camera (events, video journalism, documentaries etc.) due to time, budget & personnel restraints. In some situations the effort required to record sound separately and sync it up afterwards actually gives you more work with little noticeable gain, costing you time and money. Decide carefully if a board is for you and how often you may use it.


An example of  a typical slating process on set when sound is being recorded:

1st Assistant Director: OK, silence please. We’re going for a take. Turnover.

Sound mixer: Sound is rolling!

Camera operator: Camera speed!

2nd AC: Scene 41, slate 6A, take 1, mark.

[2nd AC claps then leaves shot]

Camera operator: Set.

1st Assistant Director/Director: Background action! And..action!

Slating shots that have no sound

For shots without sound the 2nd AC would highlight ‘mos’ (motor only sync) on the clapperboard and when slating would put their hand in between the sticks, hold it in shot and not clap.

Syncing at the end of a take (end boarding)

For those moments when syncing at the start of the take isn’t possible then the 2nd AC will clap at the end of the take, turn the board upside down and add ‘on the end’ after they’ve marked it.


So there you have it. Hopefully you’ve found this information useful so that when you’re next armed with a clapperboard you’ll know exactly what to do. Now as you return to creating great work, you might just find yourself being a little more efficient. Happy shooting!


Tips for improving the audio in your video

The first tell tale sign of a video amateur is bad audio. It doesn’t matter how beautiful your images are, how long your steadicam shot is or how interesting your talent is; if your audience is struggling to hear the content they probably won’t give you the time of day. As sound is half of the picture it is crucial that video producers get their audio knowledge up to scratch.

So, what are some of the common causes of bad sound and how could we solve these issues?

Poor location choice

Can you rely on the natural light alone?

A thorough reccie will allow you to (somewhat) find out if you’ll be disturbed during filming

Background noise is probably the biggest problem when it comes to clean sound recording. Where ever we go, whether that be in the city or the countryside, some sort of background noise will try to interfere with our recordings. This could include traffic noise, chatter, sirens, aircraft, footsteps, air conditioning..and the list goes on.


Solution: If you are fortunate enough to do a location reccie, consider the audio elements as well as the visual. Filming under flight paths, by main roads, next to the staff room etc. should all be avoided where possible. If your location looks great but you’re going to be interrupted every 2 minutes, is it really the best place to film? Consider what time of day may be best to do the recording; if the office empties out at lunch time, why not film then? Also, turn off any appliances and equipment that you’re allowed to if they emit unwanted noise. It all goes back to a little foresight and planning before your shoot.

Poor acoustics

Recording in wide open rooms with hard floors and few furnishings can make your recordings sound reverberated. While it is easy to add reverb in post, it is much harder to remove it from a recording. Acoustically treated rooms sound much better to the listener, particularly if recording voice overs.

Solution: Where possible try to shoot in rooms with soft furnishings. Consider using old carpet to reduce the reverb somewhat and this will also reduce any sounds of footsteps. If recording voice overs, either use a studio that has been sound proofed, or set up carpet and pop shields close to the artiste to treat their voice as much as possible.

Unsuitable microphone choice & placement

Sometimes it's good to have options

Sometimes it’s good to have options

You can still record good sound if there is some background noise, but how manageable that noise is all falls down to your choice of microphone. Using the inbuilt mic on your camera is rarely the best option. These mics are often of lower quality, have poor bass response and aren’t usually that directional. High quality shotgun mics may be good alternatives but even those with the most directional pickup patterns can’t completely eliminate some background noise. Lapel mics can also be a good choice but if your subject moves a lot expect to hear a lot of rustling. You also might have trouble attaching a lapel on certain outfits!

Solution: Only ever use your camera’s inbuilt mic for reference so that you can get rid of that tinny sound and reduce the likelihood of any handling noise. Shotgun mics can be great on location, but consider whether having one attached to your camera is going to get the clearest recording or if you need to get it in closer to the subject and purchase a ‘deadcat’ or ‘fluffie’ to eliminate wind noise if you are on location. If using a radio mic, attach stickies and under/over covers to eliminate wind and clothing noise. If possible, find somewhere to attach your mic where there is less chance of your audio becoming muffled  – under a tie or a shirt collar for example. If you have the luxury of both a shotgun and radio mic, record using both into separate channels so you have options! Lastly, if your camera has AGC (automatic gain control), for Pete’s sake turn it off!

Imperfect recording technique

There are numerous ways that your recording technique can affect the quality (or lack of) in your recordings. Turning your microphone’s gain up so high that there is distortion and choosing a mic input when you should be using line are both suitable examples.

Solution: Different equipment manufacturers and sound recordists will have their own opinions on what is a safe level to record at. Some may recommend your maximum recording level hit -18db as it peaks, but some may prefer it to be closer to -12db or even -6db (which is a little dangerous for my liking). It’s important to remember that once a microphone distorts it is pretty much impossible to recover, whereas sound that is recorded slightly too quietly can always be amplified. However, recording as close to your devices’ nominal level is best as too low a level will result in amplification of hiss. This page from the Final Cut Pro user guide explains it well but basically you’ll want to use microphone and recorder combinations with the lowest signal to noise ratio possible. Before you buy any audio equipment do your homework first and look out for comments made by other users regarding this.

One way I found to get a cleaner radio mic recording into my C100 was to select line input in and turn up the output of the receiver quite high

One way I found to get a cleaner radio mic recording into my C100 was to use a line input in and turn up the output of the receiver

One thing to remember is that recording into a designated audio recorder rather than a camera will in most cases give you the cleanest audio as some cameras have quite noisy preamps. On location this might not always be practical but in an acoustically treated studio this is definitely the best method. Either way it is always good to test and get to know your equipment before you go out on a shoot to see how you can get the cleanest recordings possible.


Insufficient mixing & EQ

audio waveformIs the music drowning out the dialogue? Does your subject become lost amongst the layers of foley? Recording good sound at the outset is important but mixing and equalizing that sound appropriately is just as important in order to produce a product that people want to listen to.


Solution: Check your levels using the audio meters in your editing program on both your speakers and through a set of headphones. You may notice things through your headphones that you didn’t notice otherwise.  Experiment with EQ and see if you can make any improvements, continually referring back to the original audio. Maybe you’ll discover something, maybe you won’t, but there’s no harm in trying things out. Use fade ins and fade outs where possible so that no source jars when it starts or stops. Find out more about EQ here.

Too much noise reduction

Ever watched a video that sounds like it was made underwater? If so, one cause of this is too much or inappropriately applied noise reduction in post. It sounds bad; worse than most cases of background noise!

Solution: Get it right at the recording stage – do what you can to reduce the background noise. If this isn’t entirely possible, utilize noise reduction and other plugins such as high pass filters to eliminate certain frequencies. The latter cuts off all frequencies below a certain level, allowing the higher frequencies to pass through which can be good for consistent low level noise from an appliance for example. With this and any audio filter be prepared to spend time tinkering if you want the best chances of reducing the unwanted frequency without affecting the voice.

Not listening!

 filming headphones

Despite what anyone may tell you I am a good listener!

Pretty self explanatory, really!

Solution: Always wear a decent pair of headphones and be prepared to playback takes if you can to ensure you’re recording the cleanest sound possible. Other things to listen out for include unsuitable gaps between questions and answers in an interview (you need room to cut), spikes in the audio from background noise (the consistent sound of traffic may be OK but a siren will stand out) and interference.

If you have even the slightest doubt about your recording, go for another take if you can. You will thank yourself in the edit.


These tips are just the beginning and should only be the start of your research into sound recording. However, by taking these points on board and applying them to your productions you should start to see a noticeable improvement in your audio. Plan as much as you realistically can, be prepared for the unexpected and when scheduling allow for interviews and pieces to camera to take a bit longer so you can get it right the first time.

Video Production London

10 things they don’t tell you about working in video production

Universities, film schools, specialist courses – all can be a great place to start if you want to equip yourself with useful skills for a job working in video or film production. However, there are some things that just can’t be learned in an educational environment. Only by talking to those already working in the industry and gaining experience yourself will you learn some things that no book or lecture could ever prepare you for. So listen up, we’ve got a few industry insights here. Some are positive and some are not, but if you want to work in this industry you had better listen to the pros first before you dive in at the deep end.

Video Production Company Brighton

Fatboy Slim appreciated the gig!

1. Every new job you land, no matter how big or small, becomes a huge personal victory.

This is especially true to start ups and freelancers. It is much harder to get new clients than it is to get repeat business from an existing one. Even landing little jobs that only last a few hours can give you that warm feeling inside that something is working because people want to hire YOU. This in turn will help you stay driven and motivated. Enjoy it!


2. How tremendously adaptable you sometimes have to be.

To get where you want to be in your career you may find yourself sooner or later doing something that you don’t really want to do (well, that’s life!) but you’ll realise that it’s a necessity to making any sort of progress. Whether it be learning a new skill in an area you’re not confident in or taking on work in a completely different industry just so you can survive until your next video job comes in, if you really want to succeed you’ll do what it takes. You may just find it character building too.

3. Marketing is so incredibly, ridiculously important.

Whether you freelance or run your own business, you simply can’t avoid the subject of marketing or you will fail. Word of mouth is often described as one of the best ways of getting work in an industry as small as this, and this is true, but first impressions count and knowing who it is you are trying to work for and how to target them is key to starting new working relationships. Included in this is the ability to sell yourself, plus with growing demand for online video content the marketeers out there should be your best friends!

4. GAS.

Not the poisonous kind, unless you let it get the better of you. GAS stands for gear acquisition syndrome. It is actually a thing. In the western world we are suckers for consumerism and just love to own stuff but this is especially true in video production for cameras are sexy, lenses are bokehlicious and a DJI octocopter – well, who wouldn’t want one of those?

Video Production Brighton

I’ll take them all please

It’s very tempting to spend lots of money and think your career will instantly bloom but if you’re not careful you could get stuck in a never ending process of continually needing to buy stuff and never make any money as a result. For some of us of course it is important that you buy the right tools for the job but perhaps consider whether you really do need that new flashy gizmo or if hiring would be a more sensible option. And don’t forget, your talent counts for something too.

There’s some brilliant advice on the matter in this filmmaker magazine article by DOP Sean Porter including one bit that really stuck with me:

“We have to be very cognizant about the impact, however minute, we make when we mix our creative responsibilities with enterprise. Your gear is a powerful influence on your work, both good and bad. I think stepping up means knowing which is which, even if it’s not the answer you want to hear.”

Wise words.

5. How to balance multiple jobs.

This for me, and I’m sure many others, is probably one of the hardest things about starting off in this industry that’s on this list. I’m not just talking multiple film or video jobs; I’m referring to balancing the self employed work with the employed. The paid with the unpaid. The desirable with the reliable. The big question that nobody seems to have the answer to is:

How can you get experience without a job when you can’t get the job without experience?

You have to start somewhere. Maybe you’ll be working part time so many days a week so you can focus on the video work on your days off – if you can afford to live off part time wages. But then, what if your perfect job comes up while you’re at work and you could be potentially missing out on your big break? If you keep trying to get time off from your reliable work are you likely to keep that job for long? On the contrary if you always keep your diary open, how do you know that you’re definitely going to land more video work to pay the bills? Juggling the reliable and the desirable work can be an absolute nightmare and it’s one thing that no educational institution can ever prepare you for.

My advice is to keep your options open and explore the different possibilities available to you until you find something that works. Everybody needs to earn somehow but what ends up working for one person may not work for someone else. I recently wrote about how my non video job helped me learn new transferable skills but the most important thing to understand is you have to be prepared to work your socks off, whichever path you decide to tread.

Oh, and one more thing. Dealing with a clash of job offers never gets any easier.

6. When to say no.

I must refer again to the article mentioned earlier by DOP Sean Porter, who deals with this point in great detail. Knowing when to say no can be another one of the hardest things to deal with in this industry. Taking on too much work could leave your clients unsatisfied or affect your personal life and relationships in a negative way. It’s another thing that can only be learned through experience and through applying a good level of judgment every time an opportunity arises. We’ve all accepted those jobs we’d wished we’d declined but it’s all about learning from these mistakes so that our future selves won’t curse our present selves into oblivion!

money

Budgeting can be hard when your income fluctuates

7. Steady sources of income can disappear suddenly and you may not know why.

A client may go on sick leave or change premises, marketing budgets may be slashed or a competitor may offer your clients better value. In fact, there are a whole host of reasons why you might lose a steady client and it can be very hard and frustrating when this happens, especially if you don’t know why.

The answer? Don’t take it personally, avoid complacency and learn to be like a gecko – adapt! Don’t stress and remember that factors which are beyond your control can be a blessing as well as a curse in your work life. It also pays during busy times to save for a rainy day.

8. How to manage your taxes.

Tax returns, accounting, filing..yawn. It may be boring but unfortunately it’s something that none of us can avoid doing, whether we freelance or run a business. Not to suck the fun completely out of the creative industry at hand but the more you learn about tax returns and the like the earlier on in your career the easier it will be for you to stay on top of your money and make sensible decisions throughout. You wouldn’t want any nasty surprises now!

The first place to look for information on all things tax is the HMRC website.

9. Your competition may also be your friends.

It’s not all doom and gloom. Working in such a small industry means we often bump into familiar faces and that includes the competition. The beauty of this, unlike most industries, is your competition could not only help to keep you on your toes but they could potentially be a reliable stand in for you when you need a helping hand or could loan you equipment and vice versa. There’s also a thing called referral fees for the business minded among us!

Video Production Brighton

Time to take a break?

10. How to switch off and relax.

Last, but certainly not least. You spend so much of your time and energy hacking away at your career that no matter where you are on the ladder, it can be nigh on impossible to switch off from work when you’re worried about things like where your next pay cheque is, if your clients will like your work and what your competitors are up to. Whether running a business or working for yourself and with dangerous cross overs between work and play on your social media accounts, switching off from the world of work can be very difficult indeed. It could be viewed as a good thing as we are just that determined to succeed, but don’t let it consume you. Allow yourself some ‘me time’ and enjoy those rare opportunities to turn off your phone. Your other half will appreciate it!

There is no real single secret to a successful career in any of the creative industries, but hopefully these insights will help you make the right decisions early on. If you make mistakes along the way however, that’s OK, it is part of your professional development no matter what career you decide to embark on (except for the tax issues – we wouldn’t want you getting in trouble!).

Before you go..
Download our free ebook

Mustard-Education-Video-ebook

7 Steps:
Make your school’s video
content pay for itself

  • How to use your new video to attract attention and get the results it deserves
  • How the most successful independent schools are getting all the new enrolments
  • The techniques that will give you a clear, predictable return on your video investment
  • How to track and record ROI to prove your video strategy’s working