Tag: creative

A beginners guide to lighting gels

Gels are used by cinematographers and videographers to balance the colour of light sources, adjust contrast and control shadows. It is the use of these gels that helps to create certain moods and looks to productions, whether that be low key drama or high key corporate video.

If you don’t know your ND from your CTB then read on as I introduce some of the most popular lighting gels and demonstrate how they may be used in your productions for creative effect.

CTB

CTB (not to be confused with CBT!) stands for colour temperature blue and is often referred to simply as ‘daylight’. It is used to convert tungsten balanced light sources such as traditional household bulbs and fresnels from 3200K to 5600K. It’s a common gel for balancing artificial light sources to daylight when the sun is acting as the key light in a scene.

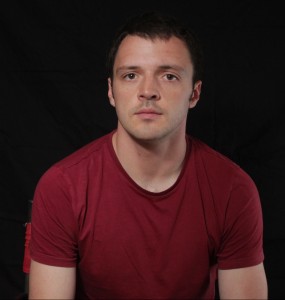
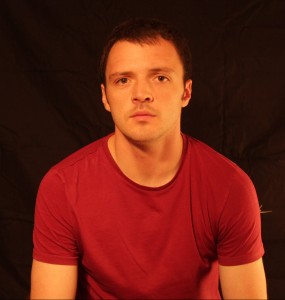
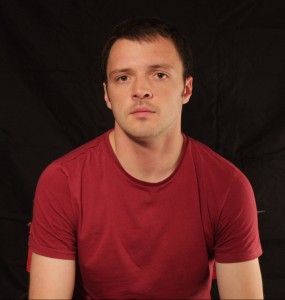
With our camera balanced to daylight and using a tungsten light source, our professional model looks like he should be in TOWIE..
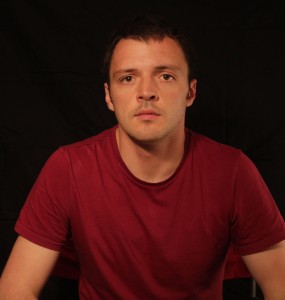
5200K_FULL_DAYLIGHT_GEL

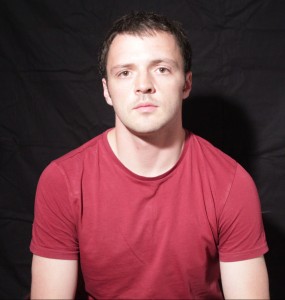
..so by applying FULL CTB the skin tone looks a bit more natural now.

5200K_HALF_DAYLIGHT_GEL

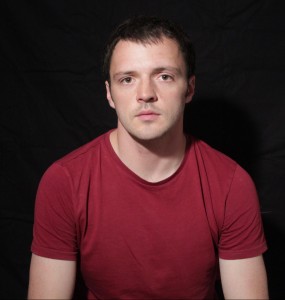
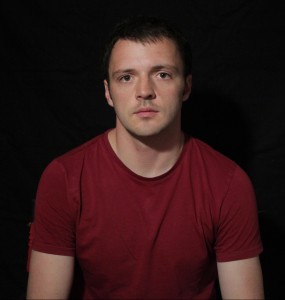
If your subject has a lighter skin tone or if your camera’s auto white balance reads around the 4500K mark (for some fluorescent lighting), you may want something in the middle between tungsten and daylight and HALF CTB may be your answer, converting tungsten sources to 4300K. In this shot the camera is still balanced to daylight.

  • CTO

Another popular colour correction gel is CTO which stands for colour temperature orange and is often simply referred to as ‘Tungsten’. It is used to convert daylight 5600K sources to 3200K, in line with the colour temperature of most traditional household lamps.
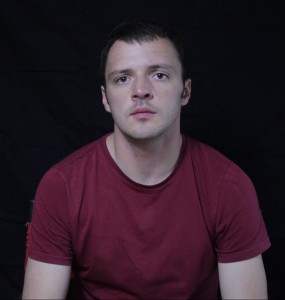
3200K_NO_TUNGSTEN_GEL

Using a daylight balanced LED light and with the camera balanced to tungsten, our image is looking a bit cold. But there is a use for this though; it is a popular method of simulating moonlight as well as shooting ‘day for night’.
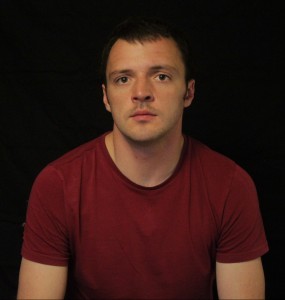
3200K_FULL_CTO_GEL

But if moonlight isn’t what you’re after, FULL CTO will return the skin tone back to a more natural colour.
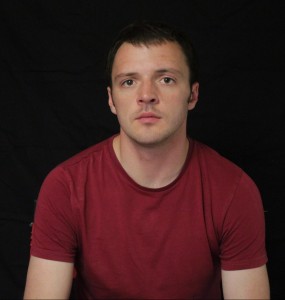
3200K_HALF_CTO_GEL

HALF CTO converts 5200K to 3800K, so a little cooler than FULL CTO but not too far off. With the light I’m using (dedolight ledzilla) and the model’s skin tone in this case HALF CTO actually looks a little nicer.

Both CTB and CTO also come in other strengths including QUARTER and EIGHTH, for those more subtle differences, but FULL and HALF are the most widely used.

  • ND

ND stands for neutral density and is used to reduce the amount of light without altering the colour. ND is often used on the camera in filter form but for lighting it can be invaluable in helping to control exposure and contrast. Using ND to reduce powerful light sources that do not have dimmers (or if you don’t want to change the colour temperature of the source through dimming) or stopping natural light from washing a scene out through covering windows with these gels, it is an incredibly useful tool.
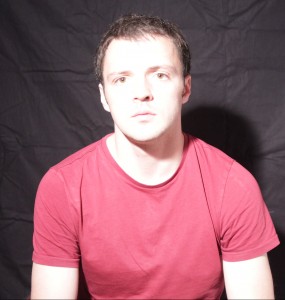
NO ND

Oh no, you can see that I forgot to iron my backdrop..so in this shot as you can see our model is looking a bit ghostly. Time to crack out the ND.

1 STOP ND

ND.3 reduces the light by 1 stop.

ND.6 reduces the light by 2 stops.

ND.6 reduces the light by 2 stops.

And ND.9 reduces the light by 3 stops.

And ND.9 reduces the light by 3 stops.

Wise words a gaffer once said to me, “you can never have enough ND!”

  • Diffusion

Diffusion is used to control the softness of shadows and the softer the source the less prominent the shadows will be. As hard lights have typically much higher output than soft lights, diffusion is key to softening these sources whilst utilising a strong beam.

There are so many different types of diffusion available and it can be difficult to know where to start so here are a few examples to give you an idea of the range available. At the end of the day it’s down to you to experiment with various types and find what you like.
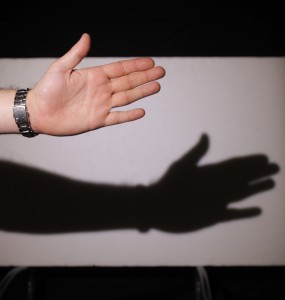
NO_DIFF

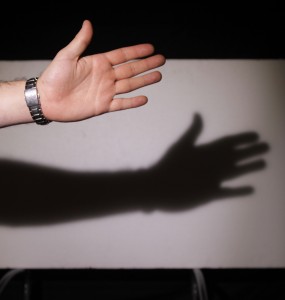
Our professional hand model is currently being lit with a hard LED source (Dedolight Ledzilla) and no diffusion.
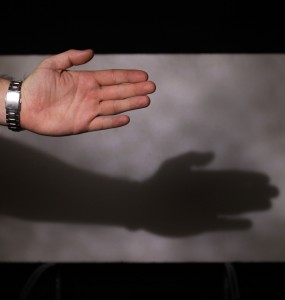
HAMPSHIRE_FROST

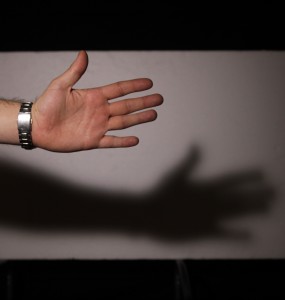
This diffusion used here is HAMPSHIRE FROST. Notice a subtle softening of the shadow.


HEAVY_DIFF

HEAVY DIFFUSION is being used here (and it’s easy to see why it got this name)

CLOTH1

I don’t actually know what this diffusion is called but it somehow found its way into my kit. A thicker, rougher sheet that is a little closer to greaseproof paper. As you can see it has a lovely texture to it and can add a bit of spice to a background.


It’s important to note too that the further a piece of diffusion is away from a light source, the softer the shadows will be, as will be a slight reduction in overall output of the light. See the example below:
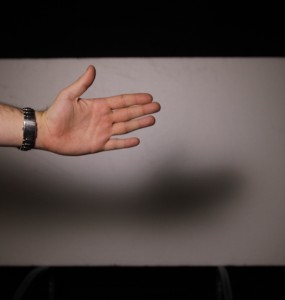
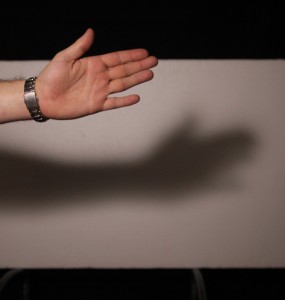
HALF DIFFUSION attached to the light..

HALF DIFFUSION attached to the light..

HALF_DIFF_FURTHER_AWAY

..and the HALF DIFFUSION moved away from the light source (closer to the subject). Notice how much softer the shadow is now.


  • “Party” gels

Not necessarily an official term but in this case I shall refer to most other coloured gels as ‘party gels’. Whilst these may not be as important for most shoots as the colour correction and other gels mentioned above, they can be used to create certain moods for your scenes whether they are used as key lights, backlights or kickers. There are an almost endless number of these gels to choose from but here are a couple of examples.
3200K_STEEL_GREEN

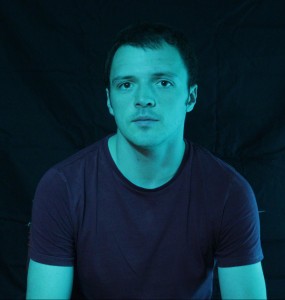
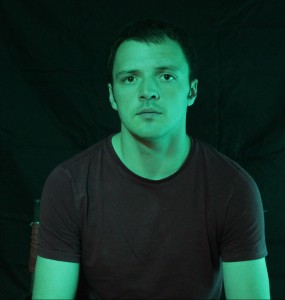
STEEL GREEN with the camera balanced to tungsten. Sci fi!

STEEL GREEN but with the camera balanced to daylight.

STEEL GREEN but with the camera balanced to daylight. Lord of the Rings or Matrix?


3200K_STRAW

More subtle than the above, a STRAW lighting gel with the camera balanced to tungsten. A nice morning light look.

5600K_STRAW

A STRAW gel but with the camera balanced to daylight. I’m getting a CSI Miami vibe here.


So, which gels should you buy?

It all starts with the light source(s) that you’ll be using most. Their colour temperature, power, whether they are dimmable and how hard or soft they are will all determine the gels you need. Aspiring DOPs will probably accumulate gels over time as their portfolio grows, but a good place to start is with the simple colour correction gels (CTO and/or CTB) and some diffusion which are the bare bones for lighting anything professionally. Another thing, don’t always rely on kit hire companies to stock a wide range of gels!

Big D Jonny boy

Experimenting is key to finding lighting styles that will grab your audience’s attention.

Use of softbox fill Liquiproof

Part of the fun and the craft of being a DOP is finding lighting styles that fit your productions and consequently help you to create your own signature style. Experiment with gels and see which colour combinations work and which don’t. Get creative!

Whether you are new to lighting or not, the LEE filter comparison tool here is a fantastic resource to see the range of lighting gels available and help you make decisions on what to buy. LEE filters are widely considered the number one name for gels; heat proof, colour accurate and with a huge choice available, they are an essential investment if you’re an aspiring DOP.

Happy shooting!


P.S. This post would not have been possible without my trusty light meter. Here are a few reasons why every aspiring DOP simply must have one.

So you shoot video…but can you do stills?

Many times I have been on a shoot and the client has asked if I can do photos too. Now I imagine this is a popular question for the majority of other videographers too but for me it has always been a bit difficult to answer. I’ll explain why.

Whilst it could appear that a digital professional who works in one visual medium would probably be competent in a similar one, the truth is that video and stills photography aren’t always as close to each other as many may think. In theory, anyone can take our their phone and take a picture and shoot some video with relatively no skill at all but most businesses wouldn’t choose this option if they wanted high quality content. Assuming that your photos and videos could be done by the same person is also not always the best thing if you want the highest quality from either, however it’s easy to see why those outside of the creative industries might pair the two up.

The reality is that the skills and experience required for the role of videographer and photographer are completely different, despite an overlap of certain techniques and equipment.

Hold on! There are some similarities..

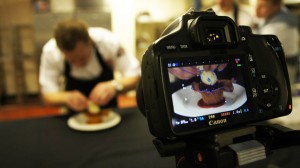
Technically we – the video guys – can do your stills. The single biggest reason why is that we actually use DSLR cameras to shoot our videos! Using dedicated stills cameras for video may seem absurd but one of the main benefits can be that we have the ability get high quality images at excellent value. The Sony A7Sii and Panasonic GH4 are both good examples of DSLRs that offer 4K video capability at an affordable price and as 4K online video is still in it550D food filmings infancy it’s not economical for the majority of us to invest in top of the range 4K video or cinema cameras so these types of DSLRs are sensible purchases. Adding to this, many DSLRs have large sensors meaning that they are exceptional in low light which is great for event videos and can offer cinematic bokeh (background blur) which can make videos look stunning. DSLRs are also perfect for shooting high quality timelapses which can add another interesting element to video content. With these considerations it makes absolute sense that online content producers have DSLRs at their disposal.

Shot composition, framing and an understanding of the technology behind the respective crafts are essential regardless of whether someone shoots video, stills or both. Colour temperature, exposure and shutter speed (or angle) are further concepts that must be grasped by either professional.

A whole lotta’ differences..

Apart from the obvious one that videos are moving and stills are not, there are actually many other less obvious differences between the two which maybe mean no, us videographers can’t (or choose not to) do your stills.

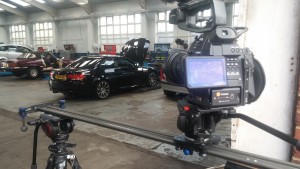
Camera on slider

Motion from the camera or from the subject helps to make a sequence more engrossing.

It boils down to the key ingredients for each craft which are in turn, completely different. Video needs motion, whereas photography is all about light (well actually, premium video is about light, which I talked about in an earlier article but the absolute bare bones of video production is motion). Successful business videos engage with an audience, encouraging them to react (i.e. with a like, share or comment on social media) and to help with this motion is essential to keeping their attention. Even if the subject isn’t moving a cut to another angle can be enough to create at least an element of movement. Sound is the other key skill in video production that often gets overlooked but it really is an art in itself.

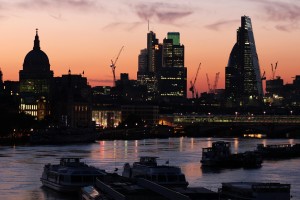
City of London

Landscape photography – being in the right place at the right time..and having a bit of patience!

Photography however is all about capturing perfect moments in the best light, whether that be using natural or artificial sources or a combination of the two. Capturing a single moment that’s sharp, interesting and exposed well is an entirely different art to shooting video and for a picture to paint a thousand words, it has to be something special. Landscape photography is a good example of how difficult it can be; to get the perfect image photographers may have to wait for hours to be in the right place at the right time in order to capture the best natural light.

The post production process can be drastically different too. Photographic editing often involves retouching, fine adjustment and layers upon layers of edits even just for a single image. Car photography in a studio is a good example; to make the various parts of a car look perfect all at once each part has to be lit separately and all of the images blended together in post production to only show the best bits from each setup. Whilst this can happen in video too it is much more time consuming and processor intensive as multiple layers of correction would require key framing (and bearing in mind that PAL video is made up of 25 frames per second, that’s a lot of frames to consider!) and so only suitable for the highest end projects.

“Could you take a still image from the video?”

Another question that I get asked often. Yes, this is possible, however as the majority of online content is shot in HD, not 4K, doing this means that you will have a smaller resolution image than you would have done if you had used a designated stills camera (and not in video mode). Megapixels are more important in photography than video for sure and as a result many camcorders will have a much lower pixel count, plus if there is any movement in your video taking a still frame might leave you with a subject that’s got a bit of motion blur. For some web purposes it may be fine extracting a smaller image from a video (including in a blog for instance) but if you wanted to zoom in, enlarge the image greatly or print it professionally then it wouldn’t be a suitable option.

So in practice yes, but if you want the best quality then no.

Wedding shooters: similar equipment, different style.

Wedding DSLR

5Dmkiii – a popular choice of camera for both wedding photographers and DSLR videographers

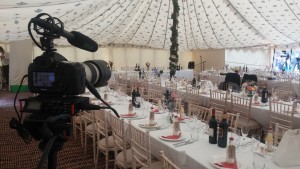
A good example of the differing styles of a videographer and a photographer would be at a typical wedding. The photographer will be capturing the key moments of the day but will also be herding the guests so they can set up and take memorable portraits that can be cherished forever. With only one opportunity to get these people together they are very much in the limelight during certain parts of the day. They would certainly need to be a people person!

The videographer however will be the complete opposite; rather than being noticeable and central to the day they will most likely be blending into the background so that they can go unnoticed. They would capture the day but not intervene with the order of events so that when the happy couple come to watch their video back they actually see the day from a whole new perspective. Events can be unpredictable so being able to foresee what’s coming and then be able to simultaneously capture the best audio and visuals is something that can take years of mastering.

C100 wedding

Canon C100 – where stills and motion overlap. A camcorder that uses interchangeable DSLR lenses.

The editing styles of each wedding shooter role differ immensely too; the photographer will spend days editing potentially hundreds of photos whereas the videographer will most likely be editing in camera, shooting as linearly as they can on the day to keep the editing time affordable and sustainable in the long term. This is especially important as data processing could take almost as much time as the editing itself due to the large file sizes involved and the process of burning the final (often hour long or more) videos onto multiple DVDs for clients.

The bottom line

Don’t get me wrong, there is absolutely no harm in offering both video and photographic services but the point of this post is that there are different skills, workflows and to some extent, even personal qualities that can be applied to each craft and more often than not the best practice is to hire the relevant specialist. On the contrary, many experienced cinematographers in film production have backgrounds in stills photography, as do many photographers venture into video production, so there is no set rule. At the end of the day it certainly can’t hurt to have an interest in both fields but knowing and being honest about where your strengths and weaknesses lie is vital when it comes to maintaining strong working relationships, regardless of the industry you work in.

So if we were to answer to the original question: “Can you do stills?”, well yes; here at FlyCreative we rely on a trusted network of talented freelancers with a range of talents to assist us in fulfilling our moving image and other digital needs. If we can’t personally meet your requirements then we’ll certainly be able to recommend you a trusted professional.

Get in touch today to find out more about our services.

Bellerbys Oxford

Bellerbys College is the gold standard for international students seeking entry to any one of 50 top UK universities and the largest provider of international students to UK universities.

fly creative was asked to produce a video showing the new Oxford study center including interviews with the students and some of the teachers.

We have produced more videos for Study Group and hope to maintain a long relationship with them, so watch out for more exciting projects.

This video was shot on 2 X Canon 7D’s with Canon EF24-70mm f/2.8L USM and EF 70-200mm f/2.8L IS II USM lenses.

Before you go..
Download our free ebook

Mustard-Education-Video-ebook

7 Steps:
Make your school’s video
content pay for itself

  • How to use your new video to attract attention and get the results it deserves
  • How the most successful independent schools are getting all the new enrolments
  • The techniques that will give you a clear, predictable return on your video investment
  • How to track and record ROI to prove your video strategy’s working