Tag: exposure

A beginners guide to lighting gels

Gels are used by cinematographers and videographers to balance the colour of light sources, adjust contrast and control shadows. It is the use of these gels that helps to create certain moods and looks to productions, whether that be low key drama or high key corporate video.

If you don’t know your ND from your CTB then read on as I introduce some of the most popular lighting gels and demonstrate how they may be used in your productions for creative effect.

CTB

CTB (not to be confused with CBT!) stands for colour temperature blue and is often referred to simply as ‘daylight’. It is used to convert tungsten balanced light sources such as traditional household bulbs and fresnels from 3200K to 5600K. It’s a common gel for balancing artificial light sources to daylight when the sun is acting as the key light in a scene.

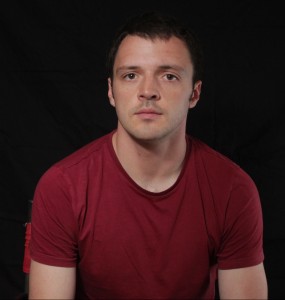
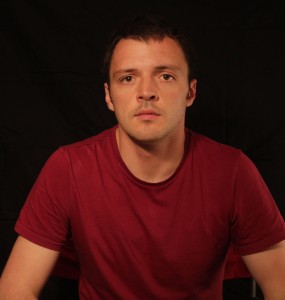
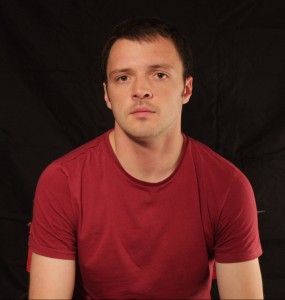
With our camera balanced to daylight and using a tungsten light source, our professional model looks like he should be in TOWIE..
5200K_FULL_DAYLIGHT_GEL

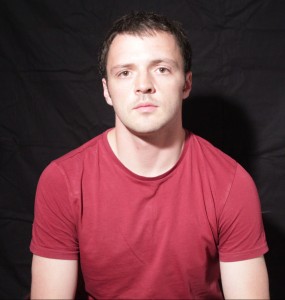
..so by applying FULL CTB the skin tone looks a bit more natural now.

5200K_HALF_DAYLIGHT_GEL

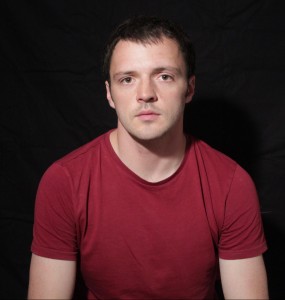
If your subject has a lighter skin tone or if your camera’s auto white balance reads around the 4500K mark (for some fluorescent lighting), you may want something in the middle between tungsten and daylight and HALF CTB may be your answer, converting tungsten sources to 4300K. In this shot the camera is still balanced to daylight.

  • CTO

Another popular colour correction gel is CTO which stands for colour temperature orange and is often simply referred to as ‘Tungsten’. It is used to convert daylight 5600K sources to 3200K, in line with the colour temperature of most traditional household lamps.
3200K_NO_TUNGSTEN_GEL

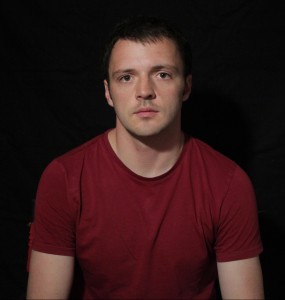
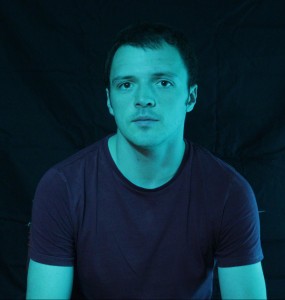
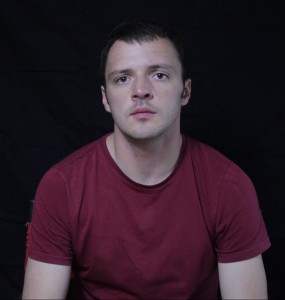
Using a daylight balanced LED light and with the camera balanced to tungsten, our image is looking a bit cold. But there is a use for this though; it is a popular method of simulating moonlight as well as shooting ‘day for night’.
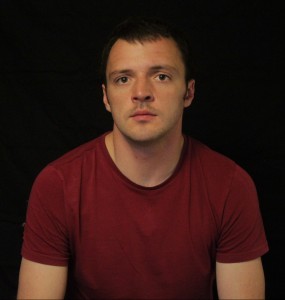
3200K_FULL_CTO_GEL

But if moonlight isn’t what you’re after, FULL CTO will return the skin tone back to a more natural colour.
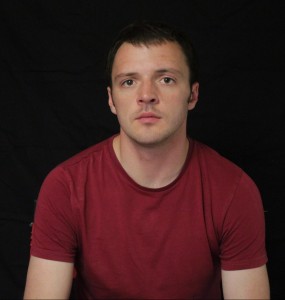
3200K_HALF_CTO_GEL

HALF CTO converts 5200K to 3800K, so a little cooler than FULL CTO but not too far off. With the light I’m using (dedolight ledzilla) and the model’s skin tone in this case HALF CTO actually looks a little nicer.

Both CTB and CTO also come in other strengths including QUARTER and EIGHTH, for those more subtle differences, but FULL and HALF are the most widely used.

  • ND

ND stands for neutral density and is used to reduce the amount of light without altering the colour. ND is often used on the camera in filter form but for lighting it can be invaluable in helping to control exposure and contrast. Using ND to reduce powerful light sources that do not have dimmers (or if you don’t want to change the colour temperature of the source through dimming) or stopping natural light from washing a scene out through covering windows with these gels, it is an incredibly useful tool.
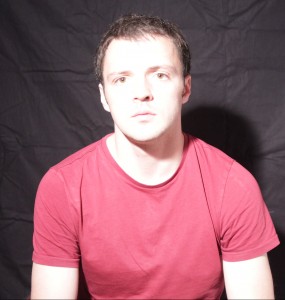
NO ND

Oh no, you can see that I forgot to iron my backdrop..so in this shot as you can see our model is looking a bit ghostly. Time to crack out the ND.

1 STOP ND

ND.3 reduces the light by 1 stop.

ND.6 reduces the light by 2 stops.

ND.6 reduces the light by 2 stops.

And ND.9 reduces the light by 3 stops.

And ND.9 reduces the light by 3 stops.

Wise words a gaffer once said to me, “you can never have enough ND!”

  • Diffusion

Diffusion is used to control the softness of shadows and the softer the source the less prominent the shadows will be. As hard lights have typically much higher output than soft lights, diffusion is key to softening these sources whilst utilising a strong beam.

There are so many different types of diffusion available and it can be difficult to know where to start so here are a few examples to give you an idea of the range available. At the end of the day it’s down to you to experiment with various types and find what you like.
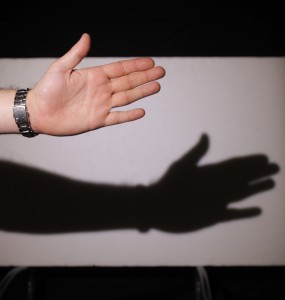
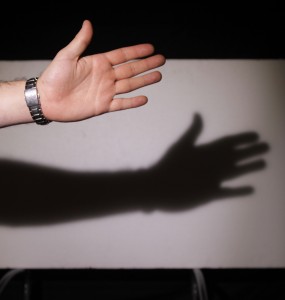
NO_DIFF

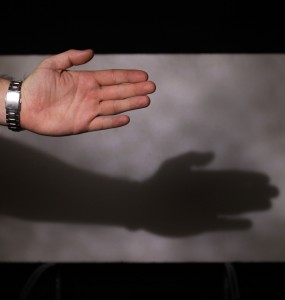
Our professional hand model is currently being lit with a hard LED source (Dedolight Ledzilla) and no diffusion.
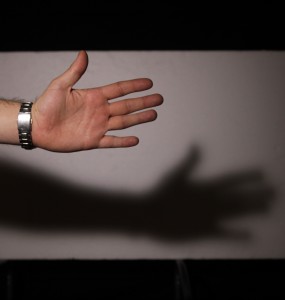
HAMPSHIRE_FROST

This diffusion used here is HAMPSHIRE FROST. Notice a subtle softening of the shadow.


HEAVY_DIFF

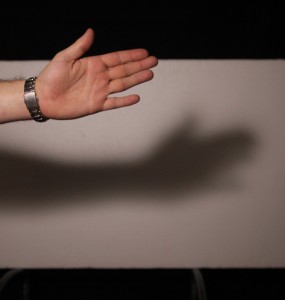
HEAVY DIFFUSION is being used here (and it’s easy to see why it got this name)

CLOTH1

I don’t actually know what this diffusion is called but it somehow found its way into my kit. A thicker, rougher sheet that is a little closer to greaseproof paper. As you can see it has a lovely texture to it and can add a bit of spice to a background.


It’s important to note too that the further a piece of diffusion is away from a light source, the softer the shadows will be, as will be a slight reduction in overall output of the light. See the example below:
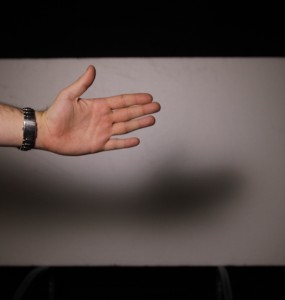
HALF DIFFUSION attached to the light..

HALF DIFFUSION attached to the light..

HALF_DIFF_FURTHER_AWAY

..and the HALF DIFFUSION moved away from the light source (closer to the subject). Notice how much softer the shadow is now.


  • “Party” gels

Not necessarily an official term but in this case I shall refer to most other coloured gels as ‘party gels’. Whilst these may not be as important for most shoots as the colour correction and other gels mentioned above, they can be used to create certain moods for your scenes whether they are used as key lights, backlights or kickers. There are an almost endless number of these gels to choose from but here are a couple of examples.
3200K_STEEL_GREEN

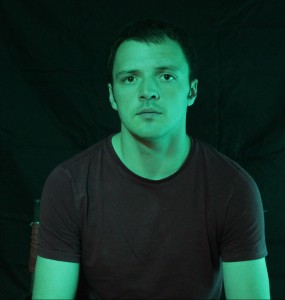
STEEL GREEN with the camera balanced to tungsten. Sci fi!

STEEL GREEN but with the camera balanced to daylight.

STEEL GREEN but with the camera balanced to daylight. Lord of the Rings or Matrix?


3200K_STRAW

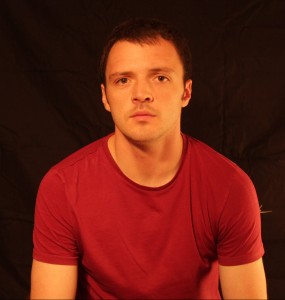
More subtle than the above, a STRAW lighting gel with the camera balanced to tungsten. A nice morning light look.

5600K_STRAW

A STRAW gel but with the camera balanced to daylight. I’m getting a CSI Miami vibe here.


So, which gels should you buy?

It all starts with the light source(s) that you’ll be using most. Their colour temperature, power, whether they are dimmable and how hard or soft they are will all determine the gels you need. Aspiring DOPs will probably accumulate gels over time as their portfolio grows, but a good place to start is with the simple colour correction gels (CTO and/or CTB) and some diffusion which are the bare bones for lighting anything professionally. Another thing, don’t always rely on kit hire companies to stock a wide range of gels!

Big D Jonny boy

Experimenting is key to finding lighting styles that will grab your audience’s attention.

Use of softbox fill Liquiproof

Part of the fun and the craft of being a DOP is finding lighting styles that fit your productions and consequently help you to create your own signature style. Experiment with gels and see which colour combinations work and which don’t. Get creative!

Whether you are new to lighting or not, the LEE filter comparison tool here is a fantastic resource to see the range of lighting gels available and help you make decisions on what to buy. LEE filters are widely considered the number one name for gels; heat proof, colour accurate and with a huge choice available, they are an essential investment if you’re an aspiring DOP.

Happy shooting!


P.S. This post would not have been possible without my trusty light meter. Here are a few reasons why every aspiring DOP simply must have one.

Light meters – do we need them for video?

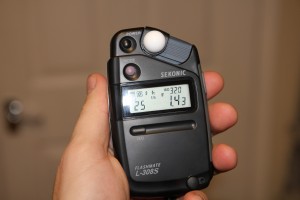
It was my birthday earlier this week and one of the presents I received from my family was a light meter – a Sekonic Flashmate L-308s to be exact. This little gizmo is hardly the most glamorous gadget in the arsenal of video gear and probably nowhere near the top of most camera peoples’ wishlists, but nevertheless I decided that it was time to get one. Now I shoot quite a lot of video and you may be wondering why I would ever need a light meter when most video cameras have histograms, wave forms, zebras and other exposure aids built in. It’s perfectly valid to question why anyone would want to spend more money on an item that is, in theory, debatable as to whether it is really needed in these modern times.

In this digital age and with the rapid advancement of technology has the light meter become more of a relic from a bygone era rather than an essential video making tool? Do photographers even need to use them anymore now that most shoot digital? Do we really need light meters for video?

The short answer is yes. But it’s not as simple as that. Depending on what you shoot, the answer may actually be no. To decide if you do need a light meter or not it’s worth considering the reasons why one might have one in their kit bag. You may be surprised at how many reasons there are:

sekonic light meter

Sekonic – a widely adopted brand of light meters

1. To get the most accurate exposure:

First and foremost and the most obvious reason for owning one. I’m not discounting inbuilt light meters in digital cameras but the truth is a quality light meter will always be the most accurate way to measure exposure because that is their primary purpose. Inbuilt light meters usually feature modes that rely on averaging the exposure by taking several readings across the frame. Using an averaging mode can sometimes result in the camera been tricked into the wrong exposure because it averages the whole scene rather than taking a reading of the subject you are focusing on, meaning your subject could end up over or under exposed. Using a light meter here can allow you to expose the correct area of the frame first time round.

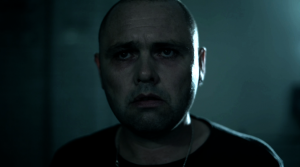
To control the highlight in this image a flag was held partially in front of the light source so it didn't wrap around the face too much.

The back light here was deliberately over exposed so that it was unrecoverable in post but if I wanted to I could have measured it so it was specifically 1 or 2 stops over the rest of his face.

2. It is easier to control your contrast:

Once you have established optimum exposure of your subject, a light meter can be used to balance the other areas of the frame to help create the look your production desires. For instance, you may want everything to be flat and even for a corporate video or high contrast and moody for drama. You could always judge by eye but knowing exactly how many stops over or under areas of your image are you can have confidence knowing that you’re being accurate. What’s more, if you know the dynamic range of your camera you can expose your images in a way that lets you have a greater degree of flexibility during colour grading if you want it.

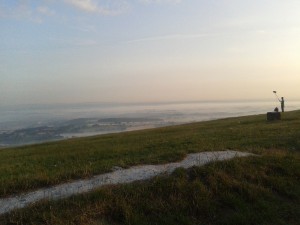
Can you rely on the natural light alone?

3. You can have a more efficient location recce:

When you visit a location how do you know what equipment to bring if you don’t know how good the natural light really is? Our eyes can be deceiving and lead us into thinking the natural light can do all the work but really the only way to be fully prepared is to measure that light and then make the decision.


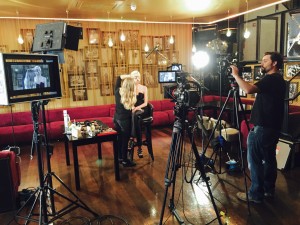
talent and lighting

Metering will improve your efficiency in setting up.

4. You can light a scene before the talent arrives (and quicker):

This is a very important point. If we could only light when the talent (or a stand in) was in shot we would never get anything done. Of course, once the talent is in the frame you may want to make some small adjustments but being able to set the exposure beforehand will help save you and everybody else’s time and money. Adding to this, if you have to run back and forth between adjusting a light and viewing the histogram or waveform this can be quite time consuming.


which camera?

It doesn’t matter which camera you decide to use, a light meter could assist you with exposure for any model that lets you set exposure manually

5. Video & photography skills often overlap. Embrace this:

For the DSLR video shooters out there, you’ve probably learned a thing or two about photography whilst you’ve been at it. You may have tried out long exposure and timelapse photography out of curiosity, the latter of which can certainly add an interesting element to your videos. Much of this may be a result of simple trial and error until you get pleasing results (this is certainly how I used to do it), however using a light meter can help you to reduce this method and once again save you time. What’s more, you could go further down the photography route later on and so having a greater understanding of exposure and light now could actually make you more employable in the future.


dog 35mm film

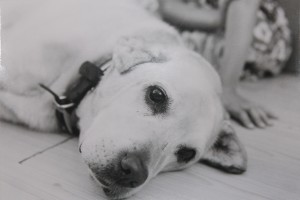
This photo of the old family dog ‘Dolly’ was taken on my old pentax 35mm film camera. Although it’s a lovely photo, if I had taken a reading off of her fur rather than relying on the inbuilt meter to average it out then it wouldn’t have appeared slightly over exposed, as being a golden lab her fur was actually a shade darker.

6. You open up the possibility of shooting on film:

Ever had that burning desire to go old school? We all have. With Kodak’s recent announcement of a new (yes, new!) Super 8 film camera you may just get tempted further into experimenting with film.

Now, many 35mm stills cameras have inbuilt spot meters, as do super 8 cameras, however, once again they may not always be the best option for you, especially if these meters calculate an exposure based on averages. Of course with digital cameras you can readjust your exposure and snap again but with rolls of film this can be an expensive thing to do so you have to be much more conservative with your shots. Taking proper exposure readings will eliminate the need for guess work and ensure you become comfortable with the format.

And finally..

7. You look like you know what you’re doing:

In other words, you look like a pro. That’s a good thing, right? Oh, and you can give accurate orders to an assistant (this is invaluable)!

So, taking these points into consideration, what kind of video shooters could benefit from using a light meter?

I believe the answer is anyone who wants or needs to light their productions to a high standard. This includes those who work in (but is certainly not limited to) commercials, drama, green screen and stills photography. Aspiring DOPs certainly need one, hence why I got one. For conferences, weddings, run and gun documentaries and corporate videos, you probably won’t need one. In these instances you can simply rely on your camera’s exposure aids and you won’t have to fork out for an expensive item that may just end up gathering dust.

At the end of the day the decision of whether you need a light meter or not is down to you and it all depends on what you shoot and/or what you want to shoot. Light meters aren’t the cheapest tools out there so, as with everything else, only get one if you really need it. If you decide that you do need one however, it could be one of the most important investments you’ll ever make in your video career.

If you would like to find out more about lighting check out this article on why good lighting can sometimes be more important than the camera and how a cheap reflector could be your most important lighting accessory (after the light meter of course!) .

Before you go..
Download our free ebook

Mustard-Education-Video-ebook

7 Steps:
Make your school’s video
content pay for itself

  • How to use your new video to attract attention and get the results it deserves
  • How the most successful independent schools are getting all the new enrolments
  • The techniques that will give you a clear, predictable return on your video investment
  • How to track and record ROI to prove your video strategy’s working