Tag: Film

7 DIY lighting essentials for low budget filmmakers

So you’ve raised the finance for your project, chosen your camera, cast your actors..and you suddenly find that your budget has disappeared in a flash. Where did it all go? Film making can be a seriously expensive affair and sadly certain departments sometimes get neglected as a result. Lighting is one of these departments.

No matter how low your budget is, lighting should never be neglected if you want to create cinematic visuals to be remembered. In fact, here are a list of reasons why good lighting is so important. In this article however I’m going to identify 7 lighting essentials that don’t cost the earth but every low budget camera operator or DOP should be armed with. Sometimes you need to spend good money on kit and sometimes you don’t, but if you’re keen to increase production value economically then read on.

  • Gaffer Tape

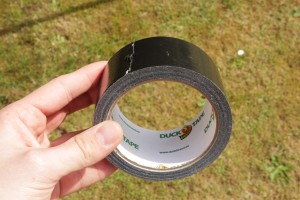
gaffer tapeA ridiculously obvious one but gaffer tape is something that should go with you on every shoot no matter how big or small your budget! It can save your life (in a creative emergency, I have yet to prove this medically!), whether it’s used to rig lights or modifiers onto unusually shaped objects or into areas that are inaccessible for light stands, gaffer tape really is essential. It can also be used to make DIY french flags to avoid lens flare and teamed up with some trusty cinefoil/blackwrap makes a perfectly functioning LCD cover for operating in bright sunlight. Trust me, don’t leave this behind!
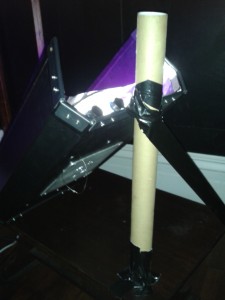
And the award for best DIY rig goes to..

And the award for best DIY rigging solution goes to..

One item you can't afford to be without is cinefoil. This, along with your gels is worth spending good money on.

Gaffer and cinefoil = budget french flag. Cinefoil is one item you can’t afford to be without on set. This, along with your gels is worth spending good money on.


  • Halogen work light

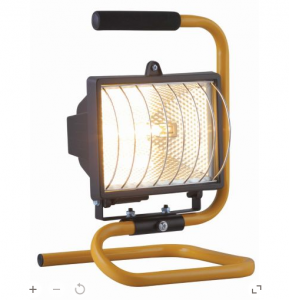
Revealing an indHalogen worklightustry secret here. Or maybe not. This item is ridiculously obvious and cheap but the likelihood is that most of us low budget filmmakers probably don’t use them..or at least not yet. If you pop down to your local B&Q you’ll find these useful halogen work lights. At about £10 each these little lights give out a fair amount of light considering their size and use tungsten balanced bulbs which means their colour temperature matches the expensive Arri equivalent. If you have the right colour correction gels then armed with a few of these you could in theory light your whole film.

Of course being cheap means that these little fixtures do have their drawbacks; short power leads, a lack of any way to control the spread of the light and the fact that they won’t attach to normal light stands are the main ones (because obviously film making isn’t what they were designed for) but, if you purchase one of these, and I recommend you get several, you could potentially fill decent sized spaces for little money. What’s more, their handles allow for easier rigging at height than some lights. With a bit of problem solving, and lets face it – that’s what film making mostly is, you’ll be able to find ways to rig, hide and control the output of these lights.

  • Polyboard & foamcore
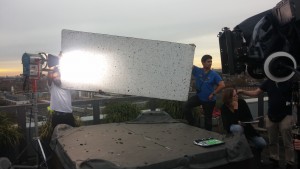
bounce board on roof

Polyboard is common even on the biggest of film sets

While you’re down at the DIY shop why don’t you pick up some of this too? Polyboard is a perfect and cheap way to bounce light in order to create flattering soft light and fill in shadows on your subject. It often comes in fairly large sizes and in various thicknesses and can be easily cut to size to meet your needs, or at least to fit in your car! What’s more, if you have any black paint lying around then paint one side and bob’s your uncle: you now have a large, lightweight flag to use for cutting light and creating negative fill. Two for the price of one (almost!).
foamcore flagIn addition to this your local craft shop will probably stock black and white foam core; both of which can be useful for smaller, more portable bounce boards and flags. Once again this is inexpensive, easy to cut to size and easy to rig. The only downside is any thin layers of card on these boards will be flammable, so be careful using them near hot light sources.


  • Spring clamps
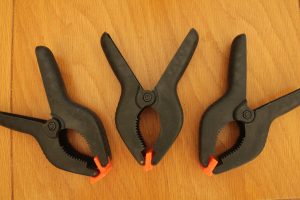
spring clamps

Top tip: buying multi packs on sites such as eBay can make these accessories even cheaper for you.

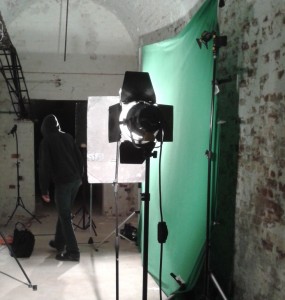
Cheap and cheerful, but where would I be without them? These large spring clamps are cheap, lightweight and a must have for anyone doing any sort of lighting. Use them to attach reflectors or boards to stands, flags and tarpaulins to backdrops and for making green screens taut. Do yourself a favour and get some now.

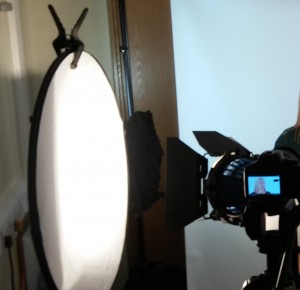
Diffuser reflector spring clamps

A quick way to hold up your reflector

spring clamp reflector


  • China ball lantern
china ball

A beautiful quality of light for certain applications.

China ball lanterns can create beautiful soft light for use in close ups and as practicals. Inexpensive and by using regular household bulbs, china lanterns are a cost effective option over the dearer branded soft fixtures and combinations offered by the likes of Arri and Chimera. They do have a specific use however, their main drawback being that regular 60W or similar household bulbs don’t give out huge amounts of light, at least not for cinema use. To the naked eye their light output is fine but on camera the lanterns reduce a bulb’s output a fair amount. Adding to this, their size and the fact that they’re made out of paper means significant fire hazards are present if too powerful bulbs are used, so you need to stick to the recommended wattage. For larger areas of soft light an Arri/Chimera combination is a much more suitable option which understandably you will need to pay for.

Despite their drawbacks if you’re able to find use for them still china ball lanterns can provide wonderful results. Rig them off C stands or mic stands, ensure you have long enough extension leads and you’re good to go. Watch out for that colour temperature though; some bulbs rate lower than 3200K (tungsten) so will appear warmer than you may like. Once again it pays to have a good selection of colour correction gels!

  • Tin foil & baking paper
tin foil

Tin foil: cheap as chips!

Who’d have thought that every day items around the home could help you in lighting your cinematic masterpieces? The highly reflective surface of tin foil can be used in the same way that the silver side of a reflector is used; to fill in shadows when a white surface isn’t cutting it or to create a bit of ‘pop’ to the image through introducing highlights. Attaching sheets of tin foil to your foam core boards (see above) or even just a sheet of plywood can give you another way of applying contrast quickly, cheaply and without having to hire anything!

No product placement here..

No product placement here..

Baking/parchment paper is a good option for when you need to diffuse hard light sources to soften their shadows and reduce the contrast. It’s designed to withstand heat so is ideal for using with hot light sources without risk of burning. So if you’ve run out of diffusing gels and need a quick softening solution, go have a look in the kitchen cupboard or run to the shop!


  • Tarpaulin
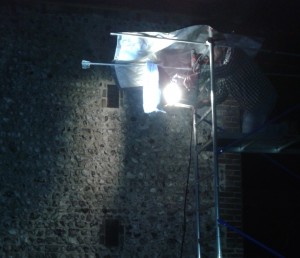
tarpaulin night shoot

Protecting a 2K arri fresnel from the rain.

There are many uses for a tarpaulin, many of which may appear to have nothing to do with filming, however the long days on location and the unpredictability of the weather (especially in glorious England) mean that a tarpaulin lends itself to being pretty useful in general on set. For DOPs a tarpaulin can provide suitable protection to lights (and camera) from the rain and from dusty or wet terrain. More importantly, they can also be setup and rigged to act as huge flags, with a host of uses. From blocking out large windows in order to control interior lighting to providing a huge source of negative fill on location, tarpaulins are inexpensive, reusable and portable. If you decide to rig one up on location then make sure you remember your spring clamps! (see above)

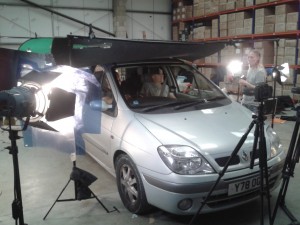
tarpaulin over windscreen

Flagging the windscreen of a car to eliminate reflections and any changes to ambient light levels.

These are just some of the useful lighting accessories that can be used in low budget film making. However, as you climb the ladder in your film career, you may find yourself using some of these items on the bigger budget productions too!

Remember that there are certain items you’ll need regardless of your budget; lighting gels and cinefoil are the big ones here. Don’t cut corners on your gels, buy the real thing (I recommend Lee filters) so you know you have high quality, accurate colours and so you can avoid setting anything alight. If your budget can stretch a little or if your professional image concerns you then get yourself a few 5 in 1 reflectors; you won’t regret it.

Hopefully you’ve found this helpful and if you have any suggestions of your own for DIY lighting do tell us in the comments!


Why, when and how to use a clapperboard

“Lights, camera..action!”

This is probably the most well known phrase associated with Hollywood and film making.

If you’ve ever watched those little behind the scenes extras on DVDs you’ll have probably seen at some point a crew member using a clapperboard. Standing in front of the camera before it rolls, shouting out some random numbers and letters before hitting the sticks together and preceding to hurry out of shot immediately afterwards. Have you ever wondered what the point of this little device is? If so, then look no further.

Clapperboards are pretty fun things and they make fantastic decorations (especially if a production or director’s name has been inscribed on it!) but they are actually very important tools in the film making process. Understanding why we use them, when to use them and how you should be using them can not only help you act professionally, but potentially save you time and money, depending on your production

clapperboard close up

Clapperboards give the editor lots of information about the production which can assist in navigating large amounts of footage.

Why do we use them?

Lets turn back the clock to an age where 35mm and 16mm film were the standards for most people making movies. When the first ‘talkies’ were released way back in the 1920s, that is films that featured synchronized picture and sound, the sound was not recorded onto the film but separately (using a sound on disc system, recording to wax records). Early film cameras were also very noisy which contributed to the difficulty of recording live sound. Fast forward to the present day and in the 21st century on movie sets the sound is still recorded separately, albeit to designated sound recorders, rather than straight into camera. The primary purpose of the clapper board back in the early days and in the present is the same; to help sync up the visuals and the sound in the cutting room.

When do we use them?   

You may be thinking that in this day and age, why are we still recording sound and visuals separately? Isn’t the technology good enough to record both in one? There are actually many reasons why we still record separately. Firstly, being able to separate the camera operator and the boom operator means that the camera isn’t restricted and is free to move however the director wishes. The sound recordist and sound mixer are also free to record from multiple sources; using radio mics on each of the actors and/or condenser mics for room ambience for example. Furthermore, designated sound recorders are manufactured to record the cleanest sounding audio possible, whereas most cameras aren’t designed with this in mind.

So, we use clapper boards whenever the highest quality audio is required and when the situation allows.

using clapperboard

Tip: If clapping close to an actor it is good etiquette to do a quiet clap for the sake of their eardrums!

How do we use them?

On feature films, the 2nd Assistant Camera is responsible for the clapperboard. On a smaller production a camera assistant or even a runner could be responsible for this.

Every single scene, slate (another word for shot), take and roll is written onto the board to signify the part of the production that is being captured. Sometimes audio clip information might be included too. The production company, director and cinematographer is also written on the board along with other important information such as the date, the frame rate of the camera for that particular shot, the shutter speed or angle, scene information (whether it is day or night, interior or exterior) and finally, whether sound is being recorded and synced or if there’s no sound (mos).

Slating scenes accurately is crucial so syncing up the footage with the sound in post is a smooth process. Added to this, having visual logs for every shot allows the editor to sift through rushes quickly, knowing exactly which point of the film he or she is at, rather than having to watch or listen to every take in full. For most scenes a loud clap is required to create a noticeable spike in the audio levels, making syncing a breeze.

What kinds of clapperboards are available?

Make no mistake, there is such a thing as a professional clapperboard. Although you can find cheap ones in fancy dress shops or on eBay, these are not built to withstand the daily rigors of set life. From inexpensive chalk boards to fully digital acrylic boards with inbuilt timecode, there are many options available. Boards with timecode allow both the camera and sound departments to be perfectly synced all the way through production. You can even sync footage using an iPad with this handy app (but it’s not quite the same in my opinion!).

If you are looking to purchase a clapper board in the UK then I recommend these guys who offer a wide range of boards to suit various budgets. It’s where I got my first one and she’s still going strong!

Sometimes it's good to have options

Sometimes you have to record straight into camera, and that’s OK (although some cameras are better than others for this)

As with all tools, there is a time and a place.

Make no mistake, there are certain situations where a clapperboard is not essential. Sometimes you have no choice but to record sound directly into camera (events, video journalism, documentaries etc.) due to time, budget & personnel restraints. In some situations the effort required to record sound separately and sync it up afterwards actually gives you more work with little noticeable gain, costing you time and money. Decide carefully if a board is for you and how often you may use it.


An example of  a typical slating process on set when sound is being recorded:

1st Assistant Director: OK, silence please. We’re going for a take. Turnover.

Sound mixer: Sound is rolling!

Camera operator: Camera speed!

2nd AC: Scene 41, slate 6A, take 1, mark.

[2nd AC claps then leaves shot]

Camera operator: Set.

1st Assistant Director/Director: Background action! And..action!

Slating shots that have no sound

For shots without sound the 2nd AC would highlight ‘mos’ (motor only sync) on the clapperboard and when slating would put their hand in between the sticks, hold it in shot and not clap.

Syncing at the end of a take (end boarding)

For those moments when syncing at the start of the take isn’t possible then the 2nd AC will clap at the end of the take, turn the board upside down and add ‘on the end’ after they’ve marked it.


So there you have it. Hopefully you’ve found this information useful so that when you’re next armed with a clapperboard you’ll know exactly what to do. Now as you return to creating great work, you might just find yourself being a little more efficient. Happy shooting!


Light meters – do we need them for video?

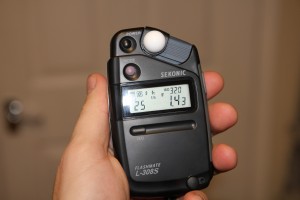
It was my birthday earlier this week and one of the presents I received from my family was a light meter – a Sekonic Flashmate L-308s to be exact. This little gizmo is hardly the most glamorous gadget in the arsenal of video gear and probably nowhere near the top of most camera peoples’ wishlists, but nevertheless I decided that it was time to get one. Now I shoot quite a lot of video and you may be wondering why I would ever need a light meter when most video cameras have histograms, wave forms, zebras and other exposure aids built in. It’s perfectly valid to question why anyone would want to spend more money on an item that is, in theory, debatable as to whether it is really needed in these modern times.

In this digital age and with the rapid advancement of technology has the light meter become more of a relic from a bygone era rather than an essential video making tool? Do photographers even need to use them anymore now that most shoot digital? Do we really need light meters for video?

The short answer is yes. But it’s not as simple as that. Depending on what you shoot, the answer may actually be no. To decide if you do need a light meter or not it’s worth considering the reasons why one might have one in their kit bag. You may be surprised at how many reasons there are:

sekonic light meter

Sekonic – a widely adopted brand of light meters

1. To get the most accurate exposure:

First and foremost and the most obvious reason for owning one. I’m not discounting inbuilt light meters in digital cameras but the truth is a quality light meter will always be the most accurate way to measure exposure because that is their primary purpose. Inbuilt light meters usually feature modes that rely on averaging the exposure by taking several readings across the frame. Using an averaging mode can sometimes result in the camera been tricked into the wrong exposure because it averages the whole scene rather than taking a reading of the subject you are focusing on, meaning your subject could end up over or under exposed. Using a light meter here can allow you to expose the correct area of the frame first time round.

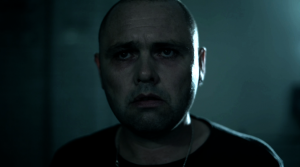
To control the highlight in this image a flag was held partially in front of the light source so it didn't wrap around the face too much.

The back light here was deliberately over exposed so that it was unrecoverable in post but if I wanted to I could have measured it so it was specifically 1 or 2 stops over the rest of his face.

2. It is easier to control your contrast:

Once you have established optimum exposure of your subject, a light meter can be used to balance the other areas of the frame to help create the look your production desires. For instance, you may want everything to be flat and even for a corporate video or high contrast and moody for drama. You could always judge by eye but knowing exactly how many stops over or under areas of your image are you can have confidence knowing that you’re being accurate. What’s more, if you know the dynamic range of your camera you can expose your images in a way that lets you have a greater degree of flexibility during colour grading if you want it.

Can you rely on the natural light alone?

3. You can have a more efficient location recce:

When you visit a location how do you know what equipment to bring if you don’t know how good the natural light really is? Our eyes can be deceiving and lead us into thinking the natural light can do all the work but really the only way to be fully prepared is to measure that light and then make the decision.


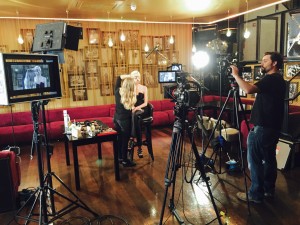
talent and lighting

Metering will improve your efficiency in setting up.

4. You can light a scene before the talent arrives (and quicker):

This is a very important point. If we could only light when the talent (or a stand in) was in shot we would never get anything done. Of course, once the talent is in the frame you may want to make some small adjustments but being able to set the exposure beforehand will help save you and everybody else’s time and money. Adding to this, if you have to run back and forth between adjusting a light and viewing the histogram or waveform this can be quite time consuming.


which camera?

It doesn’t matter which camera you decide to use, a light meter could assist you with exposure for any model that lets you set exposure manually

5. Video & photography skills often overlap. Embrace this:

For the DSLR video shooters out there, you’ve probably learned a thing or two about photography whilst you’ve been at it. You may have tried out long exposure and timelapse photography out of curiosity, the latter of which can certainly add an interesting element to your videos. Much of this may be a result of simple trial and error until you get pleasing results (this is certainly how I used to do it), however using a light meter can help you to reduce this method and once again save you time. What’s more, you could go further down the photography route later on and so having a greater understanding of exposure and light now could actually make you more employable in the future.


dog 35mm film

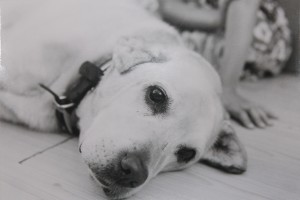
This photo of the old family dog ‘Dolly’ was taken on my old pentax 35mm film camera. Although it’s a lovely photo, if I had taken a reading off of her fur rather than relying on the inbuilt meter to average it out then it wouldn’t have appeared slightly over exposed, as being a golden lab her fur was actually a shade darker.

6. You open up the possibility of shooting on film:

Ever had that burning desire to go old school? We all have. With Kodak’s recent announcement of a new (yes, new!) Super 8 film camera you may just get tempted further into experimenting with film.

Now, many 35mm stills cameras have inbuilt spot meters, as do super 8 cameras, however, once again they may not always be the best option for you, especially if these meters calculate an exposure based on averages. Of course with digital cameras you can readjust your exposure and snap again but with rolls of film this can be an expensive thing to do so you have to be much more conservative with your shots. Taking proper exposure readings will eliminate the need for guess work and ensure you become comfortable with the format.

And finally..

7. You look like you know what you’re doing:

In other words, you look like a pro. That’s a good thing, right? Oh, and you can give accurate orders to an assistant (this is invaluable)!

So, taking these points into consideration, what kind of video shooters could benefit from using a light meter?

I believe the answer is anyone who wants or needs to light their productions to a high standard. This includes those who work in (but is certainly not limited to) commercials, drama, green screen and stills photography. Aspiring DOPs certainly need one, hence why I got one. For conferences, weddings, run and gun documentaries and corporate videos, you probably won’t need one. In these instances you can simply rely on your camera’s exposure aids and you won’t have to fork out for an expensive item that may just end up gathering dust.

At the end of the day the decision of whether you need a light meter or not is down to you and it all depends on what you shoot and/or what you want to shoot. Light meters aren’t the cheapest tools out there so, as with everything else, only get one if you really need it. If you decide that you do need one however, it could be one of the most important investments you’ll ever make in your video career.

If you would like to find out more about lighting check out this article on why good lighting can sometimes be more important than the camera and how a cheap reflector could be your most important lighting accessory (after the light meter of course!) .

Video Production Companies London

How to choose the right camera for the job

The C100's form factor and weight made it the perfect choice on a recent trip to Gibraltar

The C100’s form factor and weight made it the perfect choice for a day trip to Gibraltar

I’m terrible at making decisions sometimes. When presented with a multitude of options for anything in life it’s so easy to spend too much time overthinking which options to take that you end up wasting unforgivable amounts of time being indecisive and not actually getting anything done. The process of deciding on a camera to use is one of those tasks that I, and I’m sure many others in this field, have been guilty of in the past for spending far too long on. Many hours can be lost to Youtube comparison videos and the forums if you’re not careful. Sounding familiar? There are so many options available to us that it’s understandable why it would take so long to decide, but time is money after all and we’ll get left behind if we ‘oom’ and ‘ahh’ for too long.

And the award for most expensive wedding video ever goes to..

Lets face it – all of us techies would love to have the latest and greatest cameras for all of our projects. Wouldn’t it be great if we could shoot in 4K or 6K (or even greater) every time? Having the ability to shoot super slow motion on a full frame sensor with internal ND in a lightweight body would be pretty amazing right? Why would anyone want you shooting for them if you don’t have the most up to date technology possible?

We’d better stop dreaming I’m afraid.

Not to rain on the parade or anything but the fact of the matter is we can’t always have the most advanced technology every time. Most of the time this is down to money, but even if you had all of the money in the world to buy however many cameras you’d like, you’d probably reach the same conclusion as me eventually:

No camera is perfect. But, for each job there is a perfect camera. 

Think to yourself what your favourite film is. Why is it your favourite film? Did the choice of camera have anything to do with it?

Probably not.

You probably chose it for its story or maybe the acting. Perhaps you chose it for its cinematography, but remember the camera only did half the work. There was a person operating that camera and they would’ve probably made a conscious decision as to why that camera was the tool for the job in their current situation.

The right camera for the job

It’s very easy to get into the gear mindset and only think specs, but really if you want to be taken seriously as a professional then think of the equipment as merely tools. Cameras are obviously much more exciting than other tools in other industries, but realistically that’s what they are.  You are there to do a job and they are there to help you do that. The camera manufacturers want us to think differently, but then they want our hard earned cash! The key is finding the camera that will help you do your job, whatever it may be, as efficiently and effectively as possible whether you are buying or hiring.

So what is your situation? Do you have a short term brief to meet or a long term investment to consider? If you are stuck choosing a camera, here are some factors to consider before your dreaming becomes a money losing opportunity:

  • Price

The most obvious thing to consider. As with any other product the more features a camera has, the dearer it will be, whether you’re buying or hiring. Set yourself a budget.

  • Return on investment 

If you’re buying it’s sensible to think about how long it will take (or – gulp – if) you’ll make a return on your investment. We’d all like an Arri Alexa, but do we all earn that much in a year? Similarly if you’re shooting on a long project, would it make sense to hire a camera for that period when you could actually save money in the long run by buying?

  • Accessories

What do you actually need to make your camera perform how you want it to? Does it work straight out of the box or are there other bits required? Do these additional items cost much or take long to set up? Will these accessories remain useful if you decide to upgrade further down the line? Have you thought about which lenses you’re going to use? (that’s an entirely different subject in itself)

  • Target audience

Crucial, this one. What do you actually shoot? What are your clients asking for? Do you want to move into shooting something different? An Arri Alexa is probably going to be a bit overwhelming for talking heads!

  • Workflow

How quickly do your clients need their video? Do you need to shoot with edit friendly codecs for speed? Or do you require something more efficient for storage? Can your editing system handle 4K or do you plan to upgrade in the future? Do you need flexibility in the grade?

  • Image

It would be lovely to not have to worry about this but unfortunately in the world of business first impressions are made very quickly and this can mean the difference between landing a job or not. Whilst this is mostly attributed to personality, punctuality and presentation, the same can also be applied to the equipment you use. If your clients think you’re using cheap equipment are they likely to pay top dollar? If you shoot on a DSLR have you ever had someone ask you ‘Are you doing stills?’. What impression do you want to leave?

  • Style

OK, so we’re allowed to have a little bit of fun while we’re selecting our tools. Every camera out there has a distinct look and processes colours and skin tone slightly differently from the next. You might just simply prefer the look of one over the other, regardless of specs. Try some cameras out and see what you like. Are you Canon or Sony? Black Magic or Red?

Sony or Canon?

Are you Sony or Canon?

As you can see there is a lot to consider when choosing a camera and we would all want to know that we are making the right choice. Lets look at some examples, in this case some up to date 4K cameras, and think about when they could be used as effective tools and when they may just be a big fat waste of money:

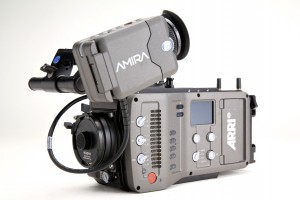
Arri Amira

arri amiraEveryone knows that Arri is king when it comes to cameras, as was evident when cinematographer Roger Deakins commented that the Alexa was the first digital cinema camera to challenge 35mm film.

The Amira is essentially a slimmed down ‘documentary’ style version of the Alexa. With HD, 2K and 4K options, a range of Pro Res codecs, slow motion up to 200 fps, internal ND, interchangeable lenses and huge dynamic range, this camera really has everything I would love to have in a camera. Most importantly, the images it produces are superb. I mean they would have to be as this camera retails at over £20,000. Would probably be hiring this one me thinks.

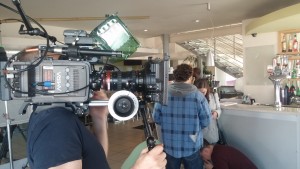
20151020_093951

I was fortunate enough to spend some time recently with the Amira. An incredible camera but with the weight of accessories you might think twice about shooting on it entirely handheld.

Best for:

  • Broadcast and high end drama, documentary, commercial etc.

Worst for:

  • Event work and majority of online output (impractical and uneconomical)


Black Magic Cinema Camera

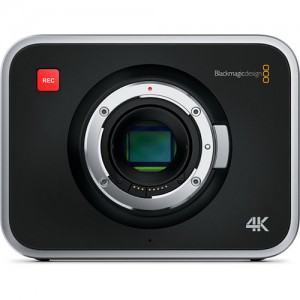
blackmagic_design_blackmagic_production_camera_4k_964119From my experience Black Magic seem to be a bit like marmite. Most people seem to either love them or hate them – there’s no in between. Why’s that? To start with, the specs for their production camera are very good with lots of frame rate options, huge dynamic range and popular lens mount options all within a small body. What’s more it comes at an unbelievable price for a 4K camera at just over £2000 currently. Where it falls short however is in its battery life, impractical screen and ergonomics. It sounds tempting but if you decide to invest in some accessories for it then suddenly it’s not so cheap.

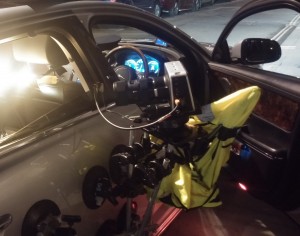
BMPC: Ideal size and weight for a car rig.

BMPC: The ideal size and weight for a car rig.

Best for:

  • Low budget drama, commercials and music videos or 4K on a budget

Worst for:

  • Anytime you have to shoot quickly, as a lone shooter or in low light, i.e. documentaries & travel (impractical)

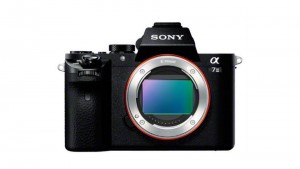
Sony A7S mkii

sony a7s iiThe A7S took the DSLR world by storm last year mostly due to its incredible low light capabilities attributed to its full frame sensor and it’s affordable price tag. Now the mkii is here and whereas previously you could only record 4K footage to an external recorder this new version offers internal 4K recording as well as some other nice features including frame rates up to 120fps and several variations of S-Log for greater dynamic range in the grade. At £2500 it is certainly an affordable 4K camera, but it may not be for everyone. As a DSLR it still lacks some features associated with professional video cameras including XLR inputs and is limited to recording no longer than 30 minutes. Its battery life is also not great and the Sony E mount offers far fewer lens options than EF or PL for example. If you decide to invest in accessories, then once again, it may not actually seem that cheap after all.

Best for:

  • Travel

Worst for:

  • Conferences, weddings and other long recordings (impractical)

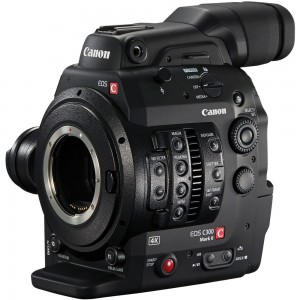
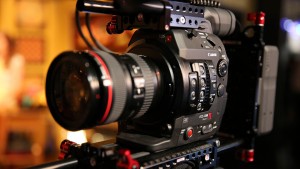
C300 mkii 

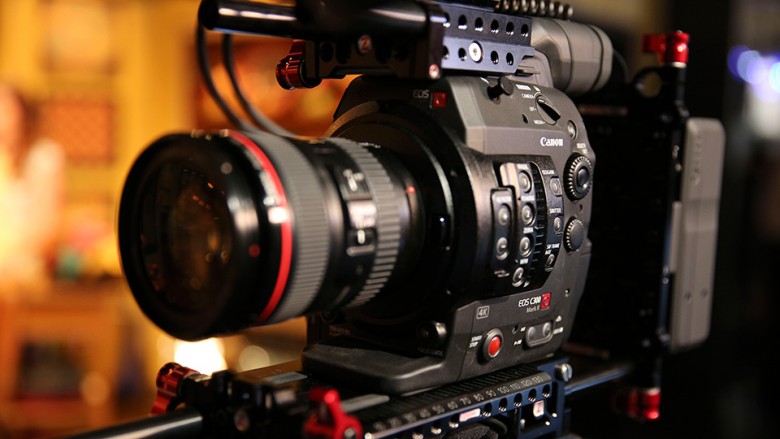
canon_0635c002_eos_c300_mark_ii_1134579

A recent offering from Canon, the C300 mkii builds upon the success of the original C300 which became a widely recognised video production workhorse. The original camera was popular for broadcast, news gathering and corporate work and the C300 mkii looks set to improve on this build with new codecs and frame rates on offer, 4K recording, inbuilt ND, popular lens mount options and a form factor that makes it ideal for shooting as a single operator. But with only being able to shoot 4K at 30p, a heavier build than the previous model and a price tag far higher than the spec-tacular Sony FS7 (which is in the same league but does offer slow motion in 4K) this camera may be too much for some at £13500.

Best for:

  • Broadcast and online (anything that requires a single operator)

Worst for:

  • 4K slow motion requirements (non existent)
Video Production Companies London

The original C300 has dropped in price substantially since the mark ii release. Great if you don’t need 4K.

These are just a few examples to get you thinking and of course these are my own opinions, but as you can see it’s a bit of a minefield out there. There are so many factors to consider and what one person needs in a camera may be unnecessary for another. It also doesn’t help that new cameras are being thrown at us left, right and centre all the time and the old models are becoming obsolete quicker than ever (which hurts us financially for sure!). The plus side of this camera boom however is there are so many options available that there is something for every budget, whether you shoot HD or 4K.

Get what you need and concentrate on producing high quality work – remember it’s not just about the equipment but the people and the creativity behind it.

Side by Side (the movie)

This looks great, It’s something every director, DOP and young film maker has been wondering for ages.. “What do talented film makers think of the digital change?”

“SIDE BY SIDE, a new documentary produced by Keanu Reeves, takes an in-depth look at this revolution. Through interviews with directors, cinematographers, film students, producers, technologists, editors, and exhibitors, SIDE BY SIDE examines all aspects of filmmaking — from capture to edit, visual effects to color correction, distribution to archive. At this moment when digital and photochemical filmmaking coexist, SIDE BY SIDE explores what has been gained, what is lost, and what the future might bring.

Featuring:
James Cameron
David Fincher
David Lynch
Robert Rodriguez
Martin Scorsese
Steven Soderbergh

We have spoken to Duke of Yorks picture house (in Brighton) to see if they will play it, but are still waiting for a reply.

This was posted on the ‘Side by Side’ https://www.facebook.com/sidebysidethemovie facebook page:

“SIDE BY SIDE premieres in London at BFI Southbank on December 6th at 20:30. Public booking begins November 13th. Please don’t call their box office until then.”

for more information on the ‘side by side’ movie check out their site here http://sidebysidethemovie.com/

Before you go..
Download our free ebook

Mustard-Education-Video-ebook

7 Steps:
Make your school’s video
content pay for itself

  • How to use your new video to attract attention and get the results it deserves
  • How the most successful independent schools are getting all the new enrolments
  • The techniques that will give you a clear, predictable return on your video investment
  • How to track and record ROI to prove your video strategy’s working