Tag: filmmaking

Why, when and how to use a clapperboard

“Lights, camera..action!”

This is probably the most well known phrase associated with Hollywood and film making.

If you’ve ever watched those little behind the scenes extras on DVDs you’ll have probably seen at some point a crew member using a clapperboard. Standing in front of the camera before it rolls, shouting out some random numbers and letters before hitting the sticks together and preceding to hurry out of shot immediately afterwards. Have you ever wondered what the point of this little device is? If so, then look no further.

Clapperboards are pretty fun things and they make fantastic decorations (especially if a production or director’s name has been inscribed on it!) but they are actually very important tools in the film making process. Understanding why we use them, when to use them and how you should be using them can not only help you act professionally, but potentially save you time and money, depending on your production

clapperboard close up

Clapperboards give the editor lots of information about the production which can assist in navigating large amounts of footage.

Why do we use them?

Lets turn back the clock to an age where 35mm and 16mm film were the standards for most people making movies. When the first ‘talkies’ were released way back in the 1920s, that is films that featured synchronized picture and sound, the sound was not recorded onto the film but separately (using a sound on disc system, recording to wax records). Early film cameras were also very noisy which contributed to the difficulty of recording live sound. Fast forward to the present day and in the 21st century on movie sets the sound is still recorded separately, albeit to designated sound recorders, rather than straight into camera. The primary purpose of the clapper board back in the early days and in the present is the same; to help sync up the visuals and the sound in the cutting room.

When do we use them?   

You may be thinking that in this day and age, why are we still recording sound and visuals separately? Isn’t the technology good enough to record both in one? There are actually many reasons why we still record separately. Firstly, being able to separate the camera operator and the boom operator means that the camera isn’t restricted and is free to move however the director wishes. The sound recordist and sound mixer are also free to record from multiple sources; using radio mics on each of the actors and/or condenser mics for room ambience for example. Furthermore, designated sound recorders are manufactured to record the cleanest sounding audio possible, whereas most cameras aren’t designed with this in mind.

So, we use clapper boards whenever the highest quality audio is required and when the situation allows.

using clapperboard

Tip: If clapping close to an actor it is good etiquette to do a quiet clap for the sake of their eardrums!

How do we use them?

On feature films, the 2nd Assistant Camera is responsible for the clapperboard. On a smaller production a camera assistant or even a runner could be responsible for this.

Every single scene, slate (another word for shot), take and roll is written onto the board to signify the part of the production that is being captured. Sometimes audio clip information might be included too. The production company, director and cinematographer is also written on the board along with other important information such as the date, the frame rate of the camera for that particular shot, the shutter speed or angle, scene information (whether it is day or night, interior or exterior) and finally, whether sound is being recorded and synced or if there’s no sound (mos).

Slating scenes accurately is crucial so syncing up the footage with the sound in post is a smooth process. Added to this, having visual logs for every shot allows the editor to sift through rushes quickly, knowing exactly which point of the film he or she is at, rather than having to watch or listen to every take in full. For most scenes a loud clap is required to create a noticeable spike in the audio levels, making syncing a breeze.

What kinds of clapperboards are available?

Make no mistake, there is such a thing as a professional clapperboard. Although you can find cheap ones in fancy dress shops or on eBay, these are not built to withstand the daily rigors of set life. From inexpensive chalk boards to fully digital acrylic boards with inbuilt timecode, there are many options available. Boards with timecode allow both the camera and sound departments to be perfectly synced all the way through production. You can even sync footage using an iPad with this handy app (but it’s not quite the same in my opinion!).

If you are looking to purchase a clapper board in the UK then I recommend these guys who offer a wide range of boards to suit various budgets. It’s where I got my first one and she’s still going strong!
Sometimes it's good to have options

Sometimes you have to record straight into camera, and that’s OK (although some cameras are better than others for this)

As with all tools, there is a time and a place.

Make no mistake, there are certain situations where a clapperboard is not essential. Sometimes you have no choice but to record sound directly into camera (events, video journalism, documentaries etc.) due to time, budget & personnel restraints. In some situations the effort required to record sound separately and sync it up afterwards actually gives you more work with little noticeable gain, costing you time and money. Decide carefully if a board is for you and how often you may use it.


An example of  a typical slating process on set when sound is being recorded:

1st Assistant Director: OK, silence please. We’re going for a take. Turnover.

Sound mixer: Sound is rolling!

Camera operator: Camera speed!

2nd AC: Scene 41, slate 6A, take 1, mark.

[2nd AC claps then leaves shot]

Camera operator: Set.

1st Assistant Director/Director: Background action! And..action!

Slating shots that have no sound

For shots without sound the 2nd AC would highlight ‘mos’ (motor only sync) on the clapperboard and when slating would put their hand in between the sticks, hold it in shot and not clap.

Syncing at the end of a take (end boarding)

For those moments when syncing at the start of the take isn’t possible then the 2nd AC will clap at the end of the take, turn the board upside down and add ‘on the end’ after they’ve marked it.


So there you have it. Hopefully you’ve found this information useful so that when you’re next armed with a clapperboard you’ll know exactly what to do. Now as you return to creating great work, you might just find yourself being a little more efficient. Happy shooting!


Light meters – do we need them for video?

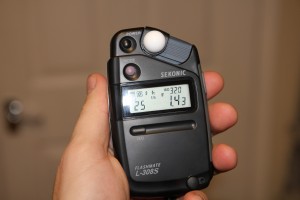
It was my birthday earlier this week and one of the presents I received from my family was a light meter – a Sekonic Flashmate L-308s to be exact. This little gizmo is hardly the most glamorous gadget in the arsenal of video gear and probably nowhere near the top of most camera peoples’ wishlists, but nevertheless I decided that it was time to get one. Now I shoot quite a lot of video and you may be wondering why I would ever need a light meter when most video cameras have histograms, wave forms, zebras and other exposure aids built in. It’s perfectly valid to question why anyone would want to spend more money on an item that is, in theory, debatable as to whether it is really needed in these modern times.

In this digital age and with the rapid advancement of technology has the light meter become more of a relic from a bygone era rather than an essential video making tool? Do photographers even need to use them anymore now that most shoot digital? Do we really need light meters for video?

The short answer is yes. But it’s not as simple as that. Depending on what you shoot, the answer may actually be no. To decide if you do need a light meter or not it’s worth considering the reasons why one might have one in their kit bag. You may be surprised at how many reasons there are:

sekonic light meter

Sekonic – a widely adopted brand of light meters

1. To get the most accurate exposure:

First and foremost and the most obvious reason for owning one. I’m not discounting inbuilt light meters in digital cameras but the truth is a quality light meter will always be the most accurate way to measure exposure because that is their primary purpose. Inbuilt light meters usually feature modes that rely on averaging the exposure by taking several readings across the frame. Using an averaging mode can sometimes result in the camera been tricked into the wrong exposure because it averages the whole scene rather than taking a reading of the subject you are focusing on, meaning your subject could end up over or under exposed. Using a light meter here can allow you to expose the correct area of the frame first time round.

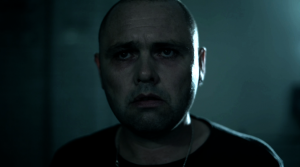
To control the highlight in this image a flag was held partially in front of the light source so it didn't wrap around the face too much.

The back light here was deliberately over exposed so that it was unrecoverable in post but if I wanted to I could have measured it so it was specifically 1 or 2 stops over the rest of his face.

2. It is easier to control your contrast:

Once you have established optimum exposure of your subject, a light meter can be used to balance the other areas of the frame to help create the look your production desires. For instance, you may want everything to be flat and even for a corporate video or high contrast and moody for drama. You could always judge by eye but knowing exactly how many stops over or under areas of your image are you can have confidence knowing that you’re being accurate. What’s more, if you know the dynamic range of your camera you can expose your images in a way that lets you have a greater degree of flexibility during colour grading if you want it.

Can you rely on the natural light alone?

3. You can have a more efficient location recce:

When you visit a location how do you know what equipment to bring if you don’t know how good the natural light really is? Our eyes can be deceiving and lead us into thinking the natural light can do all the work but really the only way to be fully prepared is to measure that light and then make the decision.


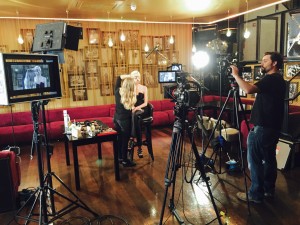
talent and lighting

Metering will improve your efficiency in setting up.

4. You can light a scene before the talent arrives (and quicker):

This is a very important point. If we could only light when the talent (or a stand in) was in shot we would never get anything done. Of course, once the talent is in the frame you may want to make some small adjustments but being able to set the exposure beforehand will help save you and everybody else’s time and money. Adding to this, if you have to run back and forth between adjusting a light and viewing the histogram or waveform this can be quite time consuming.


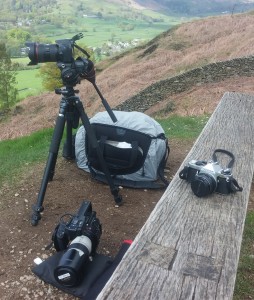
which camera?

It doesn’t matter which camera you decide to use, a light meter could assist you with exposure for any model that lets you set exposure manually

5. Video & photography skills often overlap. Embrace this:

For the DSLR video shooters out there, you’ve probably learned a thing or two about photography whilst you’ve been at it. You may have tried out long exposure and timelapse photography out of curiosity, the latter of which can certainly add an interesting element to your videos. Much of this may be a result of simple trial and error until you get pleasing results (this is certainly how I used to do it), however using a light meter can help you to reduce this method and once again save you time. What’s more, you could go further down the photography route later on and so having a greater understanding of exposure and light now could actually make you more employable in the future.


dog 35mm film

This photo of the old family dog ‘Dolly’ was taken on my old pentax 35mm film camera. Although it’s a lovely photo, if I had taken a reading off of her fur rather than relying on the inbuilt meter to average it out then it wouldn’t have appeared slightly over exposed, as being a golden lab her fur was actually a shade darker.

6. You open up the possibility of shooting on film:

Ever had that burning desire to go old school? We all have. With Kodak’s recent announcement of a new (yes, new!) Super 8 film camera you may just get tempted further into experimenting with film.

Now, many 35mm stills cameras have inbuilt spot meters, as do super 8 cameras, however, once again they may not always be the best option for you, especially if these meters calculate an exposure based on averages. Of course with digital cameras you can readjust your exposure and snap again but with rolls of film this can be an expensive thing to do so you have to be much more conservative with your shots. Taking proper exposure readings will eliminate the need for guess work and ensure you become comfortable with the format.

And finally..

7. You look like you know what you’re doing:

In other words, you look like a pro. That’s a good thing, right? Oh, and you can give accurate orders to an assistant (this is invaluable)!

So, taking these points into consideration, what kind of video shooters could benefit from using a light meter?

I believe the answer is anyone who wants or needs to light their productions to a high standard. This includes those who work in (but is certainly not limited to) commercials, drama, green screen and stills photography. Aspiring DOPs certainly need one, hence why I got one. For conferences, weddings, run and gun documentaries and corporate videos, you probably won’t need one. In these instances you can simply rely on your camera’s exposure aids and you won’t have to fork out for an expensive item that may just end up gathering dust.

At the end of the day the decision of whether you need a light meter or not is down to you and it all depends on what you shoot and/or what you want to shoot. Light meters aren’t the cheapest tools out there so, as with everything else, only get one if you really need it. If you decide that you do need one however, it could be one of the most important investments you’ll ever make in your video career.

If you would like to find out more about lighting check out this article on why good lighting can sometimes be more important than the camera and how a cheap reflector could be your most important lighting accessory (after the light meter of course!) .

12 stocking filler ideas for filmmakers

Every Christmas I’m told that I’m difficult to buy for (usually by the missus) and that I’m fussy and/or everything I want is expensive. Well, yes the A7S mk ii is expensive, I explain, but it really is such good value for money because..*rambles on about techie stuff again*

Filmmaking and video production, whether just a hobby or your career can be an expensive thing to get sucked into, however there are so many smaller, less expensive items that are so incredibly useful that might not necessarily be at the top of our shopping lists, yet when we get them we wonder how we ever survived without them. So to all the partners and families of the filmmakers and techies out there, here are some big hints for stocking filler ideas – 12 to be exact – one for each day of Christmas. Some are practical, some are a bit more fun. Now you’ll never be stuck for prezzie ideas ever again!


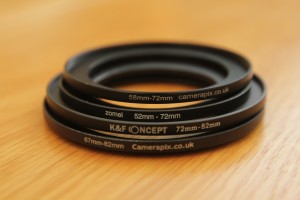
  1. Step up and step down rings
IMG_7048

Tip: Make sure you buy the filter the right way round. The first number will be the thread size of the lens it attaches to and the second number will be the thread size for your filter.

Nothing is more annoying as a camera operator than being out on location setting up the perfect shot when you decide you need to use a filter but it doesn’t fit the lens you’re using. Step up and step down rings allow camera ops and photographers to adapt their filters for use on other lenses with a different thread size. It’s a much cheaper option to buy these little rings than buying the filters a second time. The trick to this though is knowing what size filters and lenses the person you’re buying for has, so a bit of investigative work is needed here!


Where to find them: Amazon, eBay

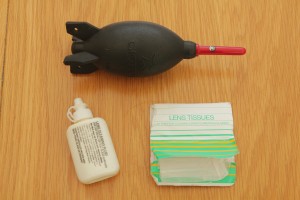
2. Camera cleaning accessories

camera cleaning kit

Tip: Camera cleaning accessories often come in kits

Inexpensive yet invaluable, having the means to clean a lens out in the field is essential, no matter if it’s a camcorder or DSLR. Rain, dust and fingerprints all provide unwanted artifacts and blemishes in images and every shooter should be prepared.

There are several options here for the buyer including lens pens, lens tissues and cleaning fluid and blowers. Essential items for your film making friend that won’t break the bank.

Where to find them: Camera stores, Amazon, eBay

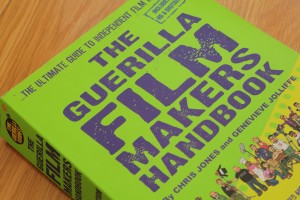
3. The Guerilla Filmmakers Handbook

Guerilla filmmakers handbook

Tip: This book also includes forms, documents and software on a CD, making it exceptional value for money.

If the person in mind is serious about film making and hasn’t already got this book then let’s just say you’ll be doing them a big favour. Packed full of interviews and information about pretty much every role in the film industry from pre production to exhibition, this book is a goldmine for tips and invaluable advice for those looking to make independent film.

Where to find it: Waterstones, Amazon


Love film

Tip: Love Film and Amazon Prime Instant Video claim to have over 70,000 titles available, old and new.

4. Love Film or Amazon Prime Instant Video gift subscription

With probably the biggest selection of films out there to rent, treat your loved one to a bit of film catch up. If they’re planning their next film then believe it or not, this would actually help them do some work and with options of 3 month, 6 month as well as 12 month subscriptions it doesn’t have to cost the earth.

Where to find it: Amazon


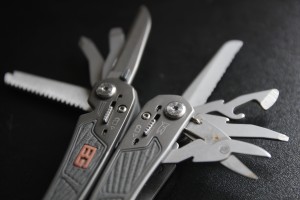
5. Multi tool

multitool

Tip: If you can’t afford a Leatherman then have no fear as there are some great multi tools out there at very affordable prices.

Not just useful at home but invaluable on a film set. Whether they need to cut their gels or change camera plates a multi tool is so useful that it doesn’t just make your loved ones’ job easier but makes them look more professional too (plus if you live with them, they might help out with DIY more often!). A perfect practical stocking filler.

Where to find it: DIY stores, Amazon


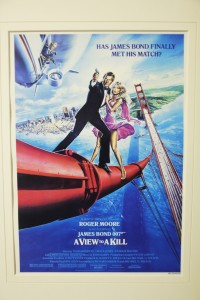
bond poster

Tip: If you decide to get a poster, make it a goodun’!

6. Film posters

Everybody loves a poster of their favourite film and your loved one is no exception. Just hope that their tastes aren’t too obscure! If you’re feeling extra nice you could always get it framed too. A perfect present for home or office.

Where to find it: Online, HMV


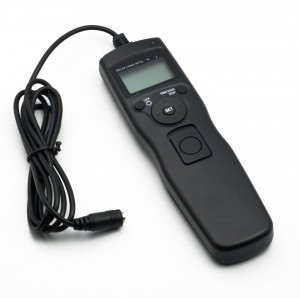
7. Intervalometer

intervalometer

Tip: Of course you’ll get the right one so it fits the lucky person’s camera, yeah? Do a little homework first.

Intervalometers or remote switches can open up a DSLR to the wonders of timelapse photography. By being able to set intervals between shots and not shake the camera when taking stills you’ll be giving them a whole new range of creative opportunities. Branded ones can be expensive but there are a host of third party offerings online at much friendlier prices.

Where to find it: Camera stores, Amazon


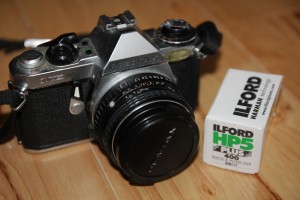
8. Roll of film

Pentax and film

Tip: Check which format they shoot on first. 35mm and medium format film are most common.

Yes, some of us still shoot on film. Not because we’re not up to date with technology, but because we love the aesthetics and the grain that film gives us. It’s pretty expensive to shoot everything on film nowadays in this digital landscape, but a role of 35mm film only actually costs a few pounds and can usually allow for 24-36 photos. Save them a few quid, and if you’re feeling extra generous look out for online deals where processing is included.

Enough to show you care, not too much to make you poor, but if your loved one shoots analogue they’ll be forever grateful.

Where to find it: Camera stores, Boots


9.  Subscription to a magazine

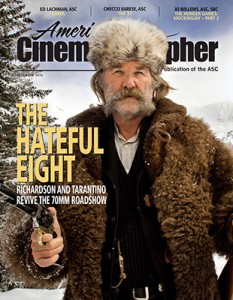
Tip: Hint hint, if anyone reading this knows me, I wouldn't mind this! Err, a tip..the ASC magazine does a greener digital edition too..

Tip: Hint hint, if anyone reading this knows me, I wouldn’t mind this! Err, a tip..the ASC magazine does a greener digital edition too..

Whether it be a trade journal or an amateur film making publication there are a host of magazines out there that would make a creative very happy indeed. Which one would suit your loved one best?

  • American Cinematographer (print & digital)
  • Videomaker
  • Sight and Sound
  • Total Film

(These are just a few examples)

Where to find it: A good old Google search (as with everything else really)


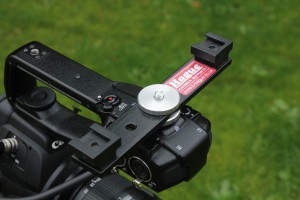
10. Multi hot shoe adapter

Tip: Adapters with 3 hot shoes are also available

Tip: Adapters with 3 hot shoes are also available

One hot shoe just isn’t enough. What’s a hot shoe I hear you ask? It’s a little slot on top of a camera where you attach accessories for your camera. The thing is, there are many incidents where a videographer or photographer might want to put on more than one item. A flash and a transmitter, or a light and a radio mic. I have no idea how I ever survived without this. Now, go help a brother out!

Where to find it: Amazon, camera stores


11. Grey/white balance card

grey white card

Tip: As with most things these cards come in sizes big and small.

Getting an exact exposure and perfect white balance should be the highest priority for any aspiring DOP or photographer. These cards are inexpensive, portable and scream professionalism. Buy these to brush up their skills and make them look good. A perfect little stocking filler.

Where to find it: Amazon, camera stores


12. Thermos flask

flask

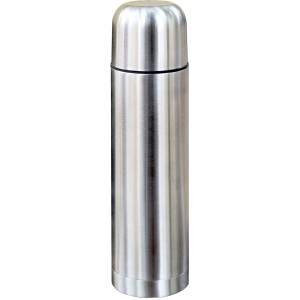
Film making often involves getting up at the crack of dawn, hanging around on location for hours on end and battling the elements. If your loved one loves their hot drinks then this is probably one of the best items you could buy them. Keep them going through those dark winter months and they’ll never forget how awesome you are!

Where to find it: Supermarkets, Google!


So there you have it, now that you have a few hints for stocking fillers go and get that Christmas shopping done!


Before you go..
Download our free ebook

Mustard-Education-Video-ebook

7 Steps:
Make your school’s video
content pay for itself

  • How to use your new video to attract attention and get the results it deserves
  • How the most successful independent schools are getting all the new enrolments
  • The techniques that will give you a clear, predictable return on your video investment
  • How to track and record ROI to prove your video strategy’s working