Tag: lighting

A beginners guide to lighting gels

Gels are used by cinematographers and videographers to balance the colour of light sources, adjust contrast and control shadows. It is the use of these gels that helps to create certain moods and looks to productions, whether that be low key drama or high key corporate video.

If you don’t know your ND from your CTB then read on as I introduce some of the most popular lighting gels and demonstrate how they may be used in your productions for creative effect.

CTB

CTB (not to be confused with CBT!) stands for colour temperature blue and is often referred to simply as ‘daylight’. It is used to convert tungsten balanced light sources such as traditional household bulbs and fresnels from 3200K to 5600K. It’s a common gel for balancing artificial light sources to daylight when the sun is acting as the key light in a scene.

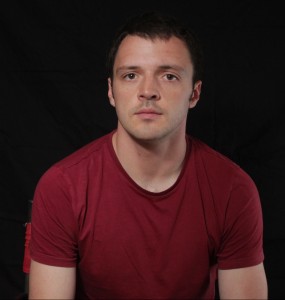
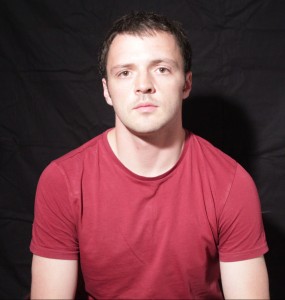
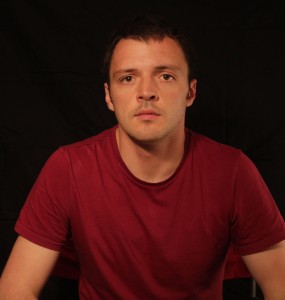
With our camera balanced to daylight and using a tungsten light source, our professional model looks like he should be in TOWIE..
5200K_FULL_DAYLIGHT_GEL

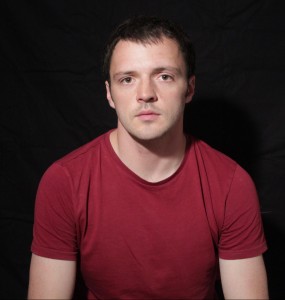
..so by applying FULL CTB the skin tone looks a bit more natural now.

5200K_HALF_DAYLIGHT_GEL

If your subject has a lighter skin tone or if your camera’s auto white balance reads around the 4500K mark (for some fluorescent lighting), you may want something in the middle between tungsten and daylight and HALF CTB may be your answer, converting tungsten sources to 4300K. In this shot the camera is still balanced to daylight.

  • CTO

Another popular colour correction gel is CTO which stands for colour temperature orange and is often simply referred to as ‘Tungsten’. It is used to convert daylight 5600K sources to 3200K, in line with the colour temperature of most traditional household lamps.
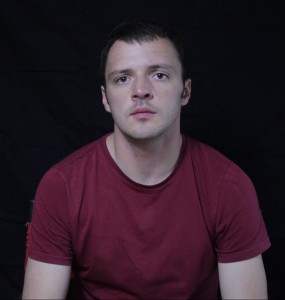
3200K_NO_TUNGSTEN_GEL

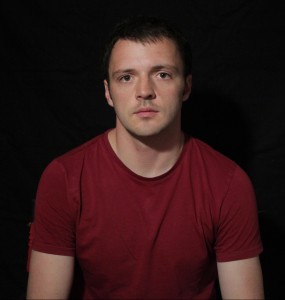
Using a daylight balanced LED light and with the camera balanced to tungsten, our image is looking a bit cold. But there is a use for this though; it is a popular method of simulating moonlight as well as shooting ‘day for night’.
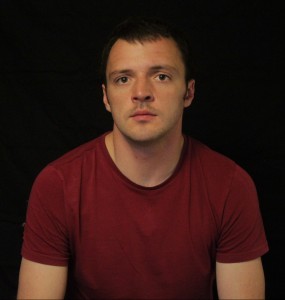
3200K_FULL_CTO_GEL

But if moonlight isn’t what you’re after, FULL CTO will return the skin tone back to a more natural colour.
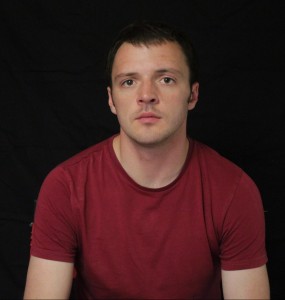
3200K_HALF_CTO_GEL

HALF CTO converts 5200K to 3800K, so a little cooler than FULL CTO but not too far off. With the light I’m using (dedolight ledzilla) and the model’s skin tone in this case HALF CTO actually looks a little nicer.

Both CTB and CTO also come in other strengths including QUARTER and EIGHTH, for those more subtle differences, but FULL and HALF are the most widely used.

  • ND

ND stands for neutral density and is used to reduce the amount of light without altering the colour. ND is often used on the camera in filter form but for lighting it can be invaluable in helping to control exposure and contrast. Using ND to reduce powerful light sources that do not have dimmers (or if you don’t want to change the colour temperature of the source through dimming) or stopping natural light from washing a scene out through covering windows with these gels, it is an incredibly useful tool.
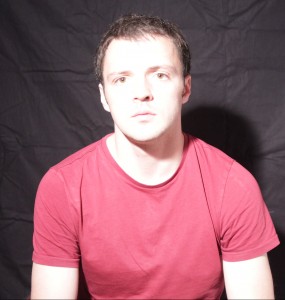
NO ND

Oh no, you can see that I forgot to iron my backdrop..so in this shot as you can see our model is looking a bit ghostly. Time to crack out the ND.

1 STOP ND

ND.3 reduces the light by 1 stop.

ND.6 reduces the light by 2 stops.

ND.6 reduces the light by 2 stops.

And ND.9 reduces the light by 3 stops.

And ND.9 reduces the light by 3 stops.

Wise words a gaffer once said to me, “you can never have enough ND!”

  • Diffusion

Diffusion is used to control the softness of shadows and the softer the source the less prominent the shadows will be. As hard lights have typically much higher output than soft lights, diffusion is key to softening these sources whilst utilising a strong beam.

There are so many different types of diffusion available and it can be difficult to know where to start so here are a few examples to give you an idea of the range available. At the end of the day it’s down to you to experiment with various types and find what you like.
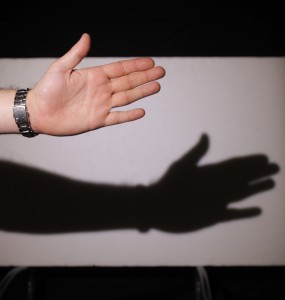
NO_DIFF

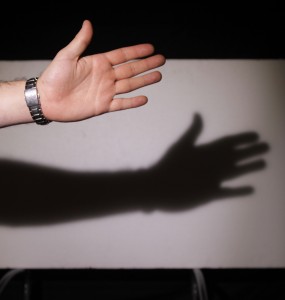
Our professional hand model is currently being lit with a hard LED source (Dedolight Ledzilla) and no diffusion.
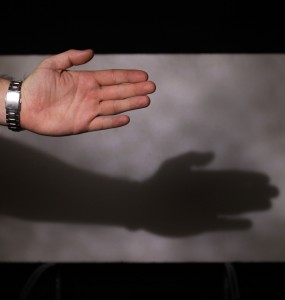
HAMPSHIRE_FROST

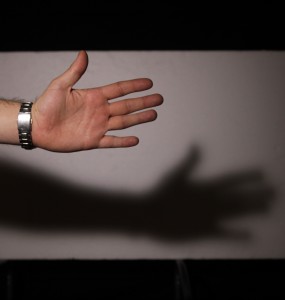
This diffusion used here is HAMPSHIRE FROST. Notice a subtle softening of the shadow.


HEAVY_DIFF

HEAVY DIFFUSION is being used here (and it’s easy to see why it got this name)

CLOTH1

I don’t actually know what this diffusion is called but it somehow found its way into my kit. A thicker, rougher sheet that is a little closer to greaseproof paper. As you can see it has a lovely texture to it and can add a bit of spice to a background.


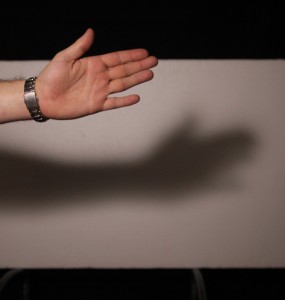
It’s important to note too that the further a piece of diffusion is away from a light source, the softer the shadows will be, as will be a slight reduction in overall output of the light. See the example below:
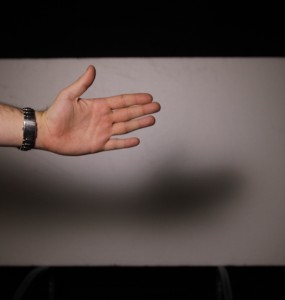
HALF DIFFUSION attached to the light..

HALF DIFFUSION attached to the light..

HALF_DIFF_FURTHER_AWAY

..and the HALF DIFFUSION moved away from the light source (closer to the subject). Notice how much softer the shadow is now.


  • “Party” gels

Not necessarily an official term but in this case I shall refer to most other coloured gels as ‘party gels’. Whilst these may not be as important for most shoots as the colour correction and other gels mentioned above, they can be used to create certain moods for your scenes whether they are used as key lights, backlights or kickers. There are an almost endless number of these gels to choose from but here are a couple of examples.
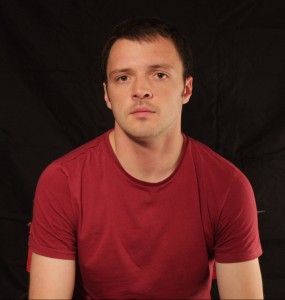
3200K_STEEL_GREEN

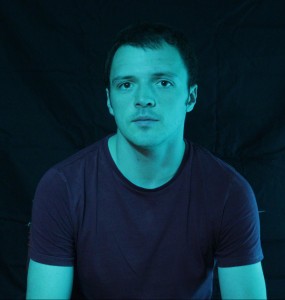
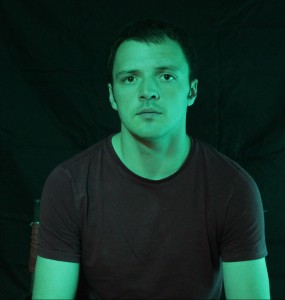
STEEL GREEN with the camera balanced to tungsten. Sci fi!

STEEL GREEN but with the camera balanced to daylight.

STEEL GREEN but with the camera balanced to daylight. Lord of the Rings or Matrix?


3200K_STRAW

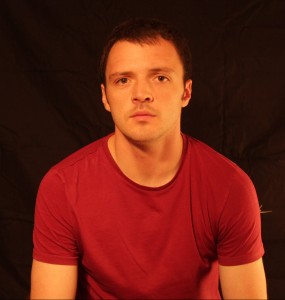
More subtle than the above, a STRAW lighting gel with the camera balanced to tungsten. A nice morning light look.

5600K_STRAW

A STRAW gel but with the camera balanced to daylight. I’m getting a CSI Miami vibe here.


So, which gels should you buy?

It all starts with the light source(s) that you’ll be using most. Their colour temperature, power, whether they are dimmable and how hard or soft they are will all determine the gels you need. Aspiring DOPs will probably accumulate gels over time as their portfolio grows, but a good place to start is with the simple colour correction gels (CTO and/or CTB) and some diffusion which are the bare bones for lighting anything professionally. Another thing, don’t always rely on kit hire companies to stock a wide range of gels!

Big D Jonny boy

Experimenting is key to finding lighting styles that will grab your audience’s attention.

Use of softbox fill Liquiproof

Part of the fun and the craft of being a DOP is finding lighting styles that fit your productions and consequently help you to create your own signature style. Experiment with gels and see which colour combinations work and which don’t. Get creative!

Whether you are new to lighting or not, the LEE filter comparison tool here is a fantastic resource to see the range of lighting gels available and help you make decisions on what to buy. LEE filters are widely considered the number one name for gels; heat proof, colour accurate and with a huge choice available, they are an essential investment if you’re an aspiring DOP.

Happy shooting!


P.S. This post would not have been possible without my trusty light meter. Here are a few reasons why every aspiring DOP simply must have one.

7 DIY lighting essentials for low budget filmmakers

So you’ve raised the finance for your project, chosen your camera, cast your actors..and you suddenly find that your budget has disappeared in a flash. Where did it all go? Film making can be a seriously expensive affair and sadly certain departments sometimes get neglected as a result. Lighting is one of these departments.

No matter how low your budget is, lighting should never be neglected if you want to create cinematic visuals to be remembered. In fact, here are a list of reasons why good lighting is so important. In this article however I’m going to identify 7 lighting essentials that don’t cost the earth but every low budget camera operator or DOP should be armed with. Sometimes you need to spend good money on kit and sometimes you don’t, but if you’re keen to increase production value economically then read on.

  • Gaffer Tape

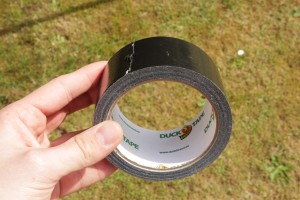
gaffer tapeA ridiculously obvious one but gaffer tape is something that should go with you on every shoot no matter how big or small your budget! It can save your life (in a creative emergency, I have yet to prove this medically!), whether it’s used to rig lights or modifiers onto unusually shaped objects or into areas that are inaccessible for light stands, gaffer tape really is essential. It can also be used to make DIY french flags to avoid lens flare and teamed up with some trusty cinefoil/blackwrap makes a perfectly functioning LCD cover for operating in bright sunlight. Trust me, don’t leave this behind!

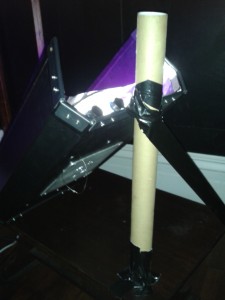
And the award for best DIY rig goes to..

And the award for best DIY rigging solution goes to..

One item you can't afford to be without is cinefoil. This, along with your gels is worth spending good money on.

Gaffer and cinefoil = budget french flag. Cinefoil is one item you can’t afford to be without on set. This, along with your gels is worth spending good money on.


  • Halogen work light

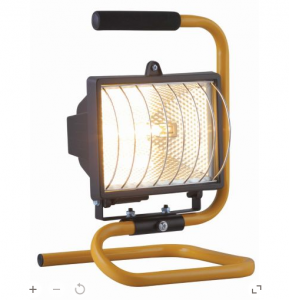
Revealing an indHalogen worklightustry secret here. Or maybe not. This item is ridiculously obvious and cheap but the likelihood is that most of us low budget filmmakers probably don’t use them..or at least not yet. If you pop down to your local B&Q you’ll find these useful halogen work lights. At about £10 each these little lights give out a fair amount of light considering their size and use tungsten balanced bulbs which means their colour temperature matches the expensive Arri equivalent. If you have the right colour correction gels then armed with a few of these you could in theory light your whole film.

Of course being cheap means that these little fixtures do have their drawbacks; short power leads, a lack of any way to control the spread of the light and the fact that they won’t attach to normal light stands are the main ones (because obviously film making isn’t what they were designed for) but, if you purchase one of these, and I recommend you get several, you could potentially fill decent sized spaces for little money. What’s more, their handles allow for easier rigging at height than some lights. With a bit of problem solving, and lets face it – that’s what film making mostly is, you’ll be able to find ways to rig, hide and control the output of these lights.

  • Polyboard & foamcore
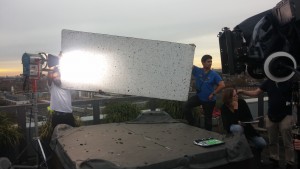
bounce board on roof

Polyboard is common even on the biggest of film sets

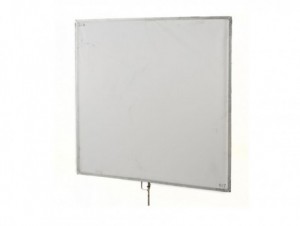
While you’re down at the DIY shop why don’t you pick up some of this too? Polyboard is a perfect and cheap way to bounce light in order to create flattering soft light and fill in shadows on your subject. It often comes in fairly large sizes and in various thicknesses and can be easily cut to size to meet your needs, or at least to fit in your car! What’s more, if you have any black paint lying around then paint one side and bob’s your uncle: you now have a large, lightweight flag to use for cutting light and creating negative fill. Two for the price of one (almost!).

foamcore flagIn addition to this your local craft shop will probably stock black and white foam core; both of which can be useful for smaller, more portable bounce boards and flags. Once again this is inexpensive, easy to cut to size and easy to rig. The only downside is any thin layers of card on these boards will be flammable, so be careful using them near hot light sources.


  • Spring clamps
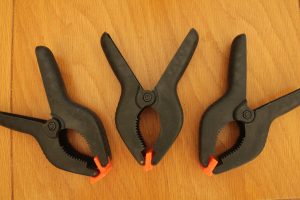
spring clamps

Top tip: buying multi packs on sites such as eBay can make these accessories even cheaper for you.

Cheap and cheerful, but where would I be without them? These large spring clamps are cheap, lightweight and a must have for anyone doing any sort of lighting. Use them to attach reflectors or boards to stands, flags and tarpaulins to backdrops and for making green screens taut. Do yourself a favour and get some now.

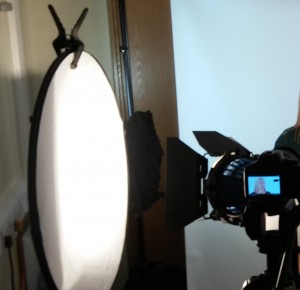
Diffuser reflector spring clamps

A quick way to hold up your reflector

spring clamp reflector


  • China ball lantern
china ball

A beautiful quality of light for certain applications.

China ball lanterns can create beautiful soft light for use in close ups and as practicals. Inexpensive and by using regular household bulbs, china lanterns are a cost effective option over the dearer branded soft fixtures and combinations offered by the likes of Arri and Chimera. They do have a specific use however, their main drawback being that regular 60W or similar household bulbs don’t give out huge amounts of light, at least not for cinema use. To the naked eye their light output is fine but on camera the lanterns reduce a bulb’s output a fair amount. Adding to this, their size and the fact that they’re made out of paper means significant fire hazards are present if too powerful bulbs are used, so you need to stick to the recommended wattage. For larger areas of soft light an Arri/Chimera combination is a much more suitable option which understandably you will need to pay for.

Despite their drawbacks if you’re able to find use for them still china ball lanterns can provide wonderful results. Rig them off C stands or mic stands, ensure you have long enough extension leads and you’re good to go. Watch out for that colour temperature though; some bulbs rate lower than 3200K (tungsten) so will appear warmer than you may like. Once again it pays to have a good selection of colour correction gels!

  • Tin foil & baking paper
tin foil

Tin foil: cheap as chips!

Who’d have thought that every day items around the home could help you in lighting your cinematic masterpieces? The highly reflective surface of tin foil can be used in the same way that the silver side of a reflector is used; to fill in shadows when a white surface isn’t cutting it or to create a bit of ‘pop’ to the image through introducing highlights. Attaching sheets of tin foil to your foam core boards (see above) or even just a sheet of plywood can give you another way of applying contrast quickly, cheaply and without having to hire anything!

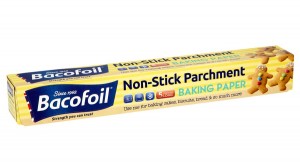
No product placement here..

No product placement here..

Baking/parchment paper is a good option for when you need to diffuse hard light sources to soften their shadows and reduce the contrast. It’s designed to withstand heat so is ideal for using with hot light sources without risk of burning. So if you’ve run out of diffusing gels and need a quick softening solution, go have a look in the kitchen cupboard or run to the shop!


  • Tarpaulin
tarpaulin night shoot

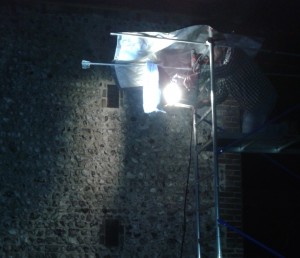
Protecting a 2K arri fresnel from the rain.

There are many uses for a tarpaulin, many of which may appear to have nothing to do with filming, however the long days on location and the unpredictability of the weather (especially in glorious England) mean that a tarpaulin lends itself to being pretty useful in general on set. For DOPs a tarpaulin can provide suitable protection to lights (and camera) from the rain and from dusty or wet terrain. More importantly, they can also be setup and rigged to act as huge flags, with a host of uses. From blocking out large windows in order to control interior lighting to providing a huge source of negative fill on location, tarpaulins are inexpensive, reusable and portable. If you decide to rig one up on location then make sure you remember your spring clamps! (see above)

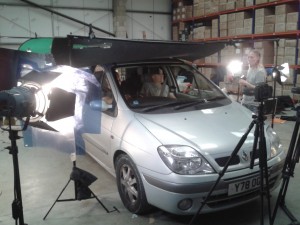
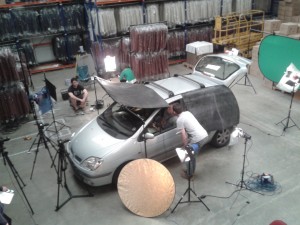
tarpaulin over windscreen

Flagging the windscreen of a car to eliminate reflections and any changes to ambient light levels.

These are just some of the useful lighting accessories that can be used in low budget film making. However, as you climb the ladder in your film career, you may find yourself using some of these items on the bigger budget productions too!

Remember that there are certain items you’ll need regardless of your budget; lighting gels and cinefoil are the big ones here. Don’t cut corners on your gels, buy the real thing (I recommend Lee filters) so you know you have high quality, accurate colours and so you can avoid setting anything alight. If your budget can stretch a little or if your professional image concerns you then get yourself a few 5 in 1 reflectors; you won’t regret it.

Hopefully you’ve found this helpful and if you have any suggestions of your own for DIY lighting do tell us in the comments!


Why a reflector is your most important lighting accessory

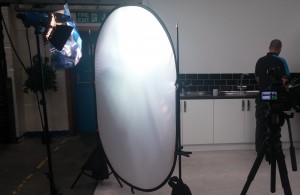
The 5 in 1 reflector: cheap and incredibly useful

Cheap, light and with so many uses, your 5 in 1 reflector is a lighting accessory that should accompany you on every shoot.

Lighting in video production is not just about flicking switches. When I was just starting out as a freelancer I was guilty of believing this; that lighting simply had to be turned on and that was that. I recently wrote about how lighting could actually be more important than the camera itself and that lighting can sometimes be deceptively simple but what should be noted here is the idea that the subject isn’t always referring to the lights themselves but to the modifiers as well. In fact, I’d say that half of lighting is actually modification. Flags, floppies, bounce, scrims, nets, diffusers..there seems to be so many different lighting accessories about that it’s hard to keep track of what they actually do. These items are all examples of lighting modifiers, however in this case I’d like to focus on the simple 5 in 1 reflector – a low cost, multi use modifier that really is an essential tool for any film maker.

But it’s just a reflector?

No it’s not. If you’re thinking that, you probably haven’t explored the many uses even the cheapest of 5 in 1 reflectors has to offer. Having 5 different sides allows you to do a lot in a variety of shooting situations whilst remaining portable and convenient.

Lets take a look at the different sides of a typical 5 in 1 reflector and how you might use them in your moving image productions:

White

Tip: If you need something bigger to bounce, polystyrene board is cheap, light and in your local DIY store

Tip: If you need something bigger to bounce, polystyrene board is cheap, light and available at your local DIY store

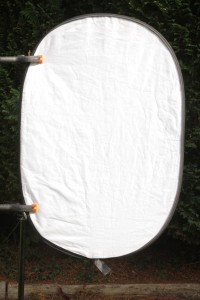
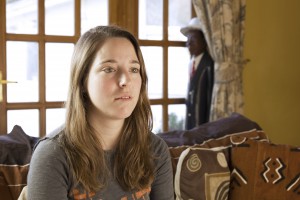
Any white reflective surface is often referred to as ‘bounce’, the reason being that a hard light is bounced off the surface and onto the subject to create a nice soft light with minimal shadows. Your hard light source could be a powerful tungsten lamp or the sun.

Soft light is commonly used in corporate environments

Look at the difference between a hard light shone directly at the subject (left) and a hard light bounced off a reflector (right)

Look at the difference between a hard light shone directly at the subject (left) and a hard light bounced off a reflector (right)


Bounced light can be used as the key light (main light source) when even lighting is required or as fill (to fill in shadows created by the key light) when a higher degree of contrast is needed. It is commonly used in all matter of video and film productions for a flattering image.

Black

Tip: If you need a flag to block out a large area such as a big window a tarpaulin is an effective solution.

From experience, you can never have enough flags.

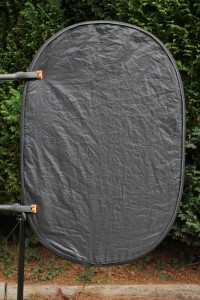
Your matte black surface is vital in situations where you want to cut out light. This could be to control exposure, shape light or even remove light from the image entirely. It is often referred to as ‘flagging’ or providing ‘negative fill’ and you would be surprised at the number of situations that you might find the need to do this.


For situations where your reflector might not be big enough a tarpaulin is a great way of flagging a large area such as a full window

For situations where your reflector might not be big enough a tarpaulin is a great way of flagging a large area such as a window.

Can't see your screen? A flag would be handy here..

Having difficulty viewing your LCD screen? A flag would be handy here..

The problem with powerful key lights is that it’s easy to lose control of them, in that light can get in some areas of the image that you don’t want it to. Some lights have barn door attachments which can help but this may not always be enough to control the spill. Simply holding up a flag can make all the difference. The other thing to consider is how long you are filming for and if natural light likely to change throughout your shoot. Flagging any uncontrollable light sources allows you to start from scratch and build your lighting design from the ground up, even allowing you to shoot night scenes during the day!

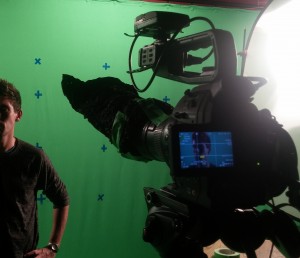
To control the highlight in this image a flag was held partially in front of the light source so it didn't wrap around the face too much.

Without a flag partially cutting the back light, the beam here would have over exposed half the actor’s face.

Diffuser

Tip: There are many different types of material that diffuse light in varying amounts. One popular and cheap method of diffusing large sources on low budget films is to use a shower curtain.

Tip: There are many different types of material that diffuse light in varying amounts. One popular and cheap method of diffusing large sources on low budget films is to use a shower curtain.

Sometimes you may not want to directly cut out light but soften it instead, so it creates more subtle shadows. Hard light sources such as direct sunlight can create strong shadows and too much contrast as a whole, in which case placing the diffuser between the light source and the subject can make it appear much less harsh. The surface of your diffuser may appear similar to the bounce but on closer inspection you’ll find it much more translucent.

lighting at kinetico cropped

Hard light shone through a diffuser is softened but without a huge reduction in overall output.

4X4-TRACE-FRAME-460x346

The diffuser is essentially a cheaper (and more portable) version of a trace frame.


By diffusing a hard light source you are able to soften the light but also keep the spread. Moving the diffuser further away from the light source will soften the shadows even further.

Tip: Another popular low budget method of creating higher contrast is to use tin foil.

Tip: Another popular low budget method of creating higher contrast is to use tin foil.

Silver

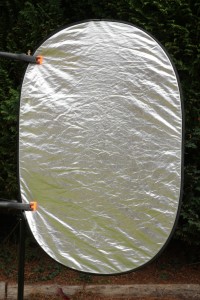
Silver is incredibly useful in creating contrast quickly, by making certain parts of the image ‘pop’ out from the rest. Whilst it must be used carefully to avoid blinding the subject, it has a surprising number of uses such as creating highlights (areas of the image that are deliberately over exposed for creative effect), filling in shadows and for creating texture (such as a rippling effect from light reflected off water).


Silver - a bit more kick to your fill than normal bounce.

It can provide a bit more kick to your fill than normal bounce.

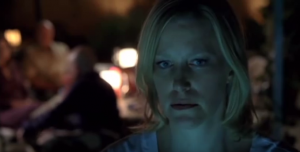
Silver can be used to create a rippling water or a 'glow from the TV' effect.

The uneven texture of silver means it can be used to create effects such as that of rippling water or a glow from the TV. Easiest to see in a moving image (yes, watching breaking bad counts as work!)


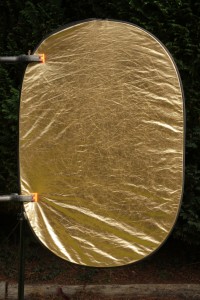
Tip: Although not as powerful as silver, gold can help increase the contrast in your image too.

Tip: Although not as powerful as silver, gold can help increase the contrast in your image too.

Gold!

Always believe in your..

Ahem.

In my opinion this is the least useful of the 5 for the moving image, but it still has some useful applications. Gold is mostly used for creating a warming sunset effect or for texture and can be particularly flattering in fashion and beauty films.

An up lighting effect for warmth.

A subtle up lighting effect for a bit of warmth.

So there you have it – your reflector has so many uses that it really is your most important lighting accessory – and I’ve only begun to touch the surface. Bouncing, diffusing and flagging each deserve their own articles but just knowing how you can start doing these modifications with your reflector will take you a step closer to raising your production values, and that’s whether you’re in a studio or on location and working in controlled settings or operating run and gun.

If you care about production values then there are really no excuses for leaving your reflector at home. In fact, once you start utilizing one you’ll probably want another (and if you need to google how to fold it back into its bag, that’s OK – we’re all guilty!).

Happy shooting!

5 tips for shooting better interviews

Interviewing: an essential skill in video production

Interviewing: an essential skill in video production

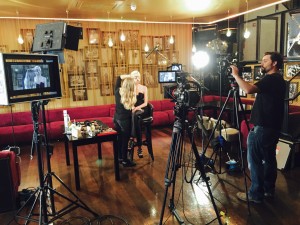
Here at flycreative we know a thing or two about filming interviews. Interviews are the heart of many video productions and most corporate, event and documentary shoots will at some point involve someone speaking to the camera in depth about a subject. Whether the topic is eCommerce or the plains of Nebraska, it is our job as video production professionals to capture and create engaging content, regardless of our knowledge of the subject at hand. Whilst the subject may change however, our approach does not and there are some key considerations to be made whenever an interview is approaching.

Being able to conduct an interview is an essential skill for any videographer or producer, but are your skills up to scratch? Here are 5 top tips for shooting better interviews:

1. Location, location, location!

As they say in business, it’s all about location, location, location. This is important aesthetically as well as practically. Here are some things to consider when deciding on a location:

  • Background – What is it? Does it portray your subject in a positive light? Are there any brands or logos you should be avoiding?
  • Lighting – Where is the best available light? Do you need or want to bring in your own?
  • Sound – Are you likely to be disturbed? Is there likely to be music or interference here?
  • Practicalities – Do you need permission to film here? Are you causing an inconvenience to the public? Is it safe to be here?

Reccie your location in advance if possible, whether that be a day before or 10 minutes before your client arrives. Any preparation time is useful and being prepared makes you look professional. If you can’t realistically reccie in advance then ask your client to send a couple of photos of the available space. The more you know in advance the more you will be able to select the right equipment for the job – there’s no point lugging around a full lighting kit if you only have 10 minutes with your subject. Food for thought.

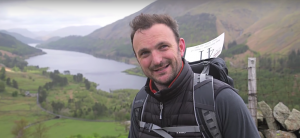
It was definitely worth the climb for this background.

Sometimes you just get lucky with a view.

2. Be considerate with your composition.

Make your subject and the frame look flattering. Always shoot at the height of your subject and ensure that their eye line is level. Use the rule of thirds to create a nice composition, allowing space for text if necessary and have your subject angled slightly away from the camera. If your subject is not a professional actor or presenter then you’ll probably find you’ll get superior results having them speak off camera.

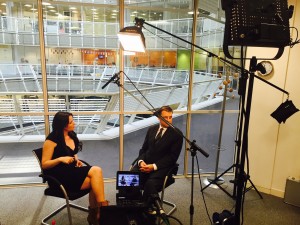
Office interview

Level, uncluttered and a suitable eye line. Bob’s your uncle.
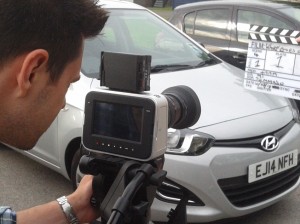
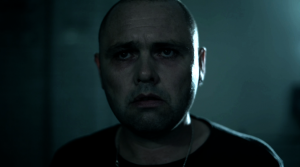
Think about your depth of field – lenses with faster apertures will give you shallower depth of field and if shooting outside you will need to use ND so you can stop down your lens and retain a nice bokeh. Don’t let your depth of field get too small however as some people can be quite animated and you’ll want them to stay consistently sharp. If you can, shoot with a high quality prime over a zoom lens for often             increased sharpness, faster apertures and nicer bokeh although there are some excellent zoom lenses out there too.
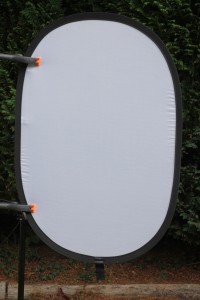
Finally if you have time, change your framing and conduct the interview again (this works best for shorter interviews and is of course irrelevant if you are shooting 4K where you have the option to pan and scan if your output is downscaled). Giving yourself the option of a medium shot and a close up gives you options in the edit and can really bump up the professionalism of the final product that little bit more.

3. Think about lighting and make time for it.

Good lighting can hide the fact that you may not have the latest hi tech camera and the results can make you look very professional indeed. Even minor lighting adjustments can make a huge difference to the final image:

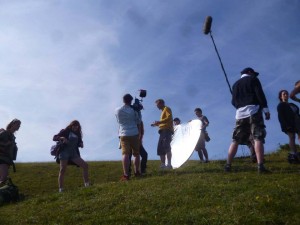
  • Daylight exteriors: On a sunny day where the lighting is high contrast, consider your subject’s position carefully in relation to where the sun is. Try to avoid flare and over exposure from shooting directly into the sun as well as having your subject squint into the sun! A 5 in 1 reflector can also be useful in many situations here.
  • Night time exteriors: Utilize any lighting fixtures at your disposal such as street lights. Set your white balance carefully and watch out for those street lights appearing too warm! It would also prove useful having a decent flicker free LED (and a twin hot shoe adaptor).
  • Interiors: For interiors you may be faced with certain difficulties such as low light, a mixture of colour temperatures and tight working environments. If you don’t have much lighting equipment or time at your disposal then you can use any incoming daylight to your advantage (although if the weather changes then this may prove difficult for longer interviews). If natural light is being used for your key light then you need to think about your colour temperature and balance to daylight if you require a warm ‘positive’ look to your footage. If tungsten or interior lighting is providing most of your ambient light then consider the use of practical lights to increase interest in the image and overall exposure. If shooting in someone’s home utilize any lamps that they may have.

The key to lighting is obtaining control. Whether that be removing, changing the colour or softening a light source the point is if you have some degree of control then you can stylize your footage in a way that compliments the product and your abilities too! In fact, lighting can sometimes be more important than the camera itself..

IMG_1596

If you want high production values, don’t forget to light.

4. Get good sound (for the love of God).

No one likes bad sound. It is usually the first tale tale sign of an amateur. Here are a few dos and don’ts regarding the matter:

Do:

  • Hire a sound recordist if your budget allows. Giving yourself less responsibility technically allows you to focus on getting results.
  • Use the best mic and cables you can afford.
  • Remember your windshield if filming outside
  • Record externally if you can, especially in studio environments. Quite often you can get cleaner audio on an external recorder than recording in to camera, due to noisy pre amps.
  • Generally aim for maximum levels between -12db and -18db when recording, although this is subject to individual preference. You can amplify somewhat in editing, but once a clip peaks it’s a goner.

Don’t:

  • Ever record using your inbuilt camera mic unless there is an exceptionally good reason. Always use a high quality radio mic or shotgun mic.
  • Record without headphones. Duh!
  • Record if you can hear music in the background. Some background noise at a consistent level can be useable and sometimes removable however.
  • Accept a take if you’re not 100% happy. If in doubt, do it again. You’ll thank yourself in the edit.
  • Let your clients walk off with your radio mics!

Remember, sound is half the picture. Don’t neglect it!

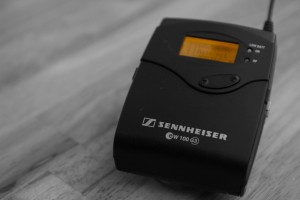
Sennheiser - one of the leading brands for audio equipment.

Sennheiser – money well spent.

5. Plan your questions & listen.

Whether you’re shooting an hour long interview or a dozen vox pops on the fly, you can still plan your questions in advance to achieve optimum results.

Speak to your subject about the question (s) you’ll be asking and find out what they would say in response before you roll the camera. Without the camera recording many people will find the pressure reduced slightly, resulting in more genuine answers (you can also sneakily use this time to do sound checks). When you do start recording your aim is now to get them to repeat what they’ve already said which makes it much easier.

Once the camera starts rolling listen carefully to the answers provided and work with your subject to make sure that what they are saying is relevant and efficiently worded. It’s OK to help them rephrase a sentence if it’s proving to be a bit of a tongue twister. Take notes if you can so that nothing gets repeated. You may get some ideas for cutaways here too.

Don’t forget – if your subject is looking off camera and there is no presenter as such then their answers must always be in full sentences. Make sure they allow a second of silence between your question and their answer and look out for potential cutting points within their answer. If you like the sound of an individual phrase within a sentence get them to repeat it as a standalone line. The beauty of video making is that we can often go for a second take; if in doubt go for it. Give yourself options in the edit!

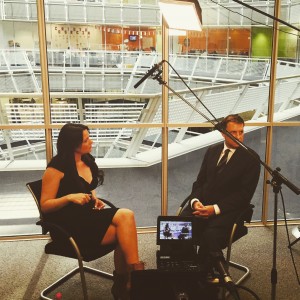
This interview had all the right ingredients.

This interview had all the right ingredients.

If all of this seems a bit daunting at first, don’t worry. With a bit of practice and application of these techniques the quality of your interviews will increase over time and will gradually become second nature to you. For some inspiration, take a look at some of the interviews we have conducted over the years..

Before you go..
Download our free ebook

Mustard-Education-Video-ebook

7 Steps:
Make your school’s video
content pay for itself

  • How to use your new video to attract attention and get the results it deserves
  • How the most successful independent schools are getting all the new enrolments
  • The techniques that will give you a clear, predictable return on your video investment
  • How to track and record ROI to prove your video strategy’s working